*** IMPORTANT - I'm retiring my digital files - SVG/PNG/DXF/EPS - and printables from 31st December 2025 ***
*** Please ensure that you have everything you need - files and/or instructions printed off from the website (find them currently in the ARCHIVES section) - by 31st December 2025 as they will not be available after this date ***

How to Use SVGs
SVG & Cut Files FAQs

How to use SVGs - Everything you need to know about Lotti Brown's SVG cut files for papercutting and crafting - how to access them and use them, available file formats, compatibility, commercial use, downloading, measurements, help with using them, and more...
Understanding SVGs
What is an SVG file all about?
An SVG file is a ‘Scalable Vector Graphic’ file. It’s a file that’s commonly used in cutting machines as it’s a digital file type that can be resized in the programme without loss of clarity – this means you can use it large or small and it won’t go ‘fuzzy’ or ‘pixelated’ (how small you can go will be determined by how intricate the design is and the material you’re using to how delicate the machine can cut without your material breaking).
Most but not all cutting machines will work with SVG files – some don’t and that’s why I’ve provided other file types, such as DXF, EPS and a PNG.
The PNG can be printed out on an ordinary printer and used either as a printed design, for example by sublimation, or to cut the design by hand if you don’t want to use a cutting machine for your crafting. It’s provided in separate layer files plus one file of the complete layered design, so as to help you with your crafting, whatever you want to make. There's some more help with how to print PNGs to a specific size in the Card Templates section further down the page.
As well as the cutting machine itself, you will usually need to access the machine's own software programme on your computer – eg. Cricut’s Design Space or Silhouette Studio.
Here are the formats some common machines accept.
Cricut machines:
- SVG
- DXF
- JPG/PNG
Silhouette machines:
- DXF (Studio – free version of software)
- SVG (Designer & Business edition – paid versions of software)
- JPG/PNG
Brother ScanNCut:
- SVG
- DXF
- JPG/PNG
Sure Cuts a Lot:
- SVG
- EPS
- JPG/PNG
If in doubt, consult the help pages for your own machine.
 Understanding SVG files
Where to Buy my SVG Cut Files
Where can I buy the design files?
The files are available in my own webstore here or via my Etsy store here... There will also be a link on any website page or blog post where I share the details of each design for you, so that you can access the file easily.
They're available worldwide and for instant download.
Prices in my own webstore are displayed in £ (GBP) but will be processed in $ USD. If you'd like to see the conversion, click over to Paypal payment (where available) and the USD price will be displayed at the bottom. Please add your country to the drop-down menu to see any additional sales tax charges required by your tax authorities.
How to Use SVGs - Downloading & Unzipping
How do I download the files from your webstore?
- If you've purchased files via my webstore, the files will be delivered via Lemon Squeezy. Lemon Squeezy is the company who deal with all the e-commerce processes for the Lotti Brown Designs webstore and are responsible for taking your payment and delivering you your files.
- You will receive an email from 'from 'LottiBrownDesigns via Lemon Squeezy' which will contain your receipt and files. Please allow a few minutes for the email to arrive. If you don't see the email, please check your spam messages folder in case your email has made its way there by mistake. If any issues arise, you can use the contact form here to contact me, letting me know full details of your order.
- You will also be able to use the 'View Order' button on the order confirmation page directly after making your purchase to view your order and access your files.
Please remember that due to the digital nature of the product, once you download your digital files, no refund can be given.
How do I download the files from Etsy?
- If you've purchased files via my ETSY store, the files will be available to download through the Etsy programme as soon as your payment has finished processing, usually within a couple of minutes.
- Please note that you will need to download your files via a web browser (on your computer or mobile/cell phone) and not via the Etsy app which, unfortunately, does not currently support digital downloading.
- The link to download the files will be in your confirmation email from Etsy. If you have an Etsy account, you will also be able access your download from ‘Your account’ (top right). Look for ‘Purchases and Reviews’ and then look for your purchase. Alongside the purchase on the far right, you will see a link to download the files again.
- If your purchase is missing from your account, you may have purchased under a different account, or as a guest. Here is a useful article from Etsy which shows you how to tell if you you purchased as a guest or with a different email address, and how to claim a guest order to add it to your account - find out here...
Please remember that due to the digital nature of the product, once you download your digital files, no refund can be given.
Downloading the .zip files
- The files are provided as .zip files. This is a ‘zipped up’ folder that contains all the files within the folder. So that you just need to make one download to your computer and you can keep all the files together easily.
- When you download your files, make sure that you save them to a folder that you can easily remember and locate on your computer.
- Help with downloading files: https://www.wikihow.com/Open-Downloads
- Help with downloading on a Windows-based computer: https://support.microsoft.com/en-us/windows/download-files-from-the-web-abb92c09-af3a-bd99-d279-a89848b54b0b
- Help with downloading on a Mac: https://support.apple.com/en-gb/guide/safari/sfri40598/mac
Please remember that due to the digital nature of the product, once you download your digital files, no refund can be given.
How do I unzip the files?
To be able to use your files, you will need to unzip them. Most computers will have unzipping software already built in such as WinZip or WinRar. There are also free unzipping programmes that you can access such as PeaZip or 7-zip.
In most cases, right clicking on your zipped folder will access a menu of options. Choose ‘Extract all’ and select where to save your files to. Then just ‘Extract’ and your files will be ready to use.
Find more help for unzipping at: https://www.wikihow.com/Unzip-a-File
How to Use the SVGs
Opening up the Files
How do I open the file in Cricut Design Space?
First, open up the Cricut Design Space programme - then...
- Select ‘New Project’
- Click on ‘Upload’ (bottom of the left hand menu)
- Under the ‘Image’ section of the page, click on ‘Upload Image’
- Click ‘Browse’ (center of the screen)
- Then navigate to the folder where you’ve saved your file. Select it and press ‘Open’
- You will see your file appear on the screen. Press ‘Upload’ (left-hand side)
- Your file should now be showing in the bottom half of the screen under ‘Recent Uploads’. Click on it to select it. Then press ‘Add to Canvas’ (bottom right)
- Wait a little for your file to load and it should appear on your design space ready for you to resize and work with.
Wait - where's the layers?
If you have just an image without the layers that you were expecting, are you trying to open the SVG file straight from your computer and not through whichever programme, (like Cricut Design Space) that you want to use the file in?
There is a quirk with SVG files (as SVG can be used for many different purposes, not just cut files) that computers can sometimes see them as an HTML file and try to open them as such.
If you open the SVG file from within your design programme, it should work correctly. Use the method just above if you're working in Cricut Design Space. There are some instructions for opening the file in Silhouette Studio, ScanNCut and Sure Cuts a Lot just a little bit further down if you keep scrolling...
I'm having trouble working with the file in Cricut Design Space?
- If you need more help with the making process, take a look at this page, alongside other beginner Cricut tips, I include the whole process for loading in the mats and getting your file cut...
- If you're trying to work with a file showing layers on the right-hand side panel, and you're having trouble selecting a particular part to work with, try 'Ungrouping' - the left-hand side icon at the top of the layers panel is the one to Group/Ungroup - make sure the file is selected (click on it and see it turn green in the panel) before you try to use it or nothing will happen.
- There are tutorials for many of the more complex files on my website - take a look at the section further down the page 'Are There Tutorials to Help Me Make Your Designs?' which has details of how to find them.
How do I open the file in Silhouette Studio?
First open up the Silhouette Studio programme - then...
- Go to ‘File’ (top left)
- In the drop-down menu, select ‘Open’
- Then navigate to the folder where you’ve saved your file. Select it, and press ‘OK’ and your file will open ready for you to work with – there may be a short wait while your file uploads.
If you’re working with DXF files in Silhouette Studio, you will see that in most cases I’ve provided a separate layer file for each colour to make separating the layers easier for you. Some simpler designs may only have one layer, while more complex ones may have more than two.
To resize the design in Silhouette Studio (while keeping all the pieces together!)
- Go to ‘Edit’ (top left) - in the drop-down menu, select ‘Select All’ (or just press Ctrl+A)
- Go to ‘Object’ (top menu bar), then select ‘Make a Compound Path’ (or just press Ctrl+E)
The design is now all bonded together and the separate parts can’t move around or get lost. You can grab a corner and drag it in or out to make the design larger or smaller.
How do I open the file in ScanNCut?
Open up the ScanNCut Canvas Workspace (instructions given for Desktop version) - then...
- Go to ‘File’ (top left)
- Then ‘Import from your computer’
- Navigate to your file and select it. Then press ‘Open’ and your file will appear ready for you to work with.
How do I open the file in Sure Cuts a Lot?
Open up the Sure Cuts a Lot design programme - then...
- Go to ‘File’ (top left)
- Then ‘Import’
- Navigate to your file and select it. Click ‘Open’ and your file is ready for you to work with.
Using PNG files
PNG files are for if you want to print the design, or if you want to print a template to use to cut by hand. I know from experience that it can sometimes be a little awkward to get the PNG to print at the exact size you want (or perhaps it's just my awkward printer!).
I've found that inserting the image files (PNGs) into a Word document and then using the Word tools to resize to the size you want will normally get you the results you want. If you'd like to try this, you can follow the directions just below...
In Word, go to:
- Insert - Pictures - find your PNG images on your computer and add them.
- Click on the first image to bring up the image tools. Use 'Size' (far right) and type in the measurements. Repeat for each element.
- You may need to rotate your image, or change the page orientation to get it to fit on the page size.
- Also think about making page margins narrower, if necessary, to make the elements fit.
Using PDF files
A small amount of my designs are available with PDF templates. To use these, please select either the A4 or Letter-sized file included and then use the 'print to actual size' function in your printer menu, for the best results.
Are There Tutorials to Help Me Make Your Designs?
Any of the designs that aren't just completely straight forward will have a tutorial of some kind on the site, to help you make it. If you need a tutorial, there should normally be a PDF included with your files, or available to download, that will have one or more links to the relevant page(s) on my website. The PDF file will called something like 'READ_ME_FIRST' or 'IMPORTANT_READ_ME' or similar so that you can identify it.
You should also be able to find the link to any tutorial in the description.
You can also find the relevant tutorial page by looking in the design pages on the site (start with 'SVG Designs' on the top menu) to find the page that I made about the design. If I thought it needed any instruction, there will be a tutorial there or links to the relevant instruction pages.
Please note that many of the greetings cards share the same tutorials as the method is the same (some of these cards will link directly to their product listing from the main card template page) - the tutorials for most of these cards are in the green section below, or on the main 'SVG Card Templates' page.
Some cards will have a separate tutorial as the method of making is a little different - you will be able to find this if you:
- click on the design on the main SVG Card Templates page
- it should also be on the product listing
- you should receive information with your purchase directing you to the tutorial(s)
Please also browse the sections below as there's more help there on lots of different topics - keep scrolling to see...
If you're not sure, please browse through the site using the menu options to help you find the design, and you should be able to find the information you need. You can always contact me here or through my Etsy store (Etsy customers only) if you're stuck with how to make a particular design you've purchased or can't find the tutorial information.
Greetings Cards SVG Templates
How do I use the score & cut function on Cricut with the card templates?
I have a tutorial for how to set the lines to score correctly on your Cricut here - I also cover which scoring tool to choose, and how to score manually if you don't have a scoring tool for your Cricut.
How do I set up the card templates in Silhouette Studio?
If you're working with Silhouette Studio, I have some brief instructions for working with the card templates here...
How do I fold & assemble my card?
I have a tutorial to help you with making your card here...
Card template sizes
Usually, using the SVG in Cricut Design Space will load the design at the size intended in the template (to make a 12 x 12cm card - approximately 4.75 x 4.75 inches). If you're using another file format in another cutting machine program, or if you want to resize the PNG files to cut by hand, please resize the elements to the following to get this size of card (12 x 12cm or 4.75 x 4.75 inches) and envelope to fit:
Standard square card - please also check additional card formats at the bottom of this section if your card has additional elements or is not a square! Print & cut cards also have their own section (further down the page).
- Envelope - size to 26.92 x 15.21 cm (10.6 x 5.99 inches)
- Inner card - size to 23.38 x 11.66cm (9.2 x 4.59 inches)
- Outer card - size to 23.88 x 11.96 cm (9.4 x 4.71 inches)
Resizing PNG files - it can be tricky, sometimes, to get PNG files to print the exact size you want them, I've found that inserting the image files (PNGs) into a Word document and then using the Word tools to resize to the size you want will normally enable you to get the correct size. Please remember to set your printer to print to actual size if you have that as an option.
In Word, go to:
- Insert - Pictures - find your PNG images on your computer and add them.
- Click on the first image to bring up the image tools. Use 'Size' (far right) and type in the measurements. Repeat for each element.
- You may need to rotate your image, or change the page orientation to get it to fit on the page size.
- Also think about making page margins narrower, if necessary, to make the elements fit.
Additional elements for the card templates - some of the card templates also have additional elements (alongside one or more of the 3 basic elements above - envelope, inner card, outer card) - I'll list the sizes of the additional elements here to help you if you need to resize and want to get the same size as my template...
Wedding cards (layered topper style - bride/groom, groom/groom, bride/bride)
- Lacy square - 10.08 x 10.08 cm (3.97 x 3.97 inches)
- Plain square - 9.69 x 9.69 cm (3.81 x 3.81 inches)
- Figures (bride/groom) - 3.58 x 7.86 cm (1.41 x 3.1 inches)
- Figure background (for B/G) - 3.87 x 8.15 cm (1.52 x 3.21 inches)
- Figures (bride/bride) - 4.87 x 7.8 cm (1.92 x 3.07 inches)
- Figure background (for B/B) - 5.17 x 8.1 cm (2.03 x 3.19 inches)
- Figures (groom/groom) - 3.15 x 7.63 cm (1.24 x 3.01 inches)
- Figure background (for G/G) - 3.45 x 7.93 cm (1.36 x 3.12 inches)
Never ending card (this design)
- Envelope - 26.92 x 15.21 cm (10.6 x 5.99 inches)
- Yellow elements (all - as provided - WITH score lines included) - 24.65 x 12.3 cm (9.71 x 4.84 inches)
- Yellow elements (all - as provided - WITHOUT score lines included) - 24.59 x 12.23 cm (9.68 x 4.81 inches)
- Orange elements (all - as provided) - 24.11 x 5.5 cm (2.17 x 9.49 inches)
- Teal elements (all - as provided) - 11.59 x 5.5 cm (4.56 x 2.17 inches)
- Green elements (all - as provided) - 11.26 x 11.56 cm (4.42 x 4.55 inches)
- Pink elements (as provided) - 5.53 x 22.91 cm (2.18 x 9.04 inches)
- Cream element (as provided) - 4.58 x 4.58 cm (1.8 x 1.8 inches)
Circle card (coming soon)
- Outer card - 23.65 x 12.03 cm (9.31 x 4.74 inches)
- Inner card - 23.08 x 11.74 cm (9.09 x 4.62 inches)
- Envelope - 26.92 x 15.21 cm (10.6 x 5.99 inches)
If you need any further measurements to help you use the card templates or any of the other designs, please just ask me either via my website or my Etsy store.
Silhouette Studio Instructions for the Card Templates
Here are some step-by-step instructions that I wrote for a customer to help them work with the card template in Silhouette Studio (free version)...
I used the DXF files and worked with each element separately, using the separate files for outer card, inner card and envelope.
For each file:
- File > Open > Select file
- Edit > Select All
- Object > Make a Compound Path
- Object > Rotate > Rotate by 90 degrees clockwise
- Grab a corner and resize to the sizes below by pulling out the corner diagonally. It’s sometimes easier to pull a little from the top right corner, until it nears the edge of the page, and then move to the bottom left corner to continue to increase until it’s the correct size – sizes just below – it doesn’t need to be precise, as I know it can sometimes be tricky to get the numbers perfectly exact so as long as it’s in the close ball park it will be okay as a little leeway is built into the template.
- Envelope - size to 26.92 x 15.21 cm (10.6 x 5.99 inches)
- Inner card - size to 23.38 x 11.66cm (9.2 x 4.59 inches)
- Outer card - size to 23.88 x 11.96 cm (9.4 x 4.71 inches)
- Edit > Select All (if necessary)
- Object > Release Compound Path
- Click away to deselect
- Select the score lines only (refer to the PDF that comes with your template if you’re unsure) – to select more than one score line at once, hold down the Shift key while you click on the score lines
- With the score line(s) selected, make sure that the solid line style is selected in the line-style drop-down menu (it should already be correct) (top left of screen)
- Then go to the line style icon on the right-hand side of your screen – this looks like three horizontal lines together, getting thicker at the bottom and with a dotted line on top – when this panel opens up click on the coloured lines icon (red, green blue) which is on the top left of this little panel
- Then click a colour that will help to distinguish the score line – I used blue
- Then go to ‘Send’ (top right corner of screen)
- Go to ‘Line’ (centre option just under the main teal top menu)
- Here, make sure each of the materials is set to ‘Cardstock’
- Then for the blue option, set your action to ‘Score’
- And for the black option, set your action to ‘Cut’
It should now be ready to send to your machine as usual.
Repeat for the other two parts of the card.
As I don’t have a Silhouette machine, I couldn’t test it out in physical form. When I use the Cricut, I have one extra step which is to ‘attach’ the score line back to the rest of the shape. From my investigations into scoring with Silhouette, this doesn’t seem like it’s necessary, but if it doesn’t work, let me know either via my contact page or via my Etsy store (if you bought the item on Etsy) and we can figure out what extra needs doing so it works for you.
Once your template is cut and scored you can continue with the craft tutorial to help you fold and assemble the card and envelope here...
Print Then Cut Card Templates & Other Print Then Cut Projects
These are the card templates available on this page - and the Christmas ornament templates on this page.
Where's my print-then-cut design?
Your print then cut template is in two parts in your files. The artwork design for the front of the card or decoration (the print-then-cut part) is in the file marked ‘PRINT THEN CUT DESIGN’ and is a JPG or PNG file which will need to be resized to the correct size.
The second part of the template is the cut file with the rest of the card and the envelope (or the decoration if you're making this project). You can select this/these file(s) from one of the files marked SVG, EPS, DXF or PNG files, whichever suits your cutting machine or if you’re cutting by hand.
How do I use the print-then-cut function for the templates?
There are full, detailed instructions for how to make the print-then-cut card templates at this page. This includes how to combine your Cricut and home printer to print (and cut) the print-then-cut part of the design as well as working with score lines for the rest of the card and actually putting it all together. This is intended primarily for Cricut users, but if you're a user of another brand of cutting machine, you may also find it helps you work through the steps for your own machine.
If you're making the Christmas decorations look at this page for instructions.
What type of cardstock should I print onto?
I've got good results printing onto photo paper which tends to give vibrant, clear prints - I've also experimented with other cardstock types including textured watercolour cardstock which gives a soft, nostalgic watercolour look to the right artwork. The most important thing is to choose a paper or cardstock that your printer can cope with - if you haven't got a rear tray for your printer, it may struggle with thicker cardstocks and glossy papers. I did some experiments with printing onto different cardstock and paper types and share my tests and results with you on this page...
Card template measurements
These measurements will make a finished card that's around 12 x 12 cm (approx 4.75 x 4.75 inches) with the envelope a little larger.
- Envelope - size to 26.92 x 15.21 cm (10.6 x 5.99 inches)
- Inner card - size to 23.38 x 11.66cm (9.2 x 4.59 inches)
- Outer card - size to 23.88 x 11.96 cm (9.4 x 4.71 inches)
- Topper square - size to 10.58 x 10.58 cm (4.17 x 4.17 inches)
- Print-then-cut design - size to 9.7 x 9.7 cm (3.82 x 3.82 inches)
Please do not increase the size of the JPG/PNG file for the print-then-cut design beyond the recommended measurements here, else the print quality may suffer.
Christmas decoration measurements
These measurements will make a finished Christmas decoration that's around 12.7 cm in diameter (approx. 4.17 inches):
- Artwork for print then cut - single circle - 9.5 x 9.5 cm (3.74 x 3.74 inches)
- Artwork for print then cut - both circles together - 9.5 x 20.16 cm (3.74 x 7.94 inches)
- All circles together - 24.2 x 21.84 cm (9.53 x 8.6 inches)
- Small circle - 10.6 x 10.6 inches (4.17 x 4.17 inches)
- Large circle - 12.7 x 12.7 cm (5 x 5 inches)
Please do not increase the size of the PNG file for the print-then-cut design beyond the recommended measurements here, else the print quality may suffer.
Resizing PNG files
How to get PNG files to print out at the size you want:
Insert your PNG files into a Word document. Then, you can use the Word tools to resize to the correct size. Also see if you can set your printer to 'print to actual size'.
In Word, go to:
- Insert - Pictures - find your PNG images on your computer and add them.
- Click on the first image to bring up the image tools. Use 'Size' (far right) and type in the measurements. Repeat for each element.
- You may need to rotate your image, or change the page orientation to get it to fit on the page size.
- Also think about making page margins narrower, if necessary, to make the elements fit.
If you need any more help with your print-then-cut templates, please just ask me, via my Etsy store (for Etsy customers) or my contact page here.
Gift Box SVG Templates
How do I score my paper box template?
You can score manually (with a knitting needle or similar and a metal rule) - if you want to do this while still cutting with a cutting machine, you will need to delete the score lines in your cutting machine program.
If you want to use the cut and score function on your cutting machine, you will need to set each of the score lines to score and then attach them to the correct cut shape. If you're using Cricut, I have full instructions for how to do this here. You may also find it helpful to follow if you're using another type of cutting machine.
How do I fold & assemble the gift box?
I have a full craft tutorial to help you fold and assemble your gift box project here.
Gift Box Template Sizes
If you use the SVG file in Cricut Design Space, it will usually load at the size I created it, so that you can make a gift box to the same size as the template (or resize it if you wish).
If you're using a different file format or another make of cutting machine, or using the PNG* to cut by hand (*in which case, also see section on resizing PNGs in Word just below) you may need to resize the template elements. You can use the following sizes to help you:
Basic square gift box template (this one) plus all patterned gift box templates with the same square shape (here)
- LID - 19.87 x 19.9 cm (7.82 x 7.83 inches)
- BASE - 19.11 x 19.11 cm (7.52 x 7.52 inches)
- LID INSERT(S) - 7.81 x 7.81 cm (3.07 x 3.07 inches)
- BASE INSERT - 7.44 x 7.44 cm (2.93 x 2.93 inches)
This makes a box approximately 8 x 8 x 2cm (3.15 x 3.15 x 0.79 inches)
Gift card box template (this one)
- LID - 24.35 x 19.88 cm (9.59 x 7.83 inches)
- BASE - 23.4 x 19.11 cm (9.21 x 7.52 inches)
- LID INSERT - 12.18 x 7.73 cm (4.8 x 3.04 inches)
- BASE INSERT - 11.72 x 7.44 cm (4.61 x 2.93 inches)
- GIFT CARD INSERT - (WITHOUT score lines included) - 19.18 x 11.72 cm (7.55 x 4.61 inches)
- GIFT CARD INSERT - (WITH score lines included) - 19.18 x 12.09 cm (7.55 x 4.76 inches)
If you're using the PNG file, the score lines are included in the shapes.
This makes a box approximately 12.5 x 8 x 2 cm in size (that's approximately 4.92 x 3.15 x 0.79 inches).
Resizing PNG Files
Sometimes it's a little awkward to get PNG files to print out at the exact size you want.
I like to insert the image files (PNGs) into a Word document. Then, it's easy to use the Word tools to resize to the correct size. You must also remember to set your printer to print to actual size if you have that as an option.
In Word, go to:
- Insert - Pictures - find your PNG images on your computer and add them.
- Click on the first image to bring up the image tools. Use 'Size' (far right) and type in the measurements. Repeat for each element.
- You may need to rotate your image, or change the page orientation to get it to fit on the page size.
- Also think about making page margins narrower, if necessary, to make the elements fit.
If you need any further measurements to help you use the gift box templates or any of the other designs, please just ask me either via my website or my Etsy store (Etsy customers only).
3D Paper Gingerbread House Template
How do I score and make the 3D paper gingerbread house?
There are full instructions to help you score and make the gingerbread house project on this page. The instructions are intended for Cricut users, but if you use another type of cutting machine, the instructions may help you to understand the process and apply it to your own machine. There is also a part of the instructions where we assemble the house together, too. Find all that here...
Paper gingerbread house measurements
The following measurements are as loaded into Cricut Design Space and include the score lines for each element.
- Front and back house panels (each) - 19.77 x 13.43 cm (or 7.78 x 5.29 inches)
- Side house panels (each) - 9.28 x 16.22 cm (or 3.65 x 6.34 inches)
- Roof panel - 17.04 x 15.37 cm (or 6.71 x 6.05 inches)
Resizing the PNG Files
It can sometimes be awkward to use PNG files and get them to print at an exact size. I've found it easiest to use Word to insert the PNG file into the document and then use Word's tools to resize. Remember to use the 'print to actual size' function on your printer, too, if you have this.
In Word, go to:
- Insert - Pictures - find your PNG images on your computer and add them.
- Click on the first image to bring up the image tools. Use 'Size' (far right) and type in the measurements. Repeat for each element.
- You may need to rotate your image, or change the page orientation to get it to fit on the page size.
- Also think about making page margins narrower, if necessary, to make the elements fit.
If you have any difficulties using the template, or need any further measurements, get in touch with me either via my contact page here or via my Etsy store (Etsy customers only) - and I'll do my best to help you out.
Papercraft Flowers (3D)
All of the 3D papercraft flower templates will have detailed photo tutorials on my website. There should be a PDF file in your set of files that will direct you to the relevant page. I may also send you a message with the relevant page after purchase too (excluding vacation times & weekends). If you're feeling stuck, check the main floral designs page and then find your flower template with instructions from there.
3D Flower Template Measurements
If you use the SVG file in Cricut Design Space, it will usually load at the size I created it, so that you can make a flower to the same size as the template (or resize it if you wish).
If you're using a different file format or another make of cutting machine, or using the PNG* to cut by hand (*in which case, also see section on resizing PNGs in Word just below) you may need to resize the template elements. You can use the following sizes to help you:
Papercraft Daffodil Template - from this page
- Back petals (large) - 7.66 x 7.28 cm (3.01 x 2.86 inches)
- Front petals (small) - 7.98 x 7.33 cm (3.14 x 2.89 inches)
- Green triangle - 4.42 x 5.57 cm (1.74 x 2.19 inches)
- Trumpet - 7.48 x 4.8 cm (2.94 x 1.89 inches)
- Sepal (shaped like a little onion) - 3.3 x 7.64 cm (1.3 x 3.01 inches)
- Stamen strip (inner, with stamens) - 3.46 x 13.09 cm (1.36 x 5.15 inches)
- Stamen strip (outer, with tabs) - 2.6 x 11.78 cm (1.02 x 4.64 inches)
- Shortest leaf - 21.07 x 1.5 cm (8.3 x 0.59 inches)
- Middle leaf - 23.01 x 1.5 cm (9.06 x 0.59 inches)
- Longest leaf - 24.74 x 1.5 cm (9.74 x 0.59 inches)
Easy Paper Flower Template - from this page
- Petal 1 - 13.95 x 13.54 cm (5.49 x 5.33 inches)
- Petal 2 - 12.48 x 12.14 cm (4.92 x 4.78 inches)
- Petal 3 - 10.35 x 10.07 cm (4.07 x 3.97 inches)
- Petal 4 - 8.68 x 8.42 cm (3.42 x 3.32 inches)
- Petal 5 - 7.31 x 7.09 cm (2.88 x 2.79 inches)
- Circle - 4.16 x 4.16 cm (1.64 x 1.64 inches)
- All petals - 27.46 x 30.56 cm (10.81 x 12.03 inches)
- Leaf 1 - 5.29 x 12 cm (2.08 x 4.72 inches)
- Leaf 2 - 4.78 x 10.87 cm (1.88 x 4.28 inches)
- Leaf 3 - 4.12 x 9.17 cm (1.62 x 3.61 inches)
- Leaf 4 - 3.59 x 8.03 cm (1.42 x 3.16 inches)
- Sepal piece - 11.5 x 7.56 cm (4.53 x 2.98 inches)
- All leaves - 18.16 x 30.62 cm (7.15 x 12.07 inches)
- Large flower centre - 6.07 x 6.06 cm (2.39 x 2.39 inches)
- Small flower centre - 4.5 x 4.52 cm (1.77 x 1.78 inches)
- Both flower centres - 11.98 x 6.06 cm (4.73 x 2.39 inches)
Resizing PNG Files
Sometimes it's just a bit tricky to get PNG files to print out at the exact size you want.
If I'm struggling, I insert the image files (PNGs) into a Word document. Then, you can use the Word tools to resize to the correct size. You need to remember to set your printer to print to actual size if you have that as an option.
In Word, go to:
- Insert - Pictures - find your PNG images on your computer and add them.
- Click on the first image to bring up the image tools. Use 'Size' (far right) and type in the measurements. Repeat for each element.
- You may need to rotate your image, or change the page orientation to get it to fit on the page size.
- Also think about making page margins narrower, if necessary, to make the elements fit.
If you need any further measurements to help you use the gift box templates or any of the other designs, please just ask me either via my website or my Etsy store (for Etsy customers).
Restrictions on Use
Are there any restrictions on how I can use the SVG files? Can I use them to make things to sell?
The files are available to use both personally (for personal craft projects, gifts etc) and for commercial use for small businesses (up to 200 uses) on physical products only.
Here’s what you can and can’t do with the files:
YOU CAN:
Use the image files to create physical products for personal or commercial use (commercial use is intended for small-business use only – up to 200 units in total) - such as papercutting or papercrafts, vinyl crafts, T-shirts, sweaters and other clothing, mugs, signs, cushions, cards, phonecases, home décor and all similar.
YOU CAN:
Alter or personalize the image by recolouring, resizing, cropping, or adding additional elements.
YOU CAN NOT:
Use the image files to create digital end products of any type.
YOU CAN NOT:
Make the image file available digitally in any format, share, sell, give away, or redistribute the image in any format which allows others to download, extract or redistribute the image, whether you have made your own alterations or not.
YOU CAN NOT:
Use the image on print-on-demand, create-on-demand, or similar services including Redbubble, Society6, Café Press or similar.
YOU CAN NOT:
Claim the image or design as your own work or claim any copyright in the work, whether you have made your own alterations or not.
YOU CAN NOT:
Use the image as part of a trademark, design mark, service mark, trade-name or similar unless the image is significantly altered and not the predominant feature of a new design.
IMPORTANT
Please read the full licensing terms at www.lottibrowndesigns.com/svg-license.html. If you have any questions, or if you’re unsure if your intended use is permitted, please just ask.

Where to go next?
There are lots of sections of my website to explore, with designs, projects, and help with a Cricut, too. Here are some I think you might like or find useful...
Another question or query?
I’m happy to take your questions and queries about using my files but I’m afraid that I can’t provide technical help or instruction with your cutting machine or design programme. I have found the official help pages for a particular cutting machine are usually a good place to start if you need technical help. If you've got a question for me, contact me here or through my Etsy store if you've made an Etsy purchase.

Shall we stay in touch..?
Each month, I share stories from my own nature journal, new art from my studio, and simple seasonal inspiration to help you feel more connected with the turning year...
Recent Articles
-
Nature Journaling Autumn Fungi & Folklore
Oct 28, 25 05:58 AM
 Nature journaling autumn fungi - discover how nature journaling helps you slow down, notice more, and reconnect with the season...
 -
Symbolism and Meaning of Fern/Reed for the Celtic Tree Calendar
Oct 27, 25 07:06 AM
 Explore the symbolism, myth and meaning of the fern (reed) as part of the Celtic Tree Calendar...
 -
Sun & Moon, Stars & Spirals
Oct 20, 25 09:31 AM
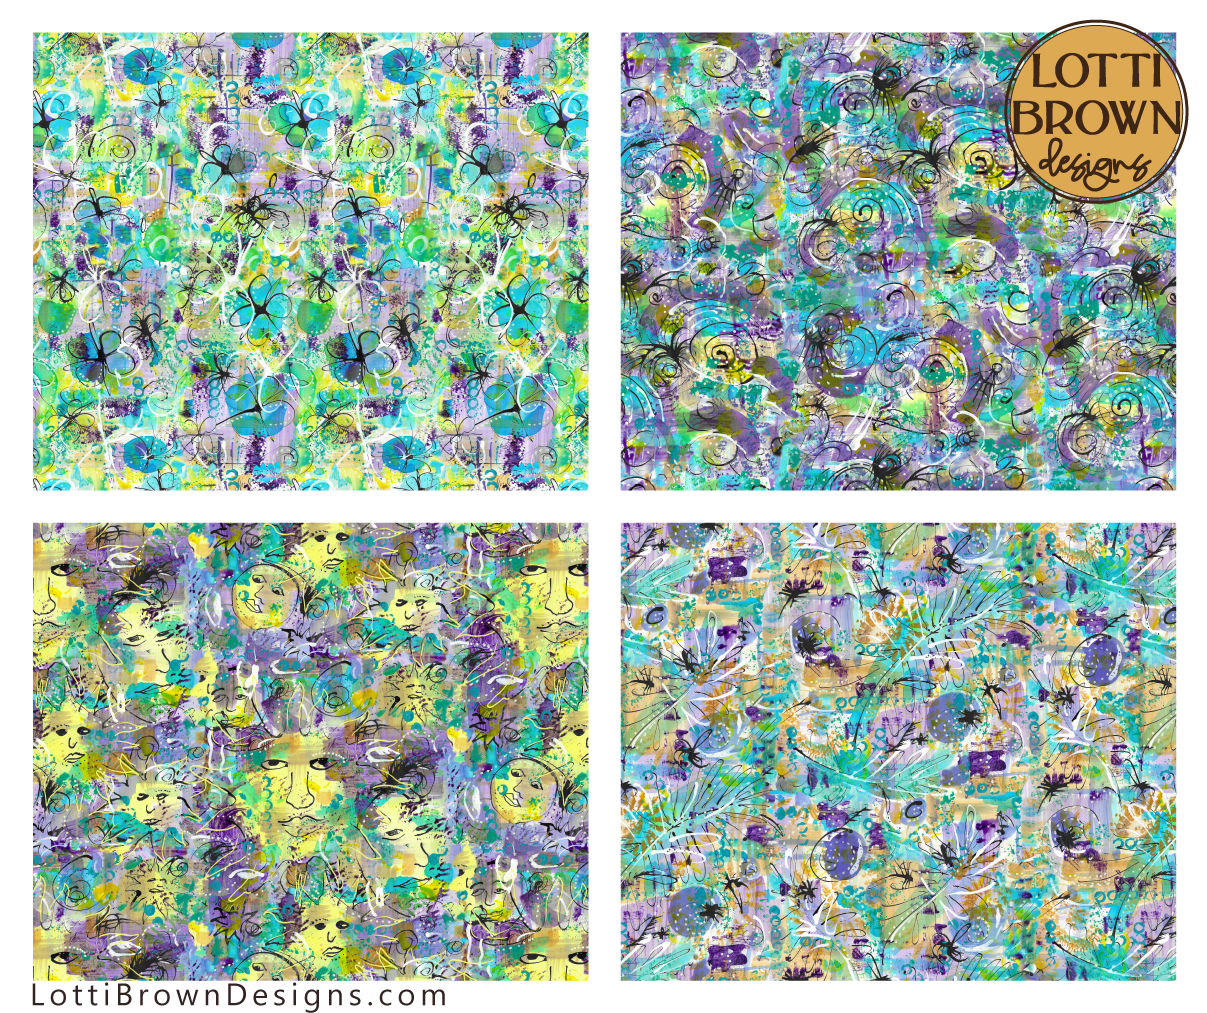 New painted patterns with sun and moons, floral, spiral and star designs...
Explore fabrics and wallpapers in these designs here (Spoonflower)...
Explore homewares and accessories in these designs her…
New painted patterns with sun and moons, floral, spiral and star designs...
Explore fabrics and wallpapers in these designs here (Spoonflower)...
Explore homewares and accessories in these designs her…
Follow me:
Share this page: