*** IMPORTANT - I'm retiring my digital files - SVG/PNG/DXF/EPS - and printables from 31st December 2025 ***
*** Please ensure that you have everything you need - files and/or instructions printed off from the website (find them currently in the ARCHIVES section) - by 31st December 2025 as they will not be available after this date ***

Testing Cardstock
for Print and Cut with Cricut
- Home
- SVG files
- Print Then Cut Card Templates
- Testing Cardstock for Print & Cut
Testing cardstock for print and cut with Cricut - a totally unscientific, scientific experiment to find the best cardstock to use in conjunction with the print then cut function on your cutting machine...
 Testing cardstocks for using with the print then cut function
So I started making some print and cut cards with my Cricut - I love them! It's a fun thing to make, especially since I get to draw and paint the designs myself - and I love the way the Cricut can scan the print and cut it neatly (better than I ever could by hand) - but I did feel like my prints, when seen close up, weren't the best they could be!
So I decided to run some tests on a few different cardstocks I have at home (some bought especially for using for print then cut cards) - the results were really interesting, and I ended up investigating more than I thought - so I thought I'd share the results (and methods) with you in case you would find it useful to know too!
Cardstock Tests for Print and Cut with Cricut
 Sunflower design cardstock test for print then cut Cricut function
So the test is to help me decide which is the best cardstock to use with print and cut with Cricut. It's really a test on which cardstock is best for printing artwork onto, as the Cricut itself doesn't actually print anything. It sends the print to your home printer to cut, then the Cricut scans the print out, and cuts around its edge - nice! You can find out about the process and how to do it, here.
So it's also actually applicable to other kinds of cutting machine, too, not just the Cricut - I just thought I would definitely send each of my test prints through the Cricut print then cut system to make sure that I knew exactly how each would turn out when using this function, just in case there was any difference when printing normally or using the print then cut function.
So in some respects, how the print turns out does depend on your home printer - a better quality home printer will certainly provide a better result than a very budget printer. But I think that this has less of an impact than you'd think...
I say this not because I've done a non-scientific scientific printer test, but I have printed out on a budget old home printer, and a posh new one - and the results were much more similar than I expected! Which led me to conclude that it was the cardstock or paper that was the important variable...
A Printer Saga!
So I started out with my HP ENVY 4505 printer. It's about 8 years old. I've been pretty happy with this printer. I printed all my print then cut designs for my first batch of print and cut card templates with this printer, on my usual lightweight white cardstock (Eastlight Premium, 160gsm) and I was very happy with the results. Until I tried to photograph them for my Etsy listings and website...
I thought that the artwork looked grainy close up...
 Looks pretty good from this distance!
 Still looks nice but you can see a little graining close up
A quick word about Cricut & high-resolution prints
A bit technical so ignore this bit if it's not your kind of thing!
I discovered while doing all this, that Cricut has a strange screen resolution in Cricut Design Space - it uses 144ppi. So when you load an image into Cricut Design Space, it will automatically resize to that resolution...
When I create my art digitally, I create it to print at a high-resolution 300ppi/dpi (for a high quality print) - so it appears to load into Cricut Design Space too large. I initially resized my artwork so that it came out the correct size when loading into Cricut Design Space, but when the print quality warning feature rolled out, I realised that this was a mistake - and I needed to create it as I had originally been doing, to print at a specific size at 300ppi/dpi and just resize it smaller to the correct size in Cricut Design Space while in this way keeping the high quality that I'd created.
Weirdly, I printed out both versions, the original 'low quality' version and the correct 'high quality' version (that needed resizing smaller in Cricut Design Space to give the high quality) and there didn't seem to be much/any difference, either to the naked eye or by camera, so don't worry too much about this unless you notice an issue in your particular print - and it does look like I might be right that it is, indeed, the paper or card type that makes the most difference in how your print looks when printed...
So this is when I wanted to experiment with some more cardstock types in my printer. I first of all wanted to try photo paper - but when I tried it in my printer, the printer didn't seem able to grab onto the paper, like it was too slippery, and couldn't print on it...
Initially, I thought it was because I was using budget photo paper. So I bought some more expensive photo paper, and it was still exactly the same. At this point, I was pretty annoyed, as my printer is supposed to be a photo printer!
So I thought maybe it was because the printer was old and perhaps needed a good clean. I looked online and found out how to clean the rollers to help it grip more easily - I did this and I don't recommend it as it didn't help and I actually broke the printer as it stopped being able to print double-sided sheets of print after this!
So I had to order a new printer - but in the meantime I did start my cardstock experiment with my tropical fish print then cut cardstock design - this was an experiment between my usual 160gsm lightweight cardstock (Eastlight Premium) and a watercolour printer paper I'd found and wanted to try as the artworks on the card are watercolours, so I thought they'd maybe look pretty nice on watercolour paper...
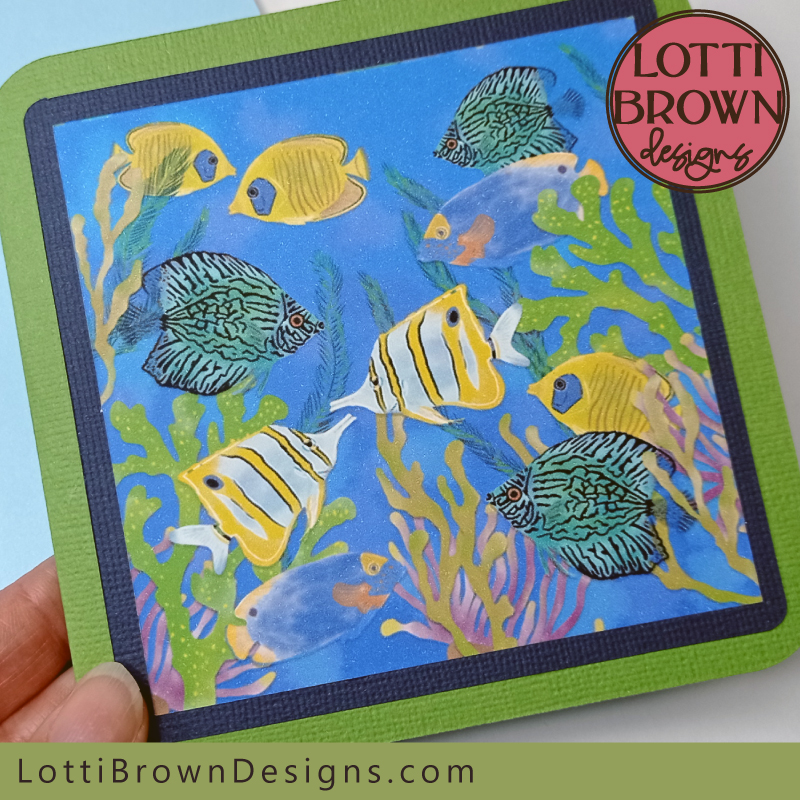 Eastlight Premium cardstock, lightweight smooth white cardstock, 160gsm
So the image above is with the usual Eastlight Premium, lightweight smooth white cardstock (160gsm) - and the image below is with the watercolour paper - Ecoline Liquid Water Colour Print Paper (150 gsm). I think the watercolour paper is definitely grainier - so at that point I decided to stick to the Eastlight Premium cardstock for future print and cut cards...
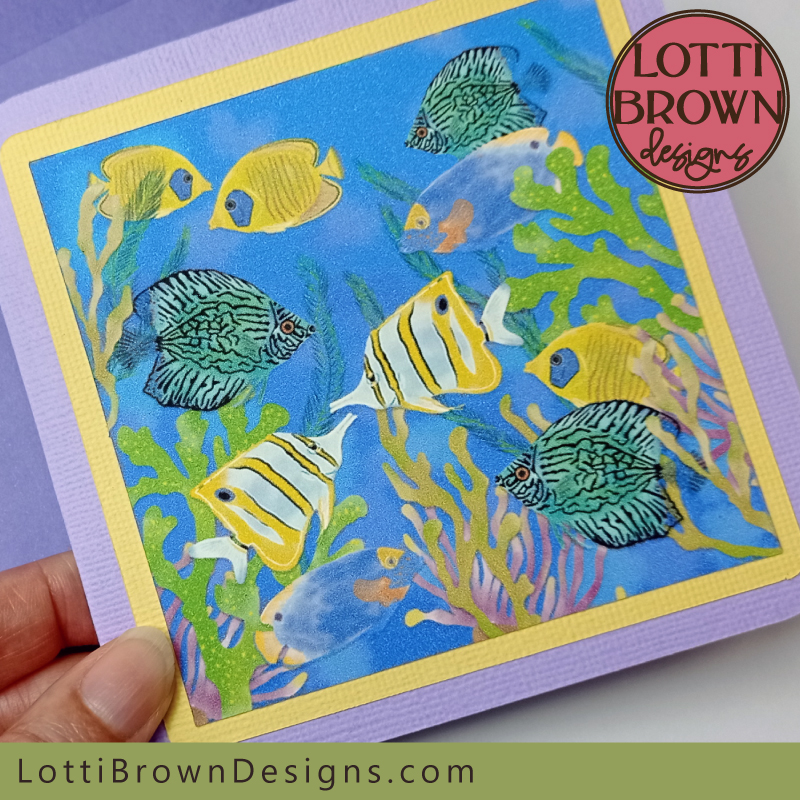 Watercolour paper - Ecoline Liquid Water Colour Print Paper (150 gsm)
Once again, the prints still looked nice in real life and from a little distance away, as you would normally look at them, but the graininess on the close up photos did bother me a little still.
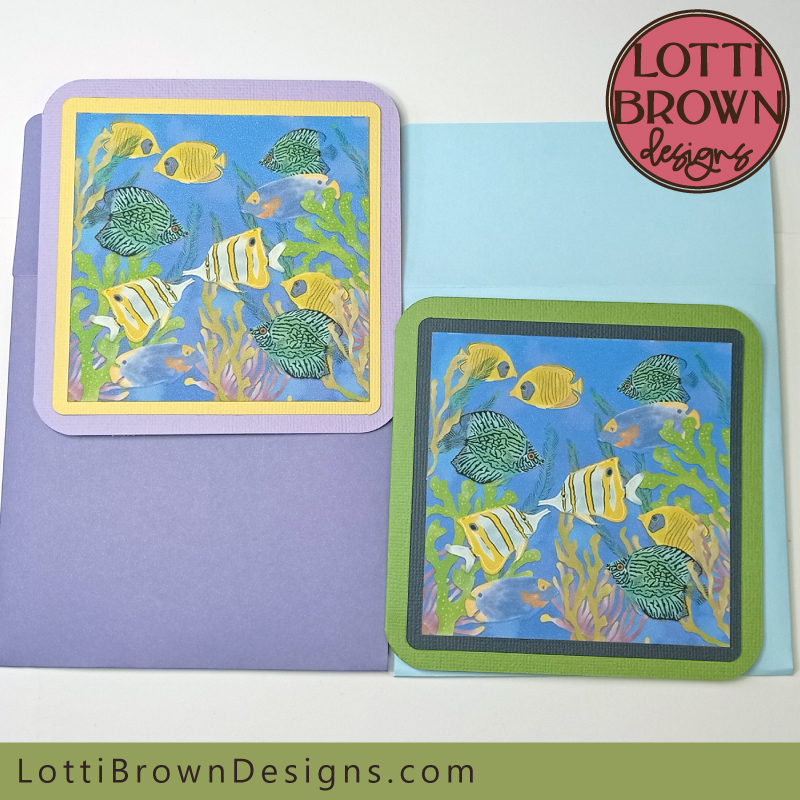 Looks better from a little distance away - but you can still see some graininess especially on the watercolour paper card (left, lilac) - this does also look less in real life than on the photo!
After breaking my printer, I started investigating which might be the best printer for Cricut and my artwork printing, and discovered that you really need a rear-loading printer to be able to print well on specialist papers (like photo paper) and thicker cardstocks...
A rear-loading tray allows thicker cardstocks to go through the printer without having to bend and curl - which happens in the normal integral tray where the paper bends through the rollers. So a rear-loading tray allows your printer to deal with slippery paper (like glossy photo paper) or thicker cardstocks that don't really bend.
I intend printing onto cardstocks and photo papers, so I definitely wanted to get a rear-loading printer that would accommodate the photo papers, sticker papers, watercolour cardstocks, and other specialist cardstocks that I might want to use.
The printer that I ended up choosing was the Canon TS9550 inkjet printer. This has a rear-loading tray so it can accommodate thicker cardstocks and glossy photo paper. It can also print up to A3 size, which means if I want to print at 12 x 12 inches, I'll be able to. Despite being an A3 printer, it was still a compact size (with an A4 scanner) which is perfect for a small office space like mine!
So once I'd got my new Canon printer, I wanted to immediately experiment with some nice watercolour cardstock I'd ordered specially. This is thicker than the watercolour paper I'd previously tried, and had a nice texture so that it looked more like the watercolour texture I expected - Belle Vous cold press watercolour cardstock (200 gsm). This is a nice thick cardstock, with a distinct ripple texture, and an ivory colour (even though it was called white when I ordered it).
So I created my new print and cut Christmas card designs using this watercolour cardstock - and I loved the results! I really liked the texture of the cardstock which really suited the watercolour artwork - and the ivory colour and the printing gave a lovely old-fashioned feel to the art, which I liked...
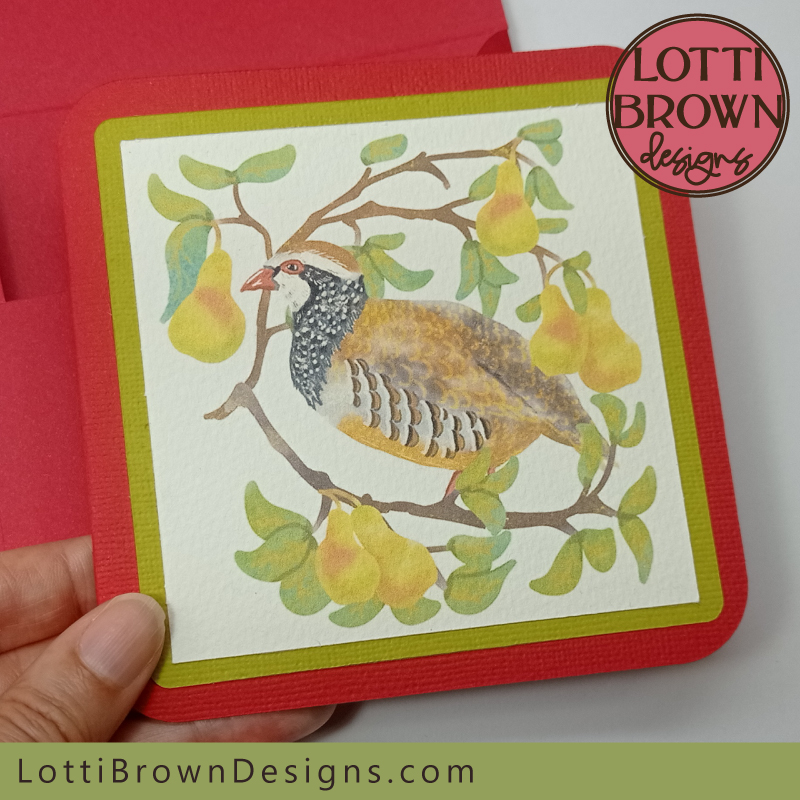 Print then cut card on textured ivory watercolour cardstock (200gsm)
At this point, I was pretty happy - but I still hadn't tested out my posh glossy photo paper with my new printer - so I decided to do an unscientific scientific test with all my cardstock options - I was a little bit shocked at the results, but all is not as straight-forward as it seems...
So here's what happened...
Unscientific Scientific Cardstock Test
The tests are all done with my Canon TS9550 inkjet printer via print and cut with Cricut. I use the rear-loading tray for everything.
The papers I'll be testing are all A4 size and are:
- Eastlight Premium - white, smooth lightweight cardstock (160 gsm) - works out at 7p per sheet
- Craft UK - ivory, smooth cardstock (300gsm) - works out at 11p per sheet
- Belle Vous - ivory (but called white), cold press, textured watercolour sheets (200gsm) - works out at 15p per sheet
- Ecoline - white watercolour printer paper (150gsm) - works out at 16p per sheet
- HP Q5456A - white, advanced glossy photo paper (250 gsm) - works out at 46p per sheet
Prices from Amazon (UK) correct 4th October 2023
The intention is not to judge individual manufacturers' paper or cardstock quality, but more to find the best type of cardstock or paper for print and cut with Cricut - it's clear to me now from these tests that some types of cardstock and paper are infinitely more suitable for the job than others - and it's our job to find that cardstock that is the most suitable for our intended project.
I used the 'Add Bleed' function for the print and cut with Cricut just for the full-colour tropical fish artwork I printed - for the sunflower artwork, I turned off the 'Add Bleed' function (as I recommend in my print then cut instructions here)...
I used the 'Standard Print' function on my printer menu for everything except for the photo paper print, when I used the 'Photo Print' function. I wondered if this made a difference and did a couple of tests between standard print and photo print functions, but I couldn't really see a difference so I think this is just a function to help you set the correct settings for your printer.
I used Best/High quality print for each print test. I also set the paper type as 'Cardstock' for everything except for the photo paper test, when I selected the photo paper setting, as felt appropriate.
I initially ran my test prints on my tropical fish artwork only, which is a full colour artwork - and then decided to run a second test on one of my artworks which has a white background, to see if this made a big difference, so the second test is for my sunflower artwork...
Apologies as my camera-work isn't always great, I think I wobble slightly so the photos aren't always as crisp and clear as they could be, but I did try to get the photos all at the same time and in the exact same lighting conditions so we could do a fair test.
So here are the results!
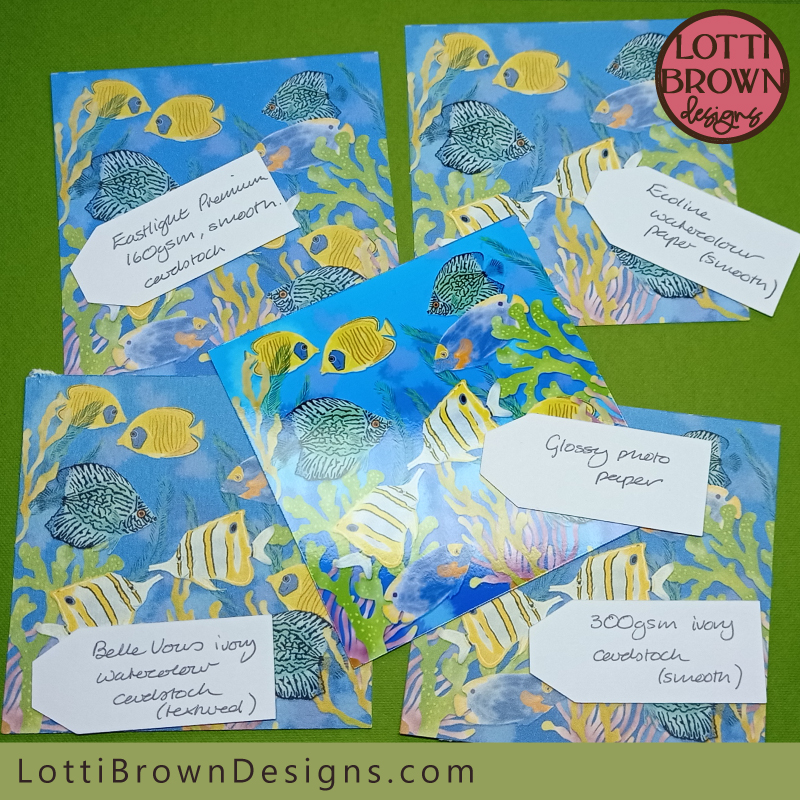
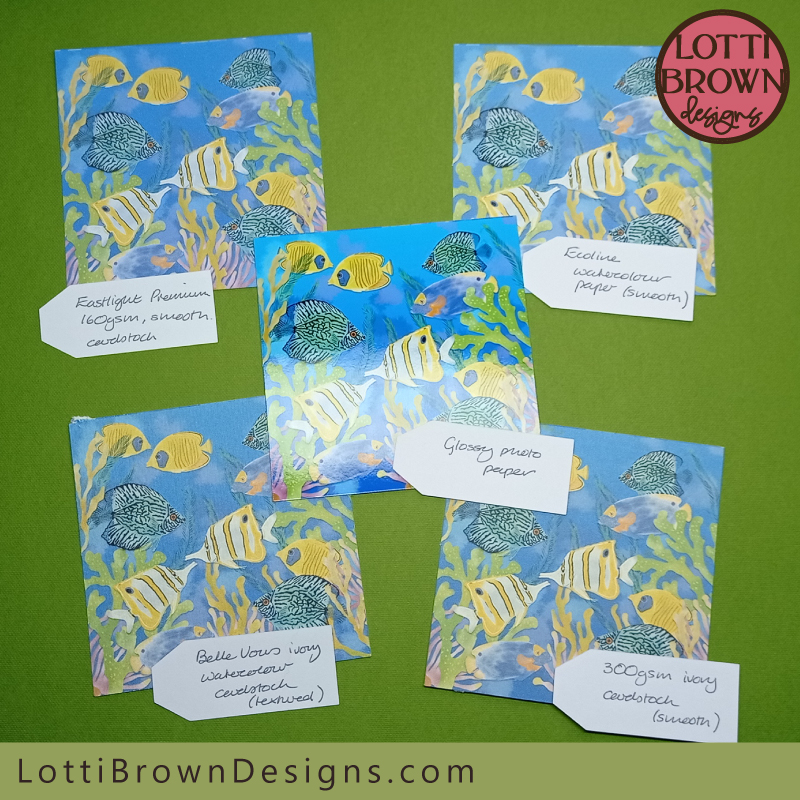 Full-colour print then cut cardstock test
So here's my first test for the full-colour tropical fish print then cut with my Cricut - you can immediately see that the glossy photo paper (in the centre) produces the most vibrant and clear image, by quite some way! I was shocked at the difference, actually.
Here's a closer look at each - and I'll run you through what I noticed for each...
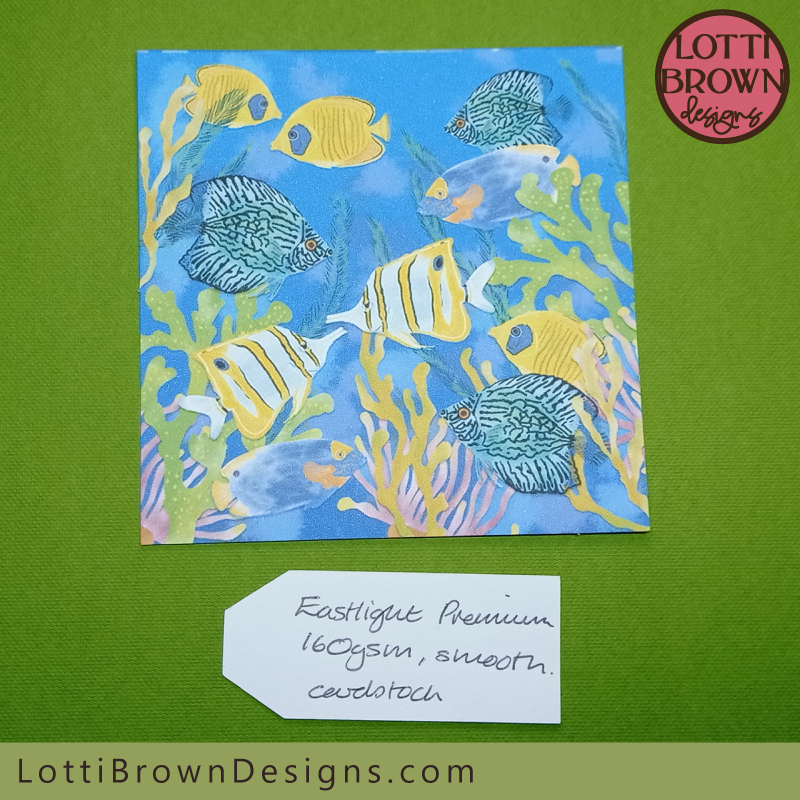 Eastlight Premium smooth white cardstock (160gsm)
Eastlight Premium white 160gsm smooth cardstock (above) - this is the print I was happy with for my initial tropical fish card print and cut (see section above) but you can see it's a bit grainy close up...
The Craft UK ivory smooth 300gsm cardstock (below) - this is a similar quality print, in my opinion, but the ivory colour of the cardstock does dampen the vibrancy somewhat.
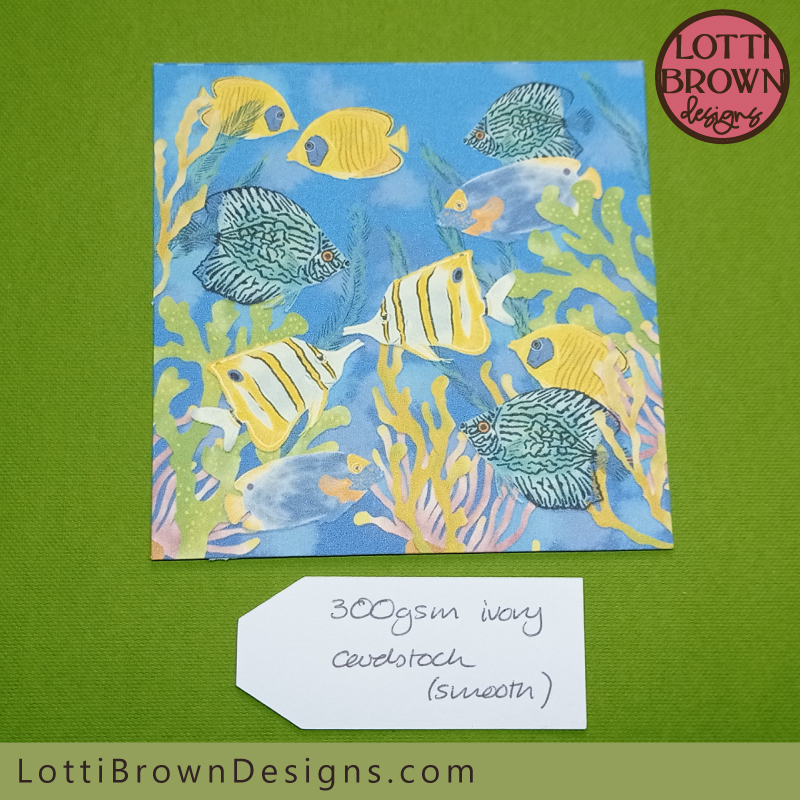 Craft UK 300gsm smooth ivory cardstock
The image below is the Ecoline white watercolour paper (150gsm) print - this was my least favourite and I thought the grainiest...
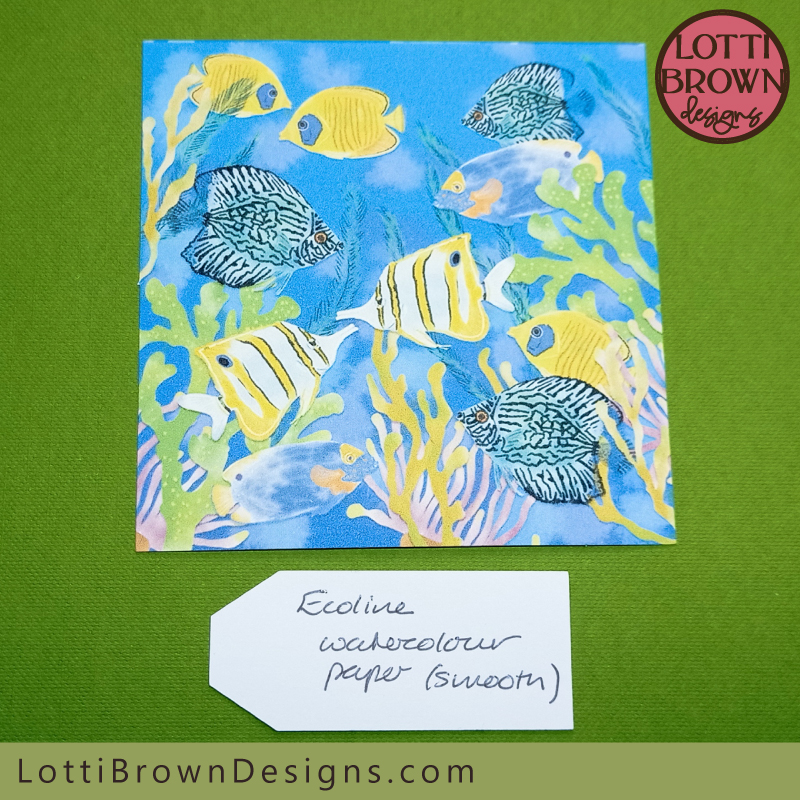 Ecoline smooth white watercolour paper (150gsm)
The image below is the Belle Vous textured ivory watercolour cardstock (200gsm) test print and cut - the texture is more noticeable in real life and really very attractive and does give a proper watercolour feel to the print. Again, I think this full-colour print did suffer from lack of vibrancy due to the ivory colour of the cardstock.
I also wanted to point out the mis-cut on the top left of the square - this watercolour cardstock can have a tendency to rip a little as it cuts (although it doesn't every time). I'd normally trim it with scissors or cut it again, but I wanted to leave this on to show you - the textured watercolour cardstock isn't ideal for cutting with a Cricut - it's just the texture of the paper with more grain/pulp inside the paper which doesn't always give clean cuts. The Cricut tends to like very smooth or very compacted textured cardstock - more about this here...
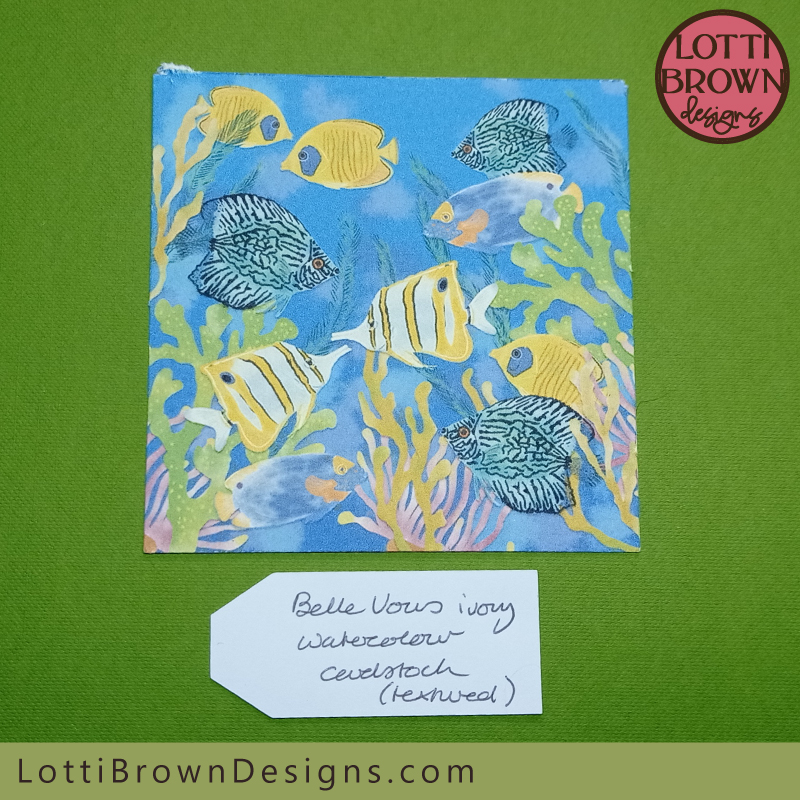 Belle Vous ivory textured watercolour cardstock (200gsm)
My final test for the tropical fish print and cut card is the glossy photo paper (below) - I was blown away by the vibrant colours and the smoothness of the colour coverage - absolutely no graininess!
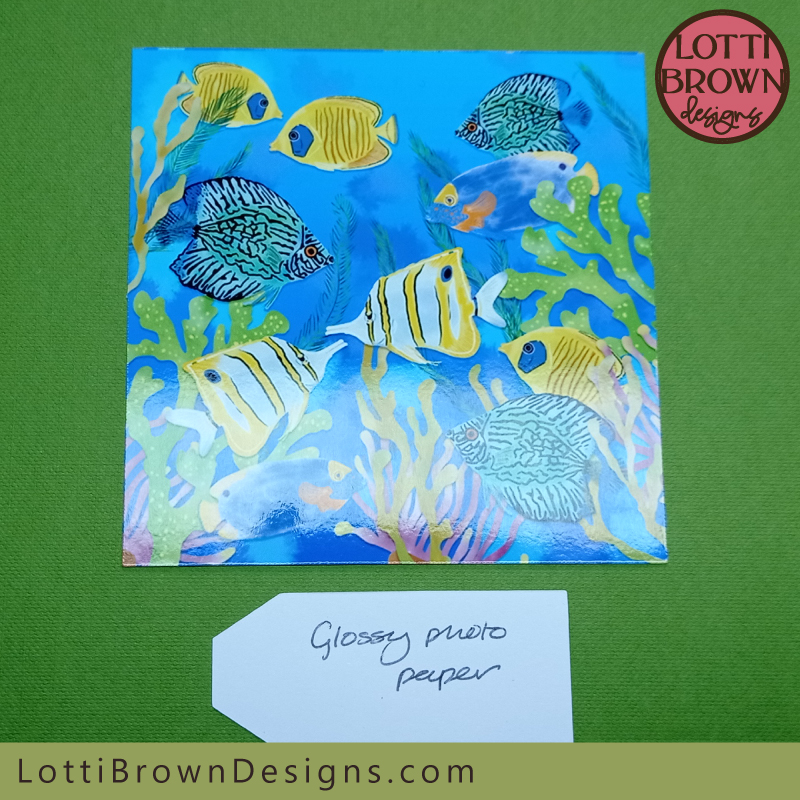 Full colour print and cut on HP Advanced glossy photo paper
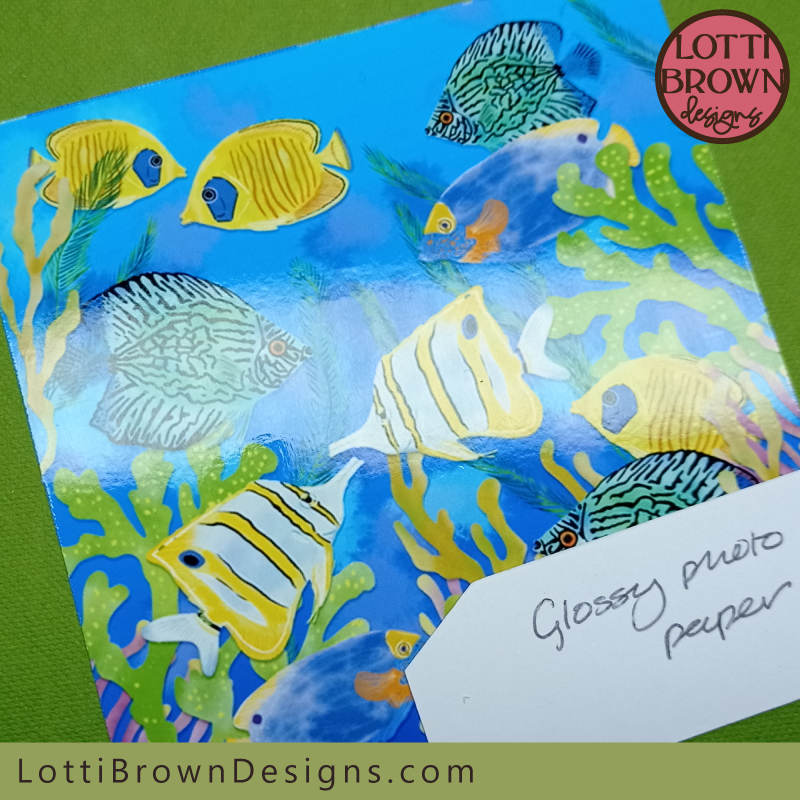 Close-up showing the full-colour print on glossy photo paper
 Full-colour print and cut cardstock test
So I think we do have a clear winner for this first test - definitely the glossy photo paper! For me, it's head and shoulders above the other cardstock options.
Testing Continues...
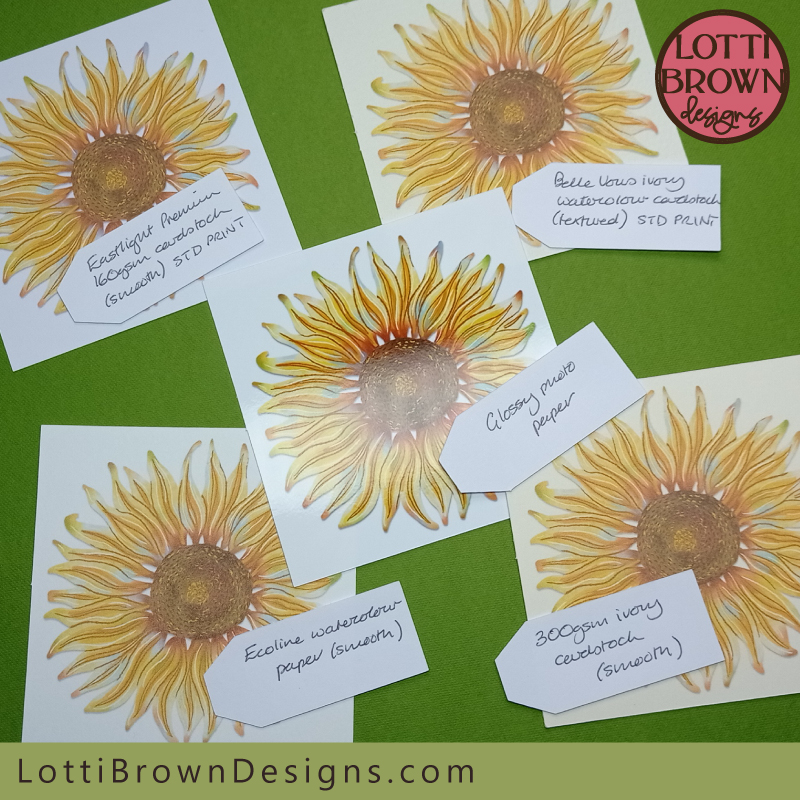
So at this point, I decided to continue the test with my sunflower artwork which has a white background - I wanted to know if having the ivory cardstock colour show through, or having the watercolour texture on the plain background, would help the print results...
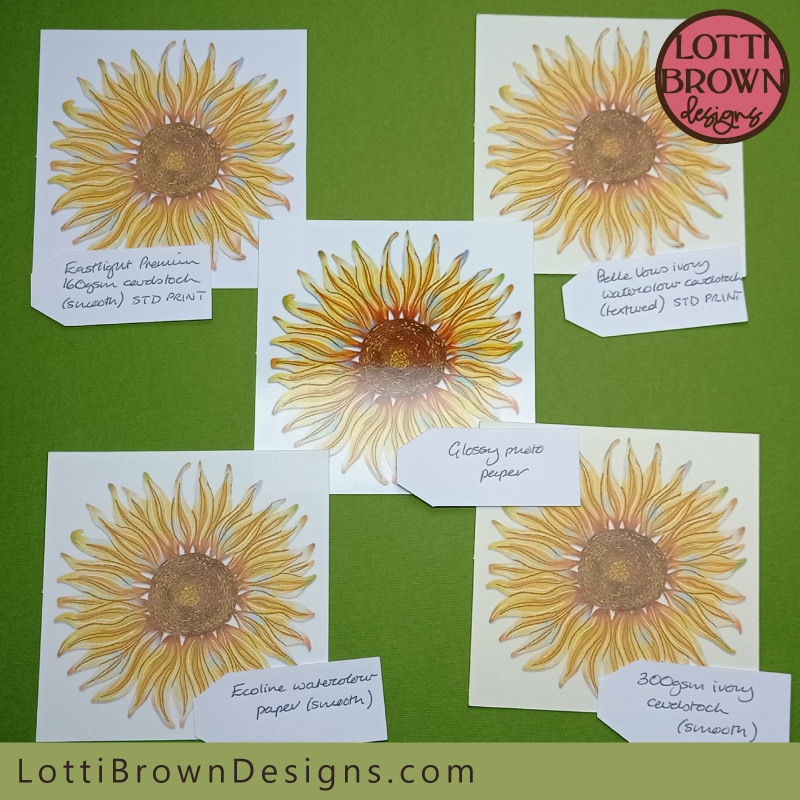 Print and cut cardstock test with sunflower artwork
I think again, it's immediately obvious again that the glossy photo paper has the most vibrancy and the clearest print.
Let's take a closer look - this time, I've included both designs on the same cardstock/paper type together...
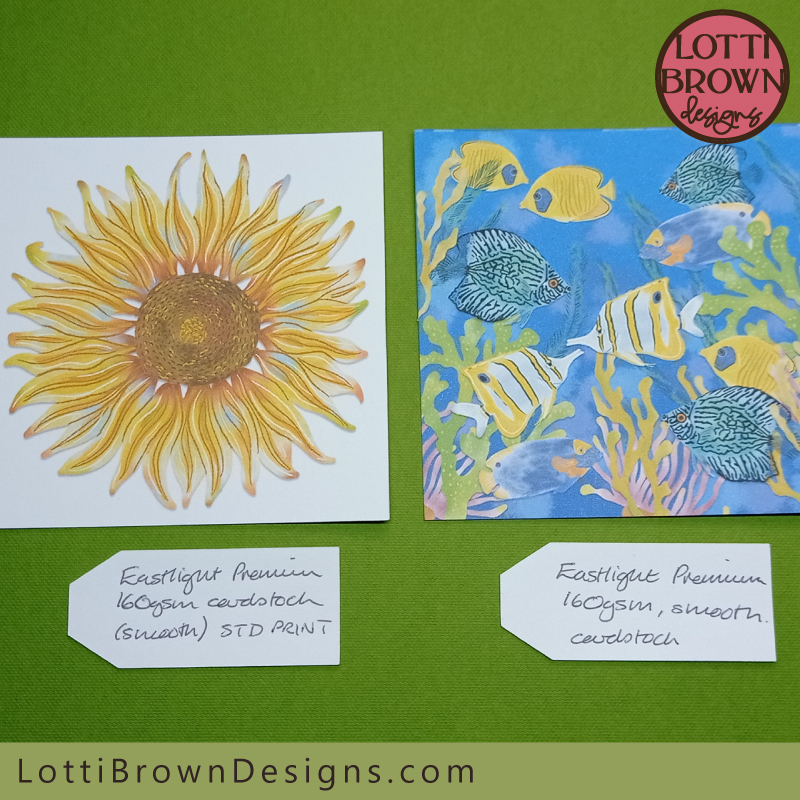 Eastlight Premium white smooth 160gsm cardstock
The Eastlight Premium white smooth 160gsm cardstock (above) I think is a pretty good result (especially if you're not examining it up close when it does look a little grainy) - the white cardstock gives a brighter colour and it is the cheapest cardstock I tried by quite some way! It's also lightweight, so if you don't want to make your card too heavy or bulky, it's a pretty good choice.
The Craft UK 300gsm ivory smooth cardstock is also a very acceptable result (below) - the ivory colour of the cardstock does dampen down the colour on both tests, but the ivory colour does look attractive for the sunflower background, and might suit your project better. This is a heavier, stiffer card than the others so it might be just what you need to make your project feel quality, or it might make your card too thick and heavy - decide to suit your project!
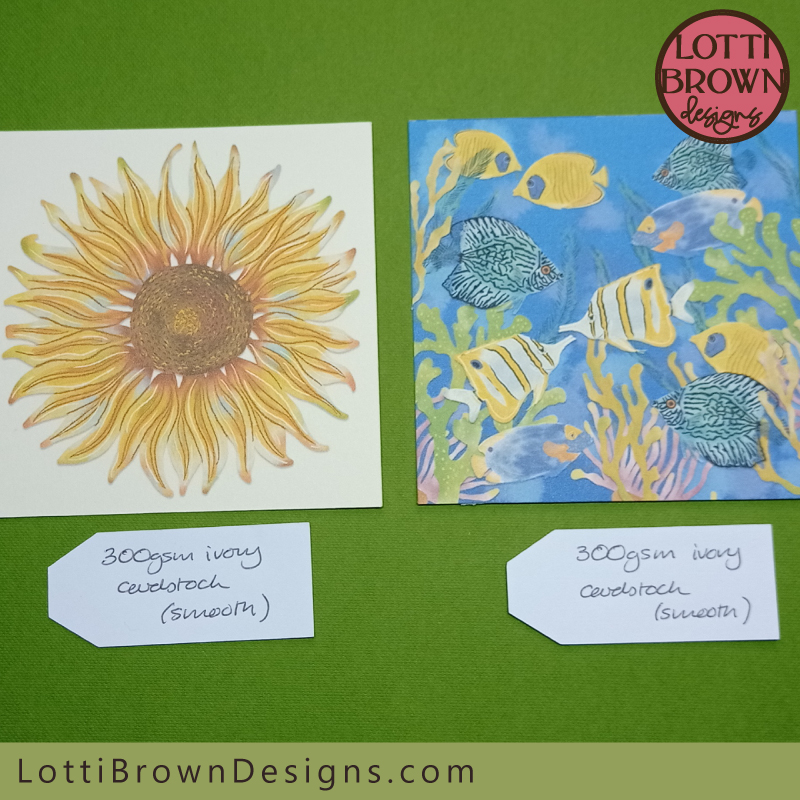 Craft UK 300gsm smooth ivory cardstock
The Ecoline watercolour paper (smooth, white, 150gsm) test below was again my least favourite for the test, although I think it did a much better job for the sunflower with the white background than the full-colour tropical fish artwork. The slight texture of the paper, while great for actual watercolour paints, doesn't really seem suitable for printing, and it does look very grainy - this might be a textural effect you really like for your artwork or prints, though!
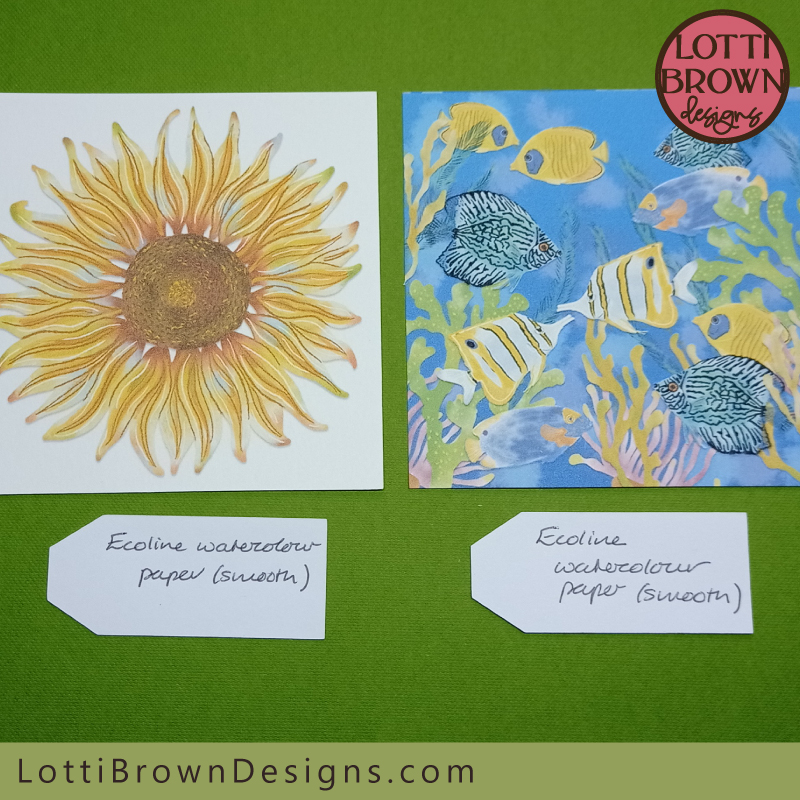 Ecoline white smooth watercolour paper (150gsm)
I also think the Belle Vous textured ivory watercolour cardstock (200gsm), below, did a better job with the sunflower than the fish artwork. The nice texture is more noticeable with the plain background and does give the artwork a watercolour look - the soft-touch feel of the cardstock is nice, too, and could be something you want to go with for your cardmaking.
When I showed my husband my test prints, this one was his favourite for the sunflower print but not for the fish!
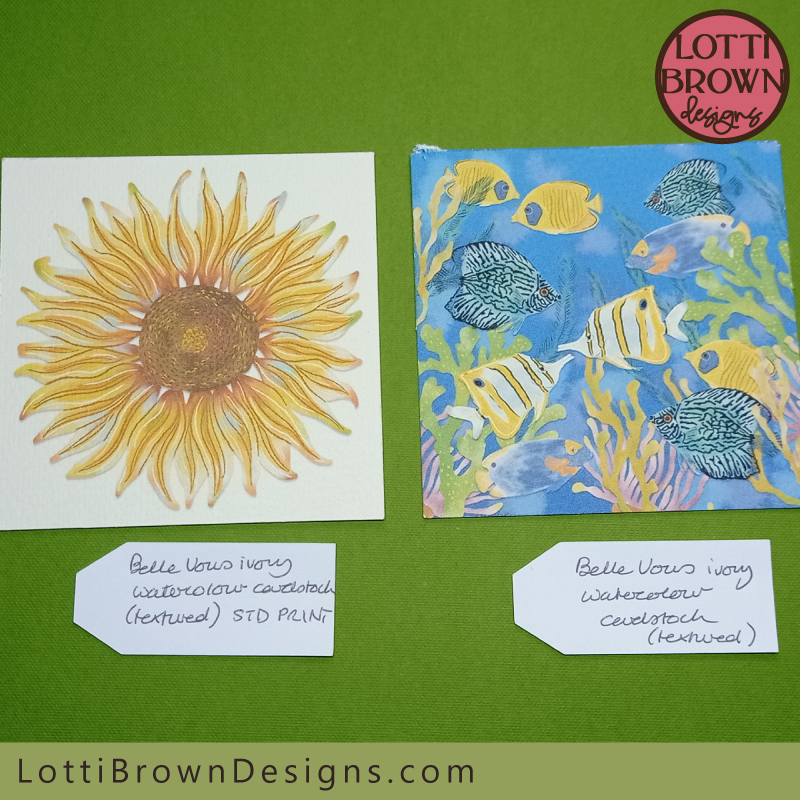 Belle Vous ivory (called white) textured watercolour cardstock (200gsm)
And last, but by no means least, is the HP glossy photo paper - once again, the photo paper 'wins' for crispness of image and vibrancy of colour - the glossy paper does give a really good result for the print out, but in some cases it might not be what you want for your project as it does lack a little of the 'softness' that the prints on cardstock do have...
I did not test any matt photo paper, as I don't have any, but I think this would be another really interesting test to do sometime to see the effect!
This one was actually my husband's least favourite for the sunflower print, in spite of the crispness of the print, but he did like the fish a lot. I think he's right and it will depend on the artwork you're printing as well as the intended project and your own personal preferences.
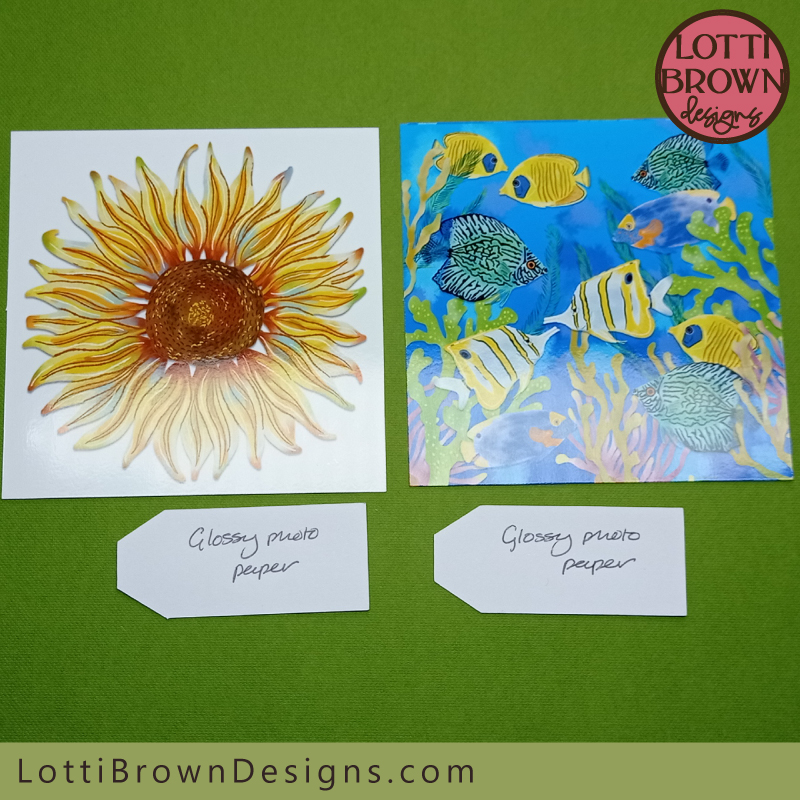 Glossy photo paper print then cut
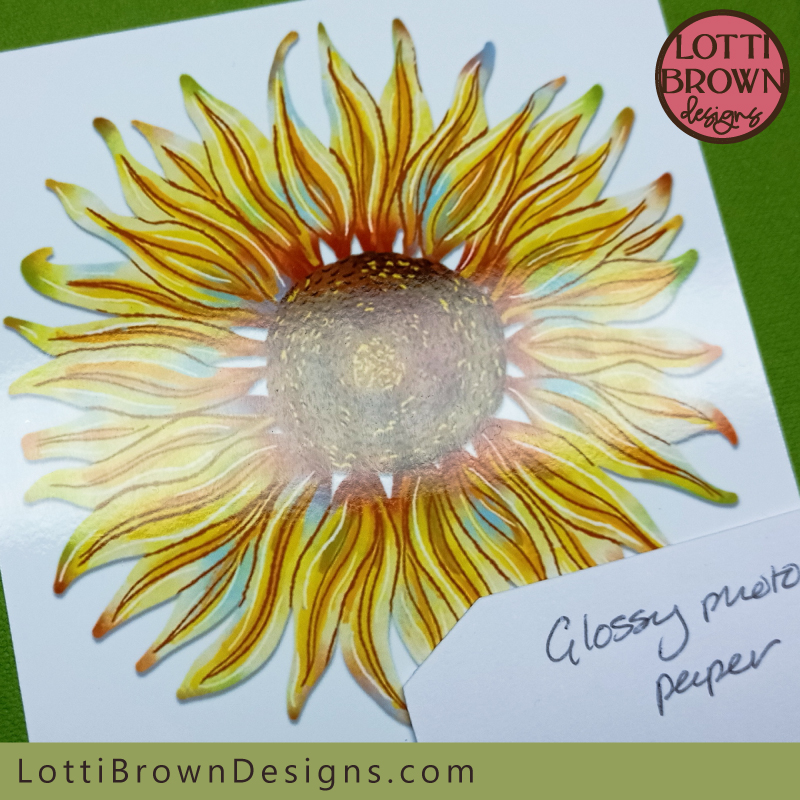 A closer look - still colourful and crisp - glossy photo paper print and cut test
Supplemental Tests
I did do two quick tests to test whether the 'photo print' setting on the printer, rather than the 'standard print' setting, was responsible for the clearer result - I left all other settings the same for the two cardstock types I tested, but set one to 'photo print' and one to 'standard print' - I think they looked the same - see what you think...
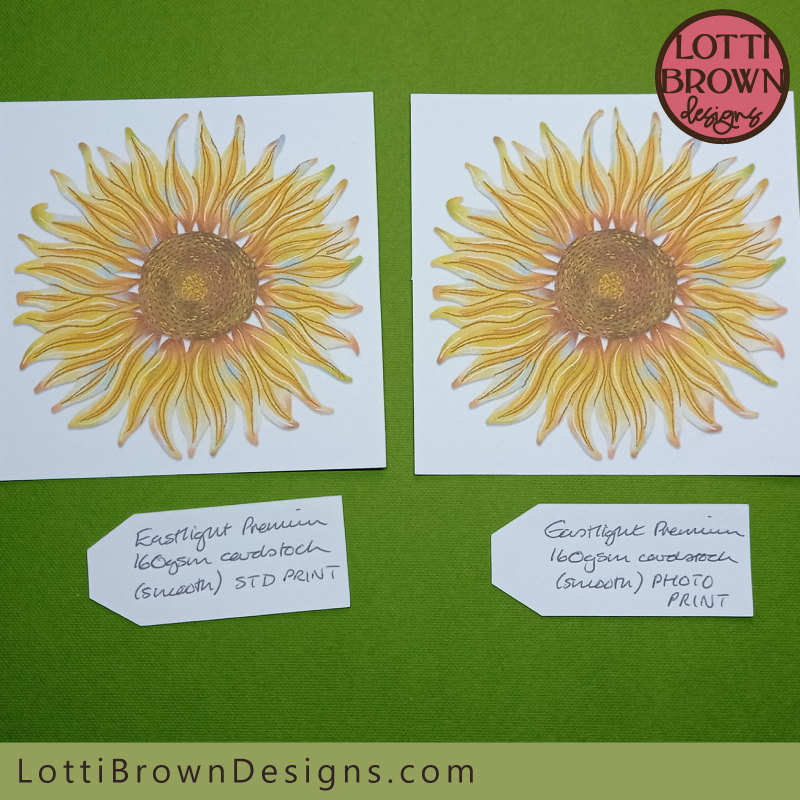 Eastlight Premium smooth white cardstock (160gsm) - standard print setting on the left, photo print setting on the right
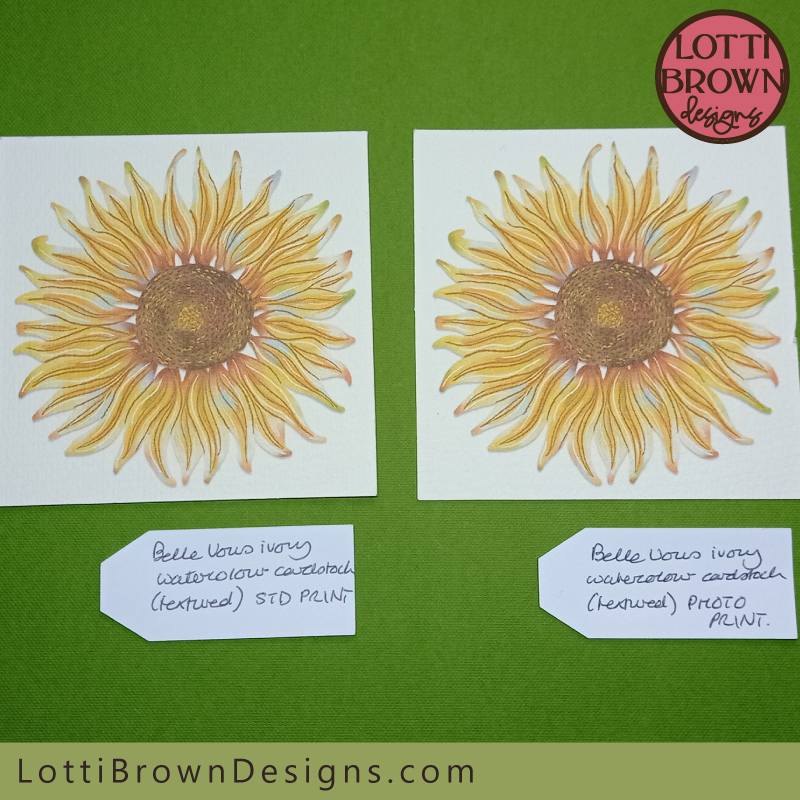 Belle Vous ivory textured watercolour cardstock (200gsm) - standard print setting on the left, photo print setting on the right
Cardstock Test for Print and Cut with Cricut Conclusion
 Print then cut cardstock test - full colour
While none of the prints were bad, I definitely think in terms of colour and crispness there is a clear winner in my cardstock test for print and cut with Cricut. It's clearly the glossy photo paper - and I'm very likely to use this again for future print and cut projects. This is especially noticeable for the full-colour tropical fish test where the colour is so much more vibrant and the print clear and crisp without graininess.
One thing about the photo paper is it was a lot more expensive than the other options - 46p per sheet compared to 15p for the Belle Vous watercolour cardstock, and only 7p for the Eastlight Premium lightweight smooth white cardstock. This does make a difference, especially if you've got lots of cards or other print and cut projects to make.
There's definitely cheaper photo paper out there than the one I tested (I was getting a really good quality photo paper to try and make my old printer work with it) - so that's certainly something I'll look at when I buy more photo paper in the future and it could make this option more affordable.
I liked the Belle Vous textured watercolour cardstock a lot - for the texture, the soft-touch, the ivory colour, and the way it did make my artwork look like an actual watercolour. I think it made my artwork look softer and more old-fashioned (in a nice way) which I liked a lot, so I think I'll be using this cardstock quite a lot, too.
The other cardstock I would choose would be the Eastlight Premium white smooth cardstock (160gsm) - this is because I have this cardstock in my stash anyway as it's so useful for making and testing. I make my card inners out of this cardstock and I could also make envelopes out of it and I also cut lots of my SVG designs in this cardstock. It's also for the price. At just 7p per sheet, it was the cheapest cardstock I tested and by no means the worst! Especially in real life, the prints look good and colourful and the card cuts well and glues well onto the card without adding too much bulk, so that's another feather in its cap - and I will certainly be using this cardstock again for my print and cut with Cricut, too.
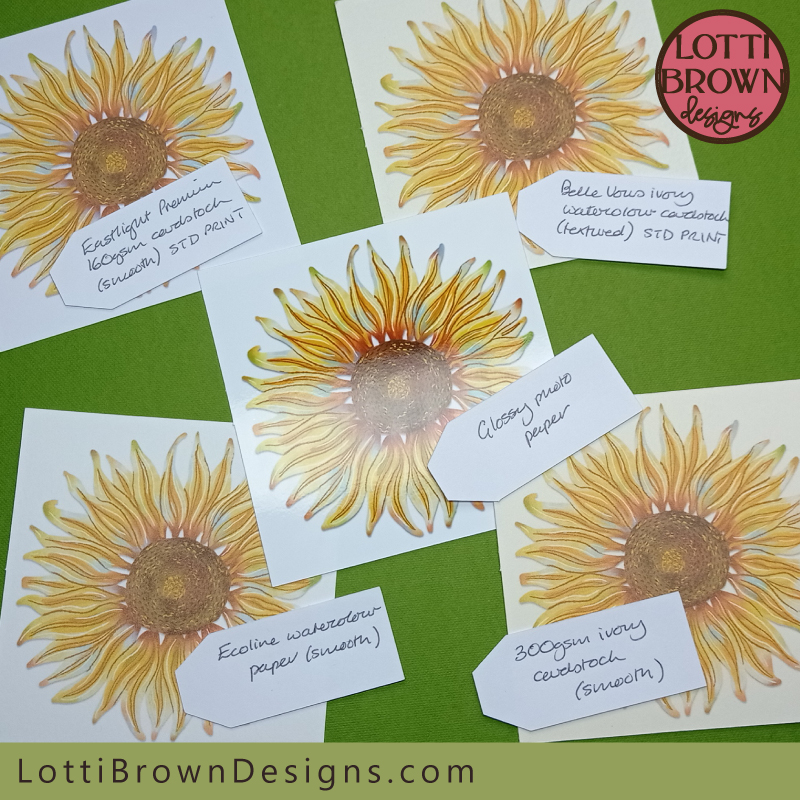 Print then cut cardstock test - white background
So if you want a crisp, vibrant full-colour image, choose the glossy photo paper (also try matt photo paper - and if you do, let me know how it turns out).
Ivory cardstock is nice for artwork and designs with white/plain backgrounds, and if you want a more nostalgic look - but it can dampen the colours down slightly.
Textured watercolour cardstock gives a special watercolour effect with a lovely texture but you do lose a little of the clarity and colour vibrancy in exchange - but it might work for what you want - again, I think this one is best for the artworks and designs with a white or off-white background.
If you've got a smooth white cardstock in your craft stash already, give it a go, as it gives perfectly good results, it's practical, and nicely budget-minded.
Above all, and so you're not wasting money buying something you can't use, check your own printer details to see which cardstocks and paper types are suitable for it. Remember that glossy photo papers and thicker cardstocks (like the 200gsm watercolour cardstock and 300gsm ivory cardstock I used here) are only really suitable for printers with a rear-loader tray - my Eastlight Premium smooth white cardstock (160gsm) went beautifully even through my old printer and flexes more like paper, so it would be great for printers with a standard tray (not rear-loading).
I hope my unscientific scientific print and cut cardstock test has helped you decide which cardstock or paper type to use - or you at least feel a bit more informed about how to make your decision and which might be right for you.
I do want to reiterate, that although many of these print and cut tests do look very grainy in my photos, some of which are very close up, they ALL looked good in real life and I wouldn't have said any of them were completely unacceptable, so don't worry too much with your choices!
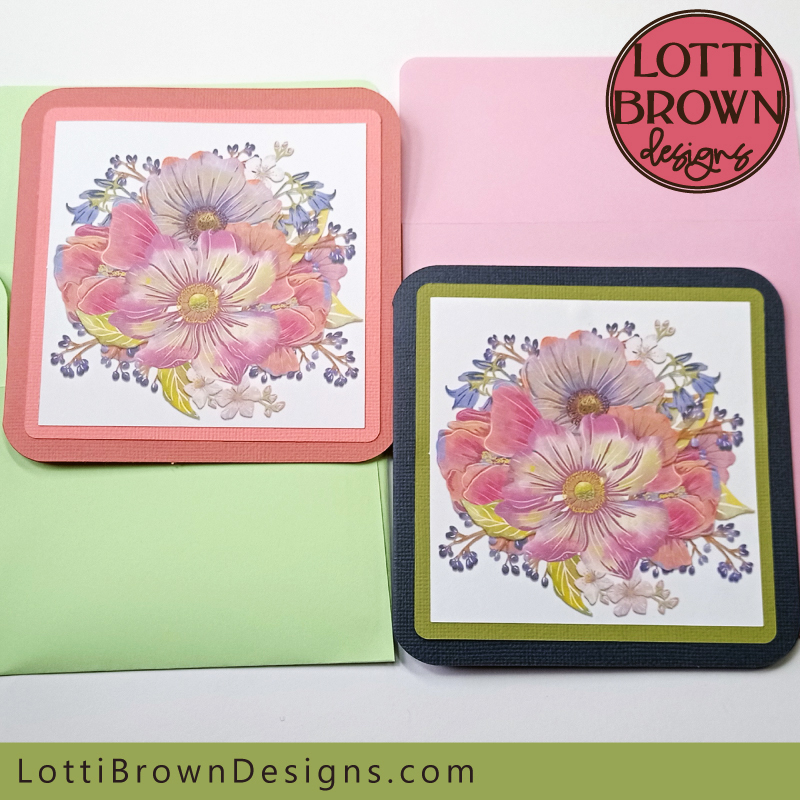
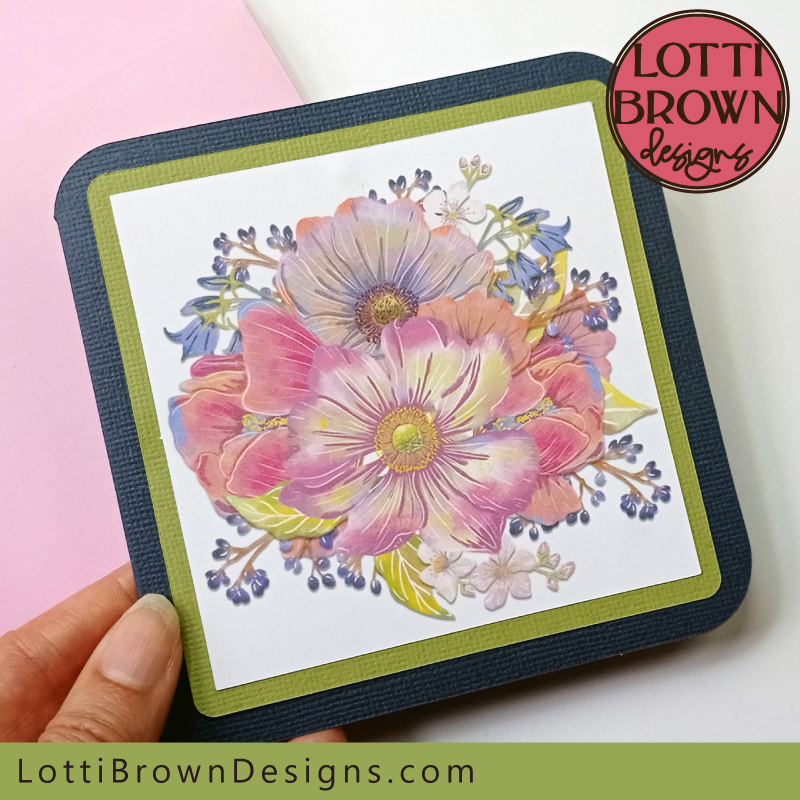
You can look at some of my made-up cards that I made with print and cut, to see how the prints look on the finished article here - you can also get both the tropical fish and sunflower designs that I was testing with here, too.
Print Updates
I'm writing this a year or so after my original page - I've been printing printable cards and my search for the best cardstock for printing onto continues so I wanted to update my new discoveries on the subject...
I've printed onto various plain white cardstock, watercolour paper and photo papers and I have to say that the photo papers win every time!
I've also experimented with glossy and matt photo paper and I like both and both seem to have excellent quality, so I recommend you to go with your own preference as to this. I did discover that some (usually big-brand) photo paper does have a printed name or watermark all the way across the reverse of the card, which is fine while you're making a 'print-and-cut' project that you're intending to stick down onto something else, but isn't so useful when you're intending to write inside! So look out for that! Crafters photo papers seem to be better for not doing this - I've been using Photo Papers Direct (in the UK).
Obviously, print settings matter and I always recommend you to print at the 'Highest' or 'Best' quality. Also look out if there is a setting to print onto 'photo' or 'plain' paper. My new printer has this now (you used to be able to select from a wide range of paper types but now it seems just photo or plain)...
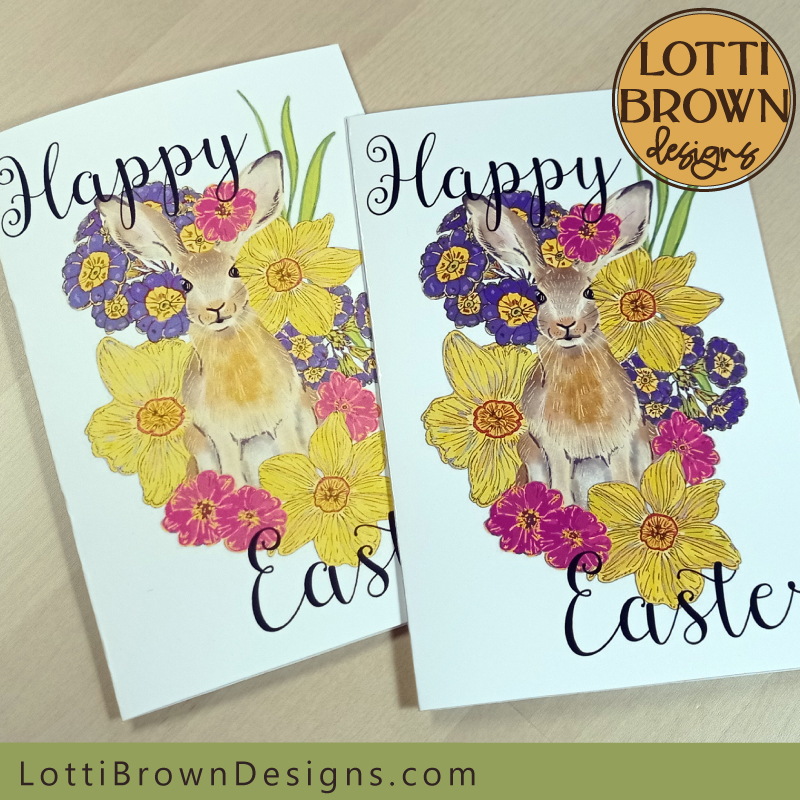 Print comparison for 'plain' or 'photo' setting
These two Easter cards are both printed on glossy photo paper - on the one on the left (the softer/paler one) used 'plain paper' setting, while for the one on the right I used 'photo paper' setting and it's come out much darker. You might prefer one look to the other, but it's just something to be aware of and check your own printer settings and/or try the settings out on your own printer to see which one you like, or how each comes out on your printer.
Starting your Print and Cut Project
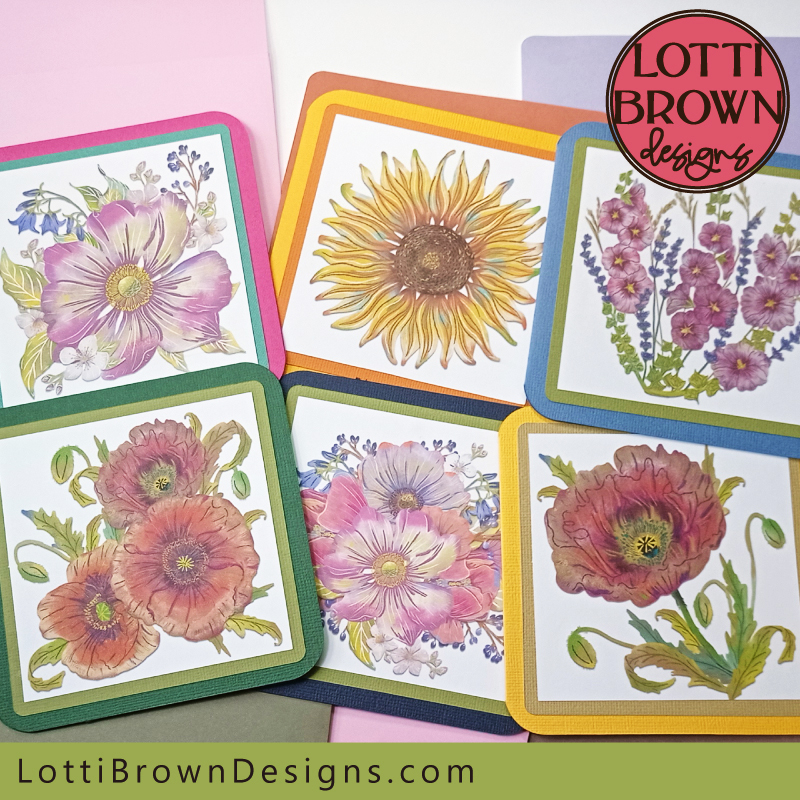
You can find my instructions for how to print and cut with Cricut here - this uses one of my print and cut card templates as an example to show you how to use the function - you can find all those card templates here...
 Print then cut card templates
More about how to use your Cricut here...
More about using cardstock with your Cricut here....
You Might Also Like:
Lotti Brown's Designs & Templates
How-tos...
- How to use SVG cut files for Cricut (also other cut file formats & machines)
 Papercut greeting card templates
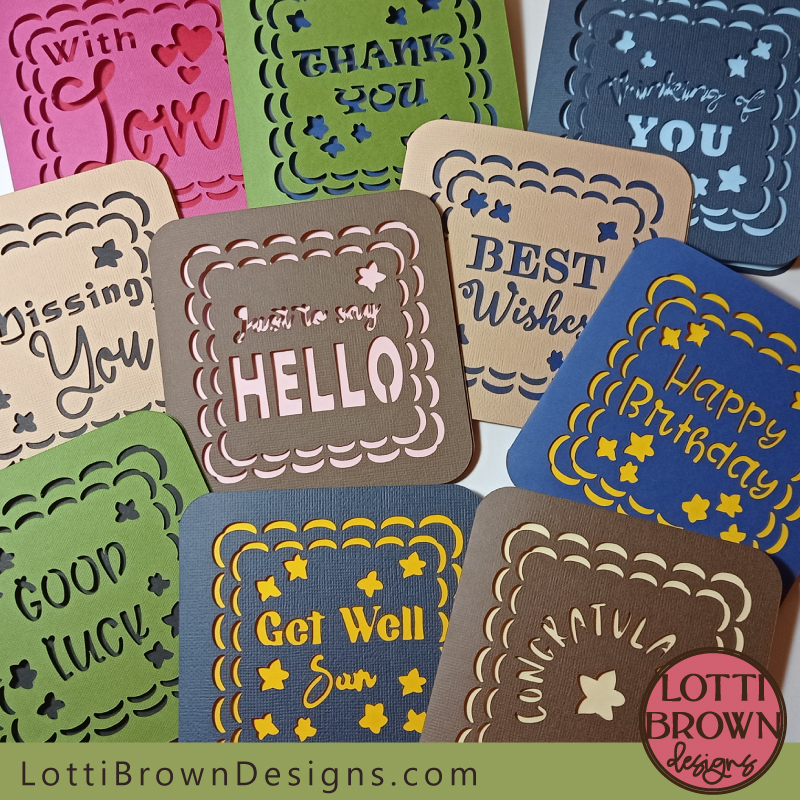
I've also got lots more papercut greeting card templates for you to make - birthdays, weddings, births, retirements, new jobs and more - take a look here...
Shall we stay in touch..?
Each month, I share stories from my own nature journal, new art from my studio, and simple seasonal inspiration to help you feel more connected with the turning year...
Recent Articles
-
British Nature Folklore Library: Stories, Seasons & Celtic Tree Wisdom
Dec 01, 25 05:09 AM
Explore British nature folklore, Celtic tree meanings, and seasonal wildlife stories. A growing library of myth, meaning, and hand-drawn inspiration. -
Beautiful Art Inspired by Nature
Dec 01, 25 05:04 AM
Beautiful folksy art inspired by nature from the fields and hedgerows of Yorkshire - colourful birds and wildlife with a nostalgic floral touch... -
Birds and Folklore in Britain: A November Nature Journal
Nov 26, 25 04:32 AM
November birds and berries - fieldfares, redwings, lapwings and snow geese with folklore, meaning and nature journal inspiration.
Follow me:
Share this page:


