*** IMPORTANT - I'm retiring my digital files - SVG/PNG/DXF/EPS - and printables from 31st December 2025 ***
*** Please ensure that you have everything you need - files and/or instructions printed off from the website (find them currently in the ARCHIVES section) - by 31st December 2025 as they will not be available after this date ***

Template for Paper Daffodil
- Home
- SVG files
- Floral SVGs
- Paper Daffodil SVG

Stunning template for paper daffodil - make beautiful papercraft daffodils for a super Springtime display - ideal for Cricut and other cutting machines, or cut by hand...
Full instructions included to make at home, starting on this page!
 Make a beautiful papercraft daffodil
Get the papercraft daffodil template from my store here
Digital download 3D paper flower template
For Cricut & similar cutting machines or to cut by hand
SVG, EPS, PNG & DXF file formats
For personal craft use & small-business commercial use (up to 200 products)
Physical (craft) products only - no digital products, use, or sharing
Template for Paper Daffodil
Inspired by Springtime daffodils, I made a template for a paper daffodil for you to make with your Cricut or similar cutting machine. You can also use the PNG file to cut it by hand.
The daffodil is quite an awkward papercraft flower to design for - there's the trumpet to attach, and also the challenge of trying to get the papercraft daffodil to look elegant and beautiful like a real daffodil flower, and not stiff and card-like... whilst at the same time making it so that it's not too difficult to make, made from easily accessible craft materials, and also able to be made by other people, too, (not just me!).
I spent over a week (full time) tweaking my paper prototypes over and over until I managed to create this daffodil beauty - so I hope you agree that it's got the prettiness of a real daffodil and that it's fun to make too!
 Make this daffodil from cardstock
I'll share the full instructions for how to make your paper daffodil here, too - so that if you want to make your own versions like this, I'll give you every step I followed, so you can follow along and get the same results!
The daffodil template is easy to make if you already have a little crafting experience - and you can also make it if you're an absolute beginner and up for a challenge! I cover everything you need to do, with detailed photos, so you won't get lost.
The SVG template used as-is in Cricut Design Space makes a daffodil flower that's around 8-8.5cm diameter (that's just over 3 inches). You can resize the file as you wish, including making it smaller - I don't recommend making it too much smaller, though, else you might find it a little too fiddly to make.
As well as my daffodil template, there's some extra crafting materials that you'll need to get the best results - so I'll run through those below as I start the instructions...
 Cardstock daffodils made with my Cricut - a beautiful and long-lasting Springtime display for my home
Quick Guide to the Tutorial Pages
If you need to refer to the different pages of the tutorial, here's a quick guide with the pages and links to help you get where you need to be - if you're just starting, keep reading this page - you're in the right place and I'll guide you through to the next page at the right time!
- Main project page and getting started (this page) - what you'll need & setting up the file in your design program (step-by-step instructions for Cricut, but you may find it useful for other machines too)
- Daffodil Tutorial Page 1 - scoring & colouring the petals & making the central stamen piece
- Daffodil Tutorial Page 2 - making the trumpet, shaping the petals, assembling the front part of the flower with front set of petals and trumpet
- Daffodil Tutorial Page 3 - creating the back half of the flower (petals & top of stalk) and sticking both halves together
- Daffodil Tutorial Page 4 - finishing the daffodil stalk
- If you don't have the template for the paper daffodil yet, you can get that from my store here (SVG, DXF, EPS & PNG file formats suitable for cutting machines or cutting by hand)
What You'll Need for Your Papercraft Daffodil
 Showing all the parts for my daffodil template - the leaves are included (bottom three items)
As well as my template for a paper daffodil, you'll need these extra crafting materials for your daffodil-making project...
- Daffodil template - SVG, DXF, EPS, PNG - if you don't already have it, you can get it from my store here.
- A way of cutting the template - this could be a cutting machine, or if you use the PNG file, you can cut by hand. I used my Cricut Maker.
- Cardstock in four different colours - my papercraft daffodil template makes a pale yellow daffodil with an orange trumpet - you can experiment with colours, perhaps making an all yellow daffodil or one that's white with an orange trumpet (I really liked making that one). I found a medium-weight cardstock (around 216gsm or 80lb) seemed to work best for the template, but feel free to experiment with different papers and cards as you wish. I used Sizzix 'Surfacez' textured cardstock for all parts of the daffodil - and if I was to make a recommendation, I would strongly recommend using that, I was very happy with the results and they had lots of different yellows, oranges and greens in the pack that I could use. Two daffodils can be made from one sheet each of A4 yellow card and green card, plus smaller bits for the orange and tan parts.
- Something to glue your daffodil together - I used a glue stick plus double-sided sticky tape, which I found really helpful for instant grab when sticking the parts together.
- Florists wire (to make the stalk of the daffodil) - I used two strands of this thinner wire per daffodil to create the stalk. Depending on what thickness wire you can get, you might be able to use just one, or might need several to support the daffodil head.
- Floral tape (also known as floral stem wrap) - this is a waxy tape that you can use to create the stem and you'll need it to attach the back of the daffodil to the wire stem (I got this and the florists wire in a floral arranging pack from Amazon).
- Materials for adding colour and detail to the petals (optional) - I used coloured pencils (yellow, orange, and tan) to add extra colour and detail to the petals. I think the coloured pencils worked really well with the cardstock to give the right effect. You can experiment with other colouring materials if you have these, or leave the cardstock uncoloured if you prefer. A pencil sharpener was also useful!
- Sharp scissors - mainly to cut the double-sided sticky tape and the floral tape.
- Scoring/embossing tool (optional) - this is to create extra detail and texture on the petals. The one I have (pale-pink & clear tool below) is from a 'Stylus' tool set - often also called an embossing tool, modelling tool, clay or ceramic tool, fondant decoration tool, or dotting tool, which also includes the round ball type tool which I'll talk about below. You could also use your scoring stylus tool from your cutting machine (if you have a hand-held type) or a knitting needle or cocktail stick.
- Moulding tool and moulding mat (optional) - this is the tool with the ball on the end plus a soft foam mat (white thing, bottom right of the photo). This will be used to shape the flower petals. If you like making flowers, I think you'll find this tool incredibly useful, but if you don't want to invest in one, you can shape the petals gently with your fingers instead. This is called a moulding tool, metal ball tool, or fondant decorating tool - the one you see below is from a Crafter's Companion set, which came together with the mat, but I also got a good selection in a set when I bought the scoring/embossing tool above.
 Things you'll also need to make your papercraft daffodil
So that's everything you'll need to make my template for the paper daffodil into a beautiful 3D daffodil that you can enjoy in your home.
If you've got everything you need, we can get started with the tutorial for making the papercraft daffodil below...
I estimate that, after the cutting is complete, each daffodil flower will probably take about half an hour to make - likely longer the first time, while you're following the instructions, and possibly a shorter time, as little as about 20 minutes, as you get used to the process and make more flowers.
I'll be showing you how to make the daffodil using my Cricut Maker - if you're using another type of cutting machine or cutting the daffodil by hand, please still take a look as I'll be including an important step to make sure that the three small slits in the centre of each petal group get cut! I'll also direct you from this part of the instructions onto the next part of the instructions...
How to Make Your Paper Daffodils
 Start crafting your own paper daffodils here!
If you would like to print these daffodil template instructions, please use the 'Print' buttons on the page (top right of the page and at the bottom of the content).
This will create a print-friendly version for you and you can also deselect any parts of the page that you don't need to print.
I'll be starting with the template for a paper daffodil file already uploaded into Cricut Design Space - if you need any help getting to this stage, please take a look at the instructions on this page - this will also help you if you're using another file type in other brands of cutting machine (I'm afraid not all possible brands can be included) or if you want to use the PNG to cut by hand...
If you're cutting by hand, cut the lines in the centre of each petal as little slits - then your instructions will start here.
If you need the measurements of each element to help you, you can find those on this page... (opens in a new window)
- Once your template is uploaded into your machine, you'll need to make sure that the slits in the centre of each petal shape are 'attached' to the petal shape. Briefly, you will need to 'Ungroup' the file, select each petal shape AND the group of cut lines (in the centre of the petal shape), then 'Attach'. The instructions below will show you this in more detail in Cricut Design Space - you may also find this useful if you're using another cutting machine type, as the actions will still need to be performed, just using your own machines software/program...
So let's begin...
1) 'Ungroup' - so that you can work with the elements separately (see below)
 Before you start anything else, click UNGROUP so that you can work with the elements separately (rather than as a 'group')
2) You'll then need to 'click away' somewhere in the 'canvas' area (the white area with grid lines) to deselect all the elements - so that's just one click somewhere in the white area.
3) Next, we need to select our first petal shape, together with the three small lines that are in the centre of the shape.
If we don't do this, the cutting machine doesn't 'know' that the three small lines are associated with the the petal shape and it will try to cut them separately, which we don't want. They are going to be little slits in the centre of the petal shape, to help us assemble the flower.
So we need to let the machine know we want to associate them with the petal shape - and this is how we do it...
So we need to select the first petal shape plus its little lines. I always put lines associated with a specific shape above the shape in the layers list on the right-hand side of Cricut Design Space. See them in the image below like this.
- So just hold down the 'Shift' key on your keyboard...
- And click on each of the four items in the layers list (see the image below)
 Select the petal shape plus each of the three shapes in the layers panel
You'll know that you selected them when the items turn pale green - like in the image below...
 The selected items have turned green in the layers list
4) So now, with the items selected (green in the layers list), just click on 'Attach' at the bottom of the screen - this is what 'attaches' the lines to the petal shape. See the image below...
 Click on 'ATTACH' and the small cut lines will be attached to their petal shape
So that's the first petal shape done. You can check it by looking in the layers list. It should have shot to the top of the list, and you'll see that it has the little paperclip icon and the word 'Attach' at the top - and the four items are grouped together and slightly inset from the others - see the image below...
 Check your layers list to see if the items are now attached like this at the top of your list
We now just need to repeat the process for the second petal shape...
5) Select the petal plus its three associated lines in the layers list...
- Hold down the 'Shift' key on your keyboard...
- And click on each of the four items in the layers list
- They'll turn green to show they're selected
- See the two images below to show you this process!
 Look for the second petal shape and the three lines above in the layers list
 Hold down the 'Shift' key on the keyboard and click on each of these items, they'll then turn green on the list to show they've been selected
6) Click on 'Attach' at the bottom of the screen - see the image below...
 Click on 'ATTACH'
Check it's worked okay by looking at the layers list - you should now see your second petal-set at the top of the list (above the first petal-set) - it should have the paperclip icon and the word 'Attach' above it, and the items be inset slightly - see the image below...
 You can check the layers list, to make sure that everything worked okay!
7) If everything looks okay, you can go straight to 'Make It' (see the image below) - from there you can just follow through with the prompts from the machine, loading the cardstock and allowing it to cut, in the normal way...
 Click 'Make It' and then follow the prompts from your machine in the normal way
 All the cardstock pieces cut ready to make your template for paper daffodil
When everything is cut out and ready, you're ready to go onto the next page of the instructions which will help you assemble your template for a paper daffodil into a pretty flower - I'm calling that 'How to Make a Paper Daffodil Tutorial Page 1' - there's several pages as I took so many photos as I didn't want you to miss a single step...
I'll direct you to the next page at every stage, but just in case you want the list of pages & links for reference, here it is:
- How to Make a Paper Daffodil Tutorial Page 1
- How to Make a Paper Daffodil Tutorial Page 2
- How to Make a Paper Daffodil Tutorial Page 3
- How to Make a Paper Daffodil Tutorial Page 4
Where to Go Next
Start making your papercraft daffodil flower with page one of the tutorial here...
 Start making your papercraft daffodils...
If you've been reading this tutorial and you fancy making the daffodil, you can get the template for a paper daffodil from my store here - there's instant download and it comes in SVG, DXF, EPS, and PNG file formats, suitable for cutting machines or cutting by hand.
Get your template for the paper daffodil here to start your own project!
You Might Also Like:
Lotti Brown's Designs & Templates
How-tos...
- How to use SVG cut files for Cricut (also other cut file formats & machines)

Shall we stay in touch..?
Each month, I share stories from my own nature journal, new art from my studio, and simple seasonal inspiration to help you feel more connected with the turning year...
Recent Articles
-
Birds and Folklore in Britain: A November Nature Journal
Nov 26, 25 04:32 AM
 November birds and berries - fieldfares, redwings, lapwings and snow geese with folklore, meaning and nature journal inspiration.
 -
Elder Tree Meaning and Myths
Nov 24, 25 06:06 AM
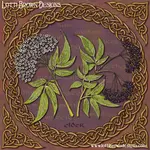 Explore the elder tree meaning, symbolism and myths with me as part of the Celtic Tree Calendar...
 -
Nature Journaling Autumn Fungi & Folklore
Oct 28, 25 05:58 AM
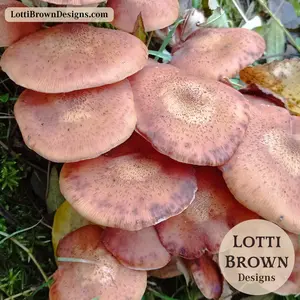 Nature journaling autumn fungi - discover how nature journaling helps you slow down, notice more, and reconnect with the season...
Follow me:
Share this page: