*** IMPORTANT - I'm retiring my digital files - SVG/PNG/DXF/EPS - and printables from 31st December 2025 ***
*** Please ensure that you have everything you need - files and/or instructions printed off from the website (find them currently in the ARCHIVES section) - by 31st December 2025 as they will not be available after this date ***

Wedding Shadow Box Ideas
- Home
- SVG files
- Shadow Box SVGs
- Wedding Shadow Box SVG

Wedding shadow box ideas to inspire you - make a romantic and thoughtful gift with your Cricut or other cutting machine.
Learn how to make a beautiful and intricate papercut shadow box for the happy couple - a gift to cherish...
 Wedding shadow box papercut to make at home
Wedding Shadow Box Ideas
I made this beautiful wedding shadow box SVG template for you - for weddings, and for anniversaries and for any other romantic occasions that you'd like to celebrate - I think it will be a really special make for a really special occasion...
- The file comes in SVG, EPS, PNG & DXF formats (available from my store here)
- You can use the file for personal crafting or a small craft-business (making up to 200 units)
- You can not use the file digitally (no digital products or sharing)
I'll share how to make the shadow box, and hopefully inspire you to get creative with colours too - you can match the colours of the wedding shadow box to match any colour theme for the wedding, or perhaps just the happy couple's favourite colours...
I'll give you some help and tips for getting the best results with colours, too...
 Wedding shadow box ideas to inspire you
I also made an alternate wedding shadow box design here, inspired from the design on this page but with a very different feel. It has a simple, contemporary feel and a fantastically colourful rainbow. You might like to check out, too, while you're here - it comes in separate versions for bride & groom, two grooms, or two brides. I'll show you a picture at the end of the page - or you can go here now if you just can't wait...
What you'll need for your wedding shadow box
You will need:
- Cardstock - in four different colours. I've used Sizzix cardstock for all the colour ideas (with the exception of the dark blue background layer which is a Clairefontaine card in 'Midnight Blue'). The cut is intricate so please use a quality cardstock that you know cuts well for these kinds of more intricate papercutting work. I've some tips for choosing and using cardstock with a Cricut here...
- Double-sided sticky pads - these stick the layers together and separate them a little to give a better shadow effect
- Frame - a box frame that's a little deeper will give you the best results for your shadow box. I've used a frame that's around 8 x 8 inches (20 x 20cm)
- A way to cut your card layers - I'm using my Cricut Maker cutting machine. You will be also able to use the template with other cutting machines or if you want to cut by hand
- The wedding shadow box SVG template - available via my store here
 Wedding shadow box SVG - layered file - SVG/DXF/EPS/PNG formats
How to Make Your Wedding Shadow Box
- Resize your design - the wedding shadow box SVG is sized to make a 20 x 20cm (8 x 8 inch) shadow box - please resize it in your design software to fit your own chosen frame (measure it!). I moved the design to the left slightly in Cricut Design Space so that I could easily fit it to cut the layers from A4 cardstock. I don't recommend resizing any smaller than the size supplied, as it is intricate!
- Choose your colours - this is the fun bit but can also be tricky too! I've supplied the file in soft creams, greens and lilac, which I think works beautifully for any wedding occasion and is a lovely romantic look - so go with this if you love the look, or if you don't feel confident to choose your own colours...
If you'd like to select your own colours for your own wedding shadow box ideas, try to make sure that you get a good contrast between the happy couple and the background. The happy couple are the central point, so they do need to stand out against the background.
I also found it worked nicely to get the two floral layers in similar colours - in a light cream and very soft green in the lilac/cream/green colour choice - and in two (quite similar) shades of pink in the blue and pink version.
In the third version, the flower layers are quite different colours, but they're tonally quite similar (quite dark, strong colours) so it also seems to work.
I know that you could get really creative with this, so bear these points in mind while you select your colours, have some fun with it, and I so look forward to seeing what you come up with!
 Pale blue, soft greys, and burgundy cardstock
 Wedding shadow box colour ideas - blue background, taupe pavilion, and pink floral layers
You will need to cut your layers using whichever method of cutting you decided to use. If you're a Cricut user, I have some help with using your files here and with using your Cricut here...
I recommend using intricate cardstock setting on your Cricut - and please be gentle when removing the cuts from your mats as they are intricate.
When your layers are cut and ready, please come back here for the instructions for assembling your wedding shadow box...
 Make a wedding shadow box with intricate papercut layers
Assembling your wedding shadow box layers
When you have your layers cut and ready, gather them together, along with your double-sided sticky pads, ready to assemble them together to create your wedding shadow box.
It's actually really easy to do (but shhh, don't tell anyone as it looks super-complicated)! You can follow along here to make sure everything runs smoothly...
 Gather your layers together and lay them out ready
All we're going to do, is stick the double-sided sticky tabs in between the layers, this separates out the layers a little to give that nice shadow effect, which really is essential for the shadow box style...
- I'm going to use one layer of sticky tabs, but you can double-up (one on top of the other) with your sticky tabs if you want a deeper gap between the layers for a more dramatic look.
- Try and stick the sticky tabs in the same or similar position on each layer, as this helps your layers to sit evenly without sagging or twisting - you don't need to be exact, but try to be in the same general area each time...
- Three or four sticky-tabs per side work well (you can get away with two!).
- Stick them on the reverse (back) of the layer each time...
 Stick the double-sided sticky tabs around the BACK of the layer with the couple on
So start with the layer with the happy couple, and remembering to stick them on the back of the layer, just stick on your double-sided sticky tabs...
Then, turn over your layer, line up the top edge along with the top edge of the background layer (both layers should be facing the front now) - and when it's nicely lined up, just lower the cut layer down slowly and when you're sure it's in place, press down to stick well.
It should look like the image below...
 The first layer is in place
We just repeat the process with the next layer, which is the one with the pretty pavilion...
Stick the sticky-tabs to the reverse of the layer, trying to get them in a similar spot to the previous layer.
 Add your sticky tabs around the back of the pavilion layer
Stick the pavilion layer on top of the two layers you already stuck together - it should look something like this...
 The wedding shadow box project looks like it's really coming together now!
The project is really coming together now - in fact, there's just one layer left to add!
Let's stick the sticky-tabs around the edge of the final layer, remembering to work on the back of the layer again...
 Add sticky tabs around the edge of the final (top) layer - remember to work on the back of the layer again!
And for the final time, just line up the top edges carefully before sticking down this top layer...
 Stick down the final layer of your wedding shadow box project idea
Hurrah! It's finished! Well, nearly...
We just need to add it into your frame and it's complete - beautiful and ready to gift or keep!
A beautiful papercut wedding shadow box idea to keep or giftThis would be a beautiful hand-crafted gift - something very special for the happy couple to keep, display and cherish throughout their marriage...
 Layered cardstock intricate papercut detail
Wedding shadow box ideas for alternative colours
I just wanted to also showcase the finished wedding shadow box ideas for alternative colours, to give you a closer look and hopefully inspire you to either choose one of these colour ideas or to get creative with your own colour combination...
 A colourful and fun look in bright pink and deep blue
A fun and colourful wedding shadow box idea with a deep blue background setting off brilliant pinks (above)...
And a sophisticated neutral palette (below) in two tones of grey, palest blue and a rich burgundy.
 A sophisticated wedding shadow box idea in a neutral colour palette
And don't forget the romantic pastel shades in the wedding shadow box template supplied (below) - cream, soft greens and lilac - pretty, floral, and very romantic...
 Lilac, greens and cream make a pretty and romantic wedding shadow box idea
Hopefully, these will help inspire you with your own wedding shadow box ideas for alternative colours...
 Sophisticated neutrals!Fun and fabulous, colourful wedding shadow box idea
If you want to make the wedding shadow box ideas, you can buy the digital template through my store (link below) with worldwide instant download....
Buy the wedding shadow box SVG template here
SVG/EPS/DXF/PNG formats
Personal and small-business commercial use
No digital products or sharing please
Wedding card SVG files
I have some nice wedding card SVG templates based on this design, that you could make to match or co-ordinate with your shadow box...


See both card designs on this page
Rainbow Wedding Shadow Box Ideas
I also used this design to spark inspiration for a new wedding shadow box design - with a contemporary feel, a colourful rainbow and separate versions for 'bride & groom', 'bride & bride' and 'groom & groom' - you can check it out here...
 Rainbow wedding shadow box - comes as separate versions for bride & groom, two grooms, or two brides
If you like the rainbow wedding shadow box projects, do also take a look at the 'bride & bride' and 'groom & groom' card designs that go with it.
'Happily Ever After' Shadow Box
I actually designed the 'Happily Ever After' shadow box to be an engagement shadow box, but after I'd finished, I thought that it would work just as well for a wedding, special anniversary, or other romantic occasion...
 Romantic 'Happily Ever After' shadow box idea - I also have versions for two men and two women
You can see the project here - I also created versions for two men or two women - here...
You Might Also Like:
Lotti Brown's Designs & Templates
How-tos...
- How to use SVG cut files for Cricut (also other cut file formats & machines)

Shall we stay in touch..?
Each month, I share stories from my own nature journal, new art from my studio, and simple seasonal inspiration to help you feel more connected with the turning year...
Recent Articles
-
Birds and Folklore in Britain: A November Nature Journal
Nov 26, 25 04:32 AM
 November birds and berries - fieldfares, redwings, lapwings and snow geese with folklore, meaning and nature journal inspiration.
 -
Elder Tree Meaning and Myths
Nov 24, 25 06:06 AM
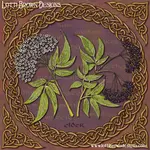 Explore the elder tree meaning, symbolism and myths with me as part of the Celtic Tree Calendar...
 -
Nature Journaling Autumn Fungi & Folklore
Oct 28, 25 05:58 AM
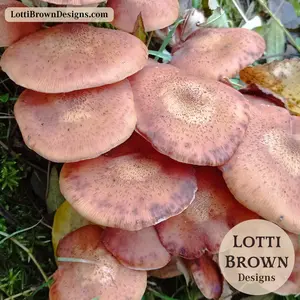 Nature journaling autumn fungi - discover how nature journaling helps you slow down, notice more, and reconnect with the season...
Follow me:
Share this page: