*** IMPORTANT - I'm retiring my digital files - SVG/PNG/DXF/EPS - and printables from 31st December 2025 ***
*** Please ensure that you have everything you need - files and/or instructions printed off from the website (find them currently in the ARCHIVES section) - by 31st December 2025 as they will not be available after this date ***

How to Make Paper Daffodils
Craft Tutorial Page 4
- Home
- SVG files
- Floral SVGs
- Paper Daffodil Tutorial Page 4

This is page 4 (the final page) of my How to Make Paper Daffodils craft tutorial. This is for you if you're currently following my papercraft daffodil craft tutorial.
You know you're in the right place if you've now nearly finished your daffodil and all that remains to do is tidy up the stem of the flower and add the sepal to the point where the stem meets the flower head.
If you're not quite at this point, or if you want to find out more about the craft project, go back to this main project page and read about the project and what you'll need, or use the links to find out where in the process you're supposed to be.
 We're making these beautiful daffodils - nearly finished now!
If you would like to print these papercraft daffodil instructions, please use the 'Print' buttons on the page (top right of the page and at the bottom of the content).
This will create a print-friendly version for you and you can also deselect any parts of the page that you don't need to print.
Let's Finish That Daffodil!!
You've come a long way, and yes, it is quite a long make - but you're nearly there - just a couple of final steps to go to tidy up the back of the daffodil so that you can use it in a vase to display at home...
You should now have a daffodil that looks pretty much complete, just a bit messy at the back - if you feel like you're not at that stage, check back here and find a better place for your stage of the make... I'll wait right here for you, so take as long as you need, there's no rush!
If you're ready to finish your papercraft daffodil flower, then we can start...
Working with the Sepal
Let's start with the sepal - this is the tan 'onion-shaped' piece of card, that will form the little hood that fits on the back of the real-life daffodil flower - you can see it in the image below...
 Let's work with this little sepal - the onion-shaped piece of card
- We'll go back to the foam mat and moulding ball to do a little bit of shaping for the sepal. Let's shape it first on the back - so that's putting the face/side that you scored and added coloured pencil to, down onto the foam mat, and then stroking gently, while pressing down, from top to bottom, with your moulding ball - see the image below...
 Use your moulding ball tool to shape on the back of the sepal piece
- As you stroke down and press with the moulding ball, the curve will start to form - see the image below...
 As you stroke down and press, the curve will form
- When you've got it curling nicely like in the image below, turn it over - now we're just going to stroke slightly and press on the very tip - see the image below...
 Turn the sepal over and use the moulding ball tool to shape just the very tip
- Your finished sepal should shape into this kind of shape, see the image below...
 Your shaped sepal should look something like this
- Next, fold it in half vertically, like in the image below. Make sure that you press your fingers along the fold to create the fold in the cardstock.
 Fold the sepal in half like this
- The unfold it - and fold it horizontally, fairly close to the base, like in the image below - again, press the fold with your fingers to set the crease.
 Fold again, horizontally, like this...
- Use these two folds to pinch the corner together and create a shape like in the two images below...
 Use these two folds to pinch at the intersection and make this kind of a shape
 Create this shape by pinching to make this corner shape
- When you loosen the shape a little, it should look like in the image below...
 It should end up looking like this - if you can't do the exact folds, just manipulate with your fingers until it takes on this eventual kind of shape
- The sepal is going to fit over the green cone/triangular shape like in the image below - just try it out with your own (without glue) so that you're happy with what you're doing...
 The sepal will fit like this - try it out with your own to see how it will work
- I tried glue and double-sided sticky tape on this too, and decided that the double-sided sticky tape was the better option. You will need quite a bit, going about half-way up the shape, like in the image below...
 I think double-sided sticky tape worked best - add it up to about half-way up the shape
- Position it in place like in the image below, and press to stick down when you're happy. We'll be using the florists tape (floral wrap) in the next step to secure it in place!
 Stick the sepal down in place at the back of the flower. We'll secure it in place with florists tape next.
Taping the Stem with Florists Tape
- We'll finish off the project with florists tape (floral wrap), so cut a length, probably about an arm's length will do, depending on how long your stem is.
 Cut a length of florists tape
- We'll be taping around the joint where the wire comes out of the green cone/triangle shape and the sepal makes the corner, so hold this part of the flower up ready to accept the florists tape - see this in the image below...
 We'll be taping around the joint to secure this part of the flower - hold it in place ready...
- If you've never used florists tape before, it's a waxy and slightly stretchy tape, so we use these qualities to help shape it... it stretches to fit the stem closely, and the waxiness and little ridges allow it to stick to itself, so as you wind it, pull it taut and keep it taut as you wrap it tightly around and press it in place.
- Start at the bottom of the sepal shape, where the corner point is, and first wind the tape down towards the base - see the image below...
 Start at the corner point and first wind the florists tape downwards, holding it taut as you wind it and pressing it in place as you go
- As you reach the end of the cardstock, change direction and wind upwards again to fasten the sepal firmly to the daffodil head. You can see how far up I went in the image below, but looking at it now, I think I could've even gone slightly higher up.
 Wind upwards to hold the sepal piece firmly in place
- Then start winding downwards and continue to cover the stems with the waxy florists tape - see the image below. Trim your wires if you don't want your daffodils to be very tall, or fold the ends of your wires up and wrap them in the tape as you go (not pictured). Remember to keep pulling the tape taut as you go.
 Continue winding downwards to wrap your daffodil stems in florists tape
- When your stem is finished, it should look something like the photo below. Wrap around several times in the same spot to finish - add a blob of glue to the very end if you feel it needs it.
 Completed, wrapped daffodil stem
And that's a wrap! That's it - your daffodil is complete. Well done!!
Put it with the green leaves you cut from the template, and admire it, pop it in a vase and enjoy it!
 Admire your lovely papercraft daffodil
 Front view
 Super Springtime daffodil!
 Side view - turning right
 Side view - turning left
Displaying Your Daffodil
 Idea for how to display your papercraft daffodils
Display your papercraft daffodil in a vase or glass jar - making a few paper daffodils will make your display far more effective. I've made six daffodils here (you can just see a yellow one hiding on the left, at the back).
As you make more daffodils, you will naturally get quicker and the process will take much less time. Promise!
I used cardstock of different colours here - partly to try out different colours to see how it looked, and also to give my display a bit of variety, as if I'd picked different daffodil varieties from my garden.
The daffodils that look white are made from a cream cardstock (with very pale yellow coloured pencil) and I also made some from various tones of yellow cardstock. My favourites were the pale yellows (and cream) and I also thought it looked better with an orange trumpet rather than a yellow one, but if you love your daffodils all yellow, go for it!
Adding the leaves into your vase or jar gives your display a bit of bulk to help them to stand up better - if you're cutting lots of different daffodils, perhaps try and vary your greens too, to make them look more natural.
 Jam jar with pretty cardstock daffodils
 Brightening up a dark corner with these pretty Springtime daffodils
I hope you enjoyed your daffodil craft project - and I hope that you continue to enjoy your papercrafted daffodils in your home, too!
 Cardstock daffodil craft project
If you've just been reading through this tutorial and think you might like to make it, take a look at the main project page here to get started with everything you need and the beginning of the making instructions...
You can get the paper daffodil template from my store here...
SVG, DXF, EPS & PNG file formats
Suitable for Cricut and other cutting machines or cutting by hand (using the PNG)
For personal craft use and small-business commercial use (up to 200 products)
For physical (craft) products only - no digital products, use, or sharing

Shall we stay in touch..?
Each month, I share stories from my own nature journal, new art from my studio, and simple seasonal inspiration to help you feel more connected with the turning year...
Recent Articles
-
December Berries Folklore in Britain - Rosehips, Holly and Haws
Dec 24, 25 04:35 AM
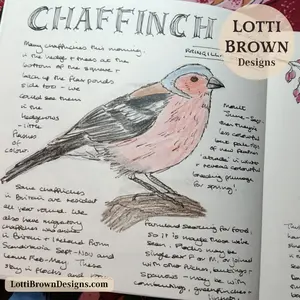 Explore December berries folklore in Britain - rosehips, haws, holly, ivy and sloes - with seasonal nature notes, birdlife, and quiet winter magic.
 -
Birch Tree Symbolism, Myth, and Folklore
Dec 23, 25 04:19 AM
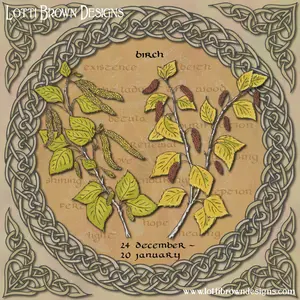 Explore birch tree symbolism, myth, meaning and folklore as part of my Celtic Tree Calendar art project...
 -
British Nature Folklore Library: Stories, Seasons & Celtic Tree Wisdom
Dec 01, 25 05:09 AM
 Explore British nature folklore, Celtic tree meanings, and seasonal wildlife stories. A growing library of myth, meaning, and hand-drawn inspiration.
Follow me:
Share this page: