*** IMPORTANT - I'm retiring my digital files - SVG/PNG/DXF/EPS - and printables from 31st December 2025 ***
*** Please ensure that you have everything you need - files and/or instructions printed off from the website (find them currently in the ARCHIVES section) - by 31st December 2025 as they will not be available after this date ***

How to Make Paper Daffodils
Craft Tutorial Page 2
- Home
- SVG files
- Floral SVGs
- Paper Daffodils Tutorial Page 2

This is page 2 of my 'How to Make Paper Daffodils Craft Tutorial' - this is for you if you're currently following my craft tutorial to make pretty daffodils out of cardstock or paper...
On this page, we're going to:
- shape the petals
- make the trumpet
- and make the front half of the flower (with the trumpet and one set of petals)
 Join me to make these pretty papercraft daffodils
This is the page for you if you already cut the shapes out, scored the lines, added colour with a coloured pencil, and made the roll-up stamen centre for the trumpet...
If you're not quite there yet, you can:
- Go to this page (main project page) to find out more about the project and/or get everything prepped that you're going to need
- Go to this page (tutorial page 1) to score lines, add colour and make the stamen centre roll
If you already made the trumpet, shaped the petals, and assembled the trumpet part of the flower, go here next (tutorial page 3) to create the back half of the flower (petals) and stick both pieces together - or page 4 to create the stalk and attach it to the flower.
If you would like to print these papercraft daffodil instructions, please use the 'Print' buttons on the page (top right of the page and at the bottom of the content).
This will create a print-friendly version for you and you can also deselect any parts of the page that you don't need to print.
Making the Daffodil Trumpet
So we should be starting with the petals already cut, scored, and coloured, and the central stamens rolled up and set to one side - if you're not quite at this stage, please return to the main project page and check from there which stage you're at - I'll wait right here for you to catch up!
So let's start with the orange trumpet shape...
- The first thing we'll do is fold the little tab along the score line you did earlier. Normally, I'd fold a score line along a metal rule to get a nice straight fold - but this fold is a bit little for this, so I'm going to fold it against my finger tips (it does help if you have slightly longer nails for this, but it can still be done without)...
- Hold your second and middle fingers with the nails on the score line - I've positioned one either end of the line - see the image below...
 You can use your fingers like this to fold the tab up against
- Then, use your other hand just to fold the tab up against your fingers along the score line - see the image below...
 Fold the tab up against your fingers
- Fold the tab up - then fold it down again to make the crease nicely - it's going to end up folded down - you can see this in the image below - you can just see the score lines and colouring on the top of the trumpet with the tab folded down...
 Fold the tab up then fold it back down again
- Next, we'll start to shape the trumpet shape. Just roll the trumpet shape lightly in your fingers like you can see in my image below - the side with the scoring and the colouring should be on the outside of the roll.
 Just roll the trumpet lightly in your fingers to start to create the rounded shape we need
- The trumpet should take on the rounded shape when you let go - see the image below - if it doesn't want to curl, you can try rolling it a little tighter, or holding it in that shape a little longer.
 The trumpet should start to take on the curved shape on its own now
- Now, let's just add a little paper glue to the tab - that on the same side that's got the scoring and colouring - see the image below...
 Add glue to the trumpet's little tab
- Then, curve the trumpet round to stick it down - try to get the bottom level as best you can. Slip one finger inside and press hard for a minute or so to help the glue stick well - see the image below...
 Curve the trumpet round and press to stick it down well along the tab
- It should look something like mine in the image below...
 The trumpet of the daffodil is now glued
- Next, just bend the bottom tabs outwards - like in the image below...
 Bend the trumpet tabs outwards
- If you sit your trumpet flat on your worksurface, with its tabs splayed outwards, it's pretty easy to just push the top little crenulations (fancy bits) out and down with your fingertip - see the image below...
 Push the crenulations (fancy bits) out and down, gently with your finger
- When you're done, it should pretty much look like this - see image below...
 Pushing the crenulations down - also known as making the trumpet fancy!
That bit's done now - so let's move onto shaping the petals...
Shaping the Daffodil Petals
- Now, it's time to shape the petals. We're going to use the moulding ball and the foam mat (check back here to see the list of equipment and materials) - this is what I recommend to use. If you don't have it, it's far from a disaster! Just read and look at the photos, and see how the petals end up, this is the shape we're aiming for...
- You can use things like a small spoon, or the rounded end of any small, hard, round handle to replace the tool, with a soft surface to replace the mat - or just curve and manipulate the cardstock with your fingers and using the warmth of your hand to soften the card and start to manipulate it into a rounded shape with creases. Also, it doesn't need to be precise in the slightest - nature provides us with all sorts of weird and wonderful shapes, so just go with that spirit and see what you can create!
 We're going to use the moulding ball tool and foam mat to shape the petals
- You just need to press and stroke the petal with the moulding ball tool, moving it the direction you want the petal to curl - I have just one image directly below and then below that, a short video that I hope will help you with the movements to make the petals all curl up...
 Press down and use stroking motions to start to curl the petals - if it creates creases, that's good, natural petals have all sorts of creases in
Watch the video above for help with how to shape your paper or cardstock daffodil petals
 Papercraft daffodil petals shaped with a curve
- Hopefully, by now, your daffodil petals should have a little bit of shape to them, a bit like mine in the image above...
- Notice, that one set of petals are chunkier than the other - the chunkier petals are the bottom set, the smaller ones will sit on top like in the image below - we'll need to know which is which for the next stage as they're not interchangeable - don't glue them down yet though.
 Identify the smaller set of petals and position them on top of the chunkier set like this - this is how they'll eventually fit together
Let's Attach the Daffodil Trumpet to the Petals
So let's get on with attaching the daffodil trumpet to the petals. We're going to attach it to the top set of petals - so that's the slightly smaller set.
- We'll be working with the two parts in the image below - that's the smaller (top) set of daffodil petals....
 Let's attach the trumpet to the smaller (top) set of daffodil petals
- We'll attach the trumpet to the petals with the tabs - so start by just sliding one of the tabs part way only, into one of the petal slits - this can be a little fiddly, that's normal, so just go steady. It might take a little wiggling just to open up the slit enough - see the image below...
 Take the first trumpet tab and slide it into one of the slits in the petals
- Once you've got the first tab in a little way, it should be easier to get the other tabs in their slit. Just pull the trumpet up vertically (gently, so you don't actually pull the tab out of its slit) then just maneuver each tab so it slides just a little way into the slit - you can push and pull from both sides. You should be able to just get each in a little way, like in the image below, and you'll find this easier than trying to pull one or more in all the way through...
 Wiggle each tab about a bit until you can get it into the slit - you'll find it easier if you don't pull them fully in yet
- When you've got everything lined up and slightly slid in, like in the image above, you can pull all the tabs fully through - like in the image below...
 You can now pull all the tabs fully through
- The next bit, I think you'll find easier if you put your trumpet assembly upside down on your worksurface like in the image below. You can make sure all the tabs are fully pulled through from here, by pulling and bending them backwards a bit...
 Pop your trumpet and petal upside down like this and make sure your tabs are fully pulled through
- Next, I cut double-sided sticky tape and put it on each of the tabs - see the two images below...
- If you decide to use glue instead, make sure you use a strong glue that will 'grab' quickly and stick and not leave the tabs sliding around.
 Add double-sided sticky tape to the trumpet tabs poking through
 Ready to stick the tabs down
- Stick your tabs down by pulling up (to make sure they're fully pulled through) and then folding over to stick down on the petal base - like in the image below - press down to make sure they stick down well.
 Fold the tabs over and stick them down onto the petal base
Next, we'll add the stamens into the centre of the trumpet...
Adding the Daffodil Stamens into the Centre of the Trumpet
Now, you'll need the trumpet and petal section we just made, and the little stamen roll that we made earlier - see the image below...
 Let's glue the stamens into the trumpet centre
- We're going to use double-sided sticky tape again, but feel free to use glue if you prefer...
- First, we need to stick down the longer tab over the rolled up part - this is how I did it, with a small strip of double-sided sticky tape stuck over the rolled up part - see the two images below...
 Stick the longer tab back across the central rolled up part
 It doesn't need to be perfect, just make it sticky and then stick the longer tab down across that central roll
- Fold the longer tab over and then stick it down, pressing it to make it stick - see the two images below...
 Fold the longer tab back over the central roll and press hard to stick down well
 Your stamen roll should now look like this with a flat(ish) bottom and tabs sticking out in two directions
- Now, we need to add glue or double-sided sticky tape to the bottom of the tabs - I found that double-sided sticky tape was best for me as it gave instant grab, but if you've got a nice sticky glue that would likely work well too. See the two images below...
 Cover the bottom of both tabs with double-sided sticky tape
 Your central stamen roll is now ready to stick down
- Just drop the stamen roll into the trumpet. You'll need something to prod it to press it down to make sure it sticks - I used the embossing tool to press it - press each tab, and then press the central roll, too. See the series of image below...
 Make sure it's firmly in place by pressing down with your embossing tool or similar
 Press down to stick it down well
 A closer look inside with tabs stuck down and helping to hold the stamens in place
- Your daffodil should now be looking something like this - image above and images below...
 Hopefully, your daffodil is also looking something like this, with the trumpet attached to the petals and the stamens attached inside the trumpet
 So that's it for the front half of the paper daffodil flower...
So we're done for this front half of the daffodil flower - you can build the back half of the flower with me on the next page...
Where to Go Next
To follow the rest of the 'How to Make Paper Daffodils' Tutorial, go to the next page now...
If you want to find out more about the project or if you need to go back to an earlier stage, I've included all the links & pages below to help you:
- Main papercraft daffodil project page with prep & materials for the project including the template
- How to Make Paper Daffodils Craft Tutorial Page 1 (scoring & colouring the petals and rolling up the centre)
- How to Make Paper Daffodils Craft Tutorial Page 2 (this page)
 Making pretty papercraft daffodils
Shall we stay in touch..?
Each month, I share stories from my own nature journal, new art from my studio, and simple seasonal inspiration to help you feel more connected with the turning year...
Recent Articles
-
Nature Journaling Autumn Fungi & Folklore
Oct 28, 25 05:58 AM
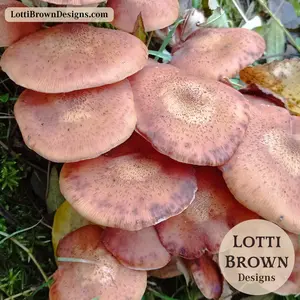 Nature journaling autumn fungi - discover how nature journaling helps you slow down, notice more, and reconnect with the season...
 -
Symbolism and Meaning of Fern/Reed for the Celtic Tree Calendar
Oct 27, 25 07:06 AM
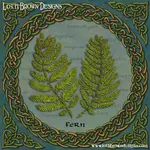 Explore the symbolism, myth and meaning of the fern (reed) as part of the Celtic Tree Calendar...
 -
Sun & Moon, Stars & Spirals
Oct 20, 25 09:31 AM
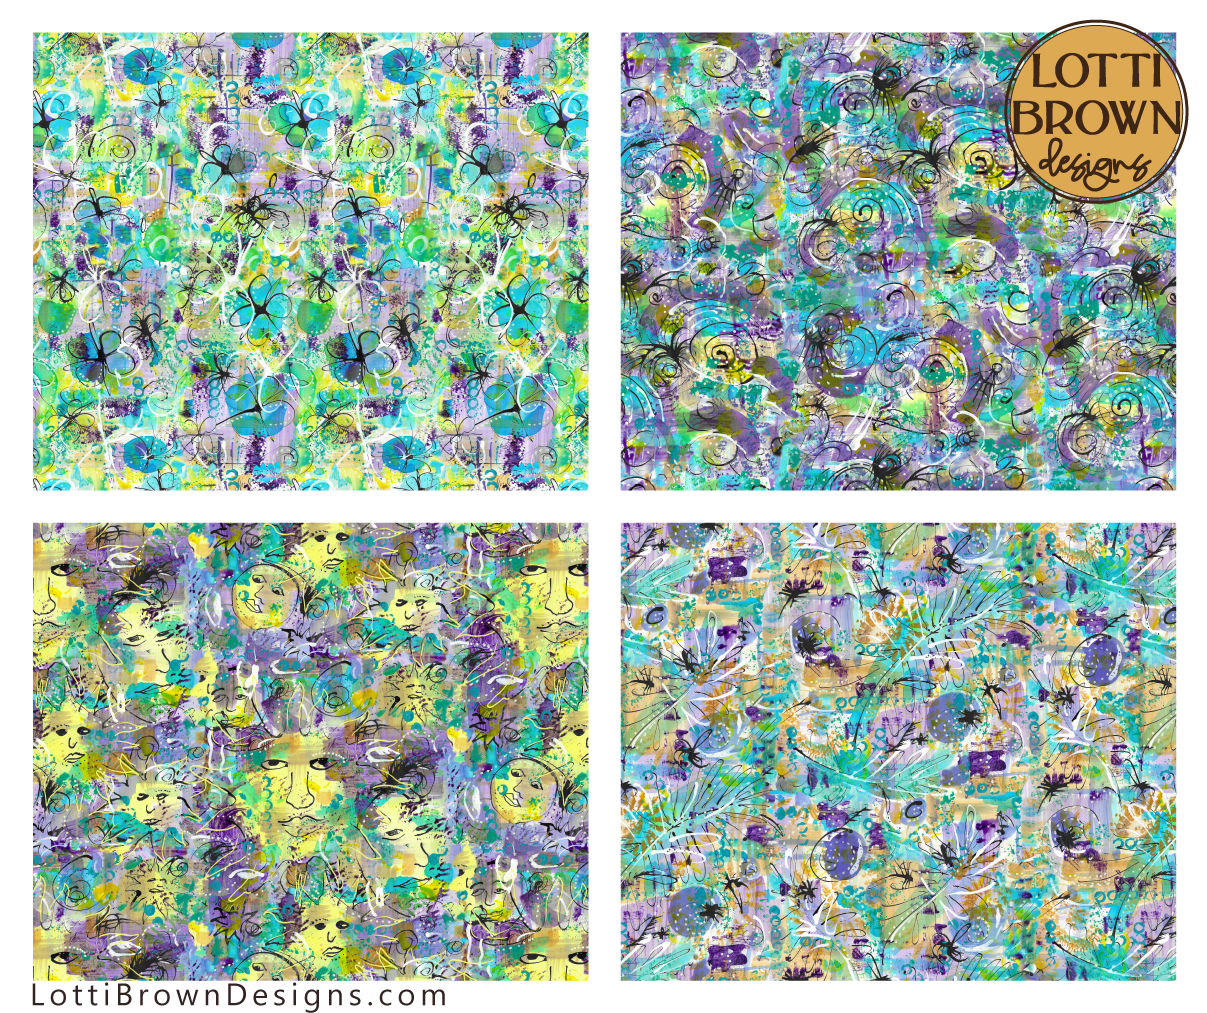 New painted patterns with sun and moons, floral, spiral and star designs...
Explore fabrics and wallpapers in these designs here (Spoonflower)...
Explore homewares and accessories in these designs her…
New painted patterns with sun and moons, floral, spiral and star designs...
Explore fabrics and wallpapers in these designs here (Spoonflower)...
Explore homewares and accessories in these designs her…
Follow me:
Share this page: