*** IMPORTANT - I'm retiring my digital files - SVG/PNG/DXF/EPS - and printables from 31st December 2025 ***
*** Please ensure that you have everything you need - files and/or instructions printed off from the website (find them currently in the ARCHIVES section) - by 31st December 2025 as they will not be available after this date ***

How to Make Paper Daffodils
Craft Tutorial Page 3
- Home
- SVG files
- Floral SVGs
- Paper Daffodil Tutorial Page 3

This is page 3 of my 'How to Make Paper Daffodils' craft tutorial. This is for you if you're in the middle of following my papercraft daffodil craft tutorial.
On this page we'll:
- Make the back half of the daffodil flower
- And stick the front and back halves together!
 Let's make these pretty papercraft daffodils together
You're in the right place if you already:
- Made and assembled the front part of the daffodil flower with one set of petals and the trumpet stuck together with the stamens stuck down in the centre of the trumpet.
If you're not quite at this stage, please go back to the main project page here, and check where you are in the project or find out more about the project. You can come back here when you're all caught up - no rush, I'll be waiting patiently!
If you would like to print these papercraft daffodil instructions, please use the 'Print' buttons on the page (top right of the page and at the bottom of the content).
This will create a print-friendly version for you and you can also deselect any parts of the page that you don't need to print.
Let's Make the Back Half of Your Daffodil!
So we're starting with the front half of your daffodil flower fully assembled and stuck together - so that's one set of petals, with the trumpet and the stamens inside. If you're not quite at this stage yet, check back here to get back on track.
So let's get going and get that daffodil made!
On this page, we'll get the back part of the daffodil flower made - we'll be using the larger set of petals (hopefully, the only set you've got left at this point) plus the green triangular shape which will form the point where the flower attaches to the stalk at the back of the flower. See the image below...
We'll also be using a couple of your strands of florist wire later on this page, so hopefully you can have that to hand for later, too...
 We'll be using these parts on this page
- Let's start by creating the tab for this green triangular shape. Use your embossing tool to score a fold line. I'll be working with the card so that the smooth/matt side is the 'front' side - so here I've got the textured/shiny side face down on the work surface. We need to go from the bottom corner like you see in the image below...
 Identify this bottom corner on your green triangular shape
- And going up to this top corner - see the image below...
 Identify the top corner we'll score up to
- Use your embossing tool (or similar point) to draw a score line between the two points identified above - just like before, no need to be perfectly straight, it's just a guide - see the image below...
 Draw a score line between the two points
- Now, just like you did for the trumpet tab, place your fingertips along the score line to help you fold up the little tab - if you've got longer nails, use them - see the image below...
 Use your fingertips to help you make the fold
- Now, fold your tab up against this line - fold it forwards and back and leave it folded back against the shiny side - see the image below - the shiny side is up, here...
 Fold your tab back along the score line - and end up with it folded back against the shiny side like this (shiny side up, here)
- Next, take the two bottom corners (the end with the tabs) and let them meet together at the corners like in the image below - the smooth/matt side is on the outside here (shiny/textured side is inside with the tab tucked inside). No glue yet!
- Note that you're not making a complete fold, just bringing the two corners together, as the tab will be at the bottom where it would fold, and we don't want to fold the tab...
 Put these two corners together
- Then join the two corners at the pointed end together (with the tab still tucked inside) like you can see in the image below. Again, no glue just yet. Note that this is small and kind of fiddly, so it doesn't matter if it isn't precise. You can squeeze this end tight and start creating the fold in the cardstock at this end, as long as you don't fold the bottom tab at the other end...
 Fold the two corners together at the other end too
- Your shape should look a bit like this now - see the image below. Squeeze your fingers along the bottom (folded) edge to create the fold - but not all the way along, just the pointed edge and maybe two thirds of the way along, keep the tab unfolded at the end.
 Squeeze the bottom edge to create a fold, leaving the tab end unfolded (don't fold the tab)
- Now add some paper glue to your tab - I'm gluing on the smooth/matt side here (image below)...
 Glue the tab on the smooth/matt side
- Glue the two edges together, holding for a couple of minutes and squeezing tightly with your fingers all along the edge to make it stick well - see the image below...
 Glue the two edges together and hold it tightly while it sticks
- Then, open it out so that it looks like the image below - check inside with your finger to see if the tab is still well stuck down and press down again if necessary...
 Open the shape out like this - check inside to make sure the tab is well stuck down
- We'll be working with this same triangular piece with the seam along the top. This is how mine looks (see the image below) - note that the narrow end is not completely stuck down as the tab here is so narrow, and this is fine so long as the shape as a whole holds in place. We will need a tiny bit of a gap for the next bit, in any case, so a little bit of wiggle room at this end will likely make your next job slightly easier and we won't see this end in the finished flower...
 Checking the seam - a little gap like this is to be expected and is perfectly fine as long as the rest is stuck well
- Now, find your florists wire and take one or two strands, or however many you think you need to make the stem of your flower - it's not photographed terribly clearly in the photo directly below but I'm using two strands for my flower, which you'll be able to see in some of the photos further down...
- All you need to do is to take the two strands together (as if to make one thicker strand) and roughly bend the very end over a couple of times, just to create a knob or bulge at the end. Around 1 cm or 1/2 inch is fine, we don't need it too long, and it certainly doesn't need to be too thick, all we need it to do is not slip through the hole in the end of the green triangular/cone shape - see the image below...
 Bend the very end of your florists wire over a couple of times (if you're using more than one strand, bend them all together as one)
- Next, thread this through the green triangular/cone shape, with the folded wires to end up inside the triangular/cone shape - see the two images below...
 Thread the florists wire through the hole
 The bent end of the wire will sit inside the triangular/cone shape and should stop the wire coming through the hole - if it doesn't, either make your bent wire part a little larger or make sure the seam hasn't come unstuck
- Once you've pulled the wire through, bend the wire stem where it comes out of the card cone/triangle shape to form a right angle - the glued seam should be on the top - see the image below (seam just out of sight)...
 Bend the wire stem like this, keeping the seam edge at the top
Attaching the Petals
- Now, we're going to attach the set of petals to this green triangular/cone shape. Start by bending back the three tabs, like you can see in the image below...
 Bend back the three tabs like this
- We're going to thread the tabs through the slits in the petals, just like we did for the other set of petals. So start with just one of the tabs and push it though, not the whole way - see the image below...
- You may find this very fiddly - this is nothing you're doing wrong, it is a fiddly job! Just be patient with yourself and gentle with the tabs.
 Start by pushing one of the tabs through a slit, not all the way yet, though...
- Once the first tab is in, lift the green cone/triangle shape upwards to allow you to wiggle the other two tabs and push them into the slits - grab them from the other side and pull them, each one a little at a time, to pull the green back piece closer to the petals - see the series of images below...
 Pull the tabs through from the other side, each in turn, a little at a time
 Pull the tabs through gently
- Note the positioning of the bottom tab at this point - see the image below...
 Note the positioning of the bottom tab at this point
- Soon, you should be able to pull all three of the tabs fully through - see the two images below...
 Here, the tabs are now fully pulled through
 This is how it should look from behind when the tabs are fully pulled through
- Now, let's stick the tabs down. I'm using double-sided sticky tape for this so it sticks instantly - see the two images below...
 I've cut thin strips of double-sided sticky tape to use on the tabs
 Get ready to stick the tabs down - you can see here that my tape is larger than the tab, this doesn't matter at all!
- As you fold each tab over, give it a pull to make sure that the green cone/triangular shape is well pulled up against the back of the petal, then fold over the tab and stick it down, like in the image below...
 Fold over the tabs, pulling as you go, and stick them down, pressing firmly to make sure they stick down well
That's it for the back part of the flower - now we're going to make it actually look like a daffodil and stick both parts together...
Attaching the Back & Front Parts of the Flower
Let's now attach the front and back parts of the flower together - you'll need the part we just made, together with the trumpet part we made earlier - see the image below...
 Let's stick these front and back parts of the daffodil flower together to make a whole flower!
- This really is as simple as sticking the two parts together - again, I've used double-sided sticky tape for the instant grab - I tried the paper glue but it didn't stick very well. If you have a stronger glue or a hot glue gun, it may work better. Cut largish pieces of double-sided tape and stick it on the back of the trumpet piece. You can even cover slightly more than I've got in the two images below...
 Cut double-sided sticky tape to cover the back of the trumpet piece
 Close up view
- I think it's best to hold the back of the flower up vertically (with the seam on the green shape pointing up, at the top) then line up the front piece (with the trumpet). The petals should go alternately, like you can see in the image below, so that they're evenly spaced around the whole of the flower. Do also take note of the seam in the trumpet - this will want to go at the bottom of the flower, so it's here at the bottom right in the image below. Just take a moment to line the two parts up before you press them together to stick them together...
 Line up the petals and make sure the trumpet seam is at the bottom of the flower before sticking them together
- Get your trusty embossing tool to press down in the middle (inside the trumpet, around the base of the central stamens) to make sure the two sides are stuck down well - see the image below...
 Use the embossing tool to push down in the middle of the trumpet to make sure it's stuck down well
 Press down with your fingers from both the front and the back of the flower, all around the centre circle, to make sure both sides are stuck together well
- And that's it! The main part of the flower is finished - hurrah!
 The main part of the daffodil flower is finished
There's still just the little matter of the wires hanging out the back - let's get it properly finished and add the sepal to the back and tidy up the wires to make them into a stem - do that on the next page here...
Where to Go Next
To follow the final page of the 'How to Make Paper Daffodils' Tutorial, go to that final page now...
If you want to find out more about the project or if you need to go back to an earlier stage, I've included all the links & pages below to help you:
- Main papercraft daffodil project page with prep & materials for the project including the template - always start here
- How to Make Paper Daffodils Craft Tutorial Page 1 (scoring & colouring the petals and rolling up the centre)
- How to Make Paper Daffodils Craft Tutorial Page 2 (making the front part of the flower)
- How to Make Paper Daffodils Craft Tutorial Page 3 (this page - making the back part of the flower and sticking front & back together)
- How to Make Paper Daffodils Craft Tutorial Page 4 (final part of the tutorial - finish off the head of the flower and stalk)


Shall we stay in touch..?
Each month, I share stories from my own nature journal, new art from my studio, and simple seasonal inspiration to help you feel more connected with the turning year...
Recent Articles
-
Nature Journaling Autumn Fungi & Folklore
Oct 28, 25 05:58 AM
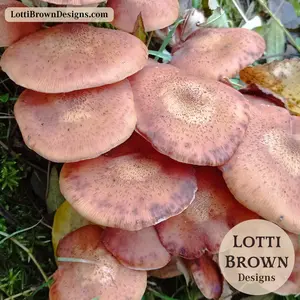 Nature journaling autumn fungi - discover how nature journaling helps you slow down, notice more, and reconnect with the season...
 -
Symbolism and Meaning of Fern/Reed for the Celtic Tree Calendar
Oct 27, 25 07:06 AM
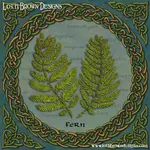 Explore the symbolism, myth and meaning of the fern (reed) as part of the Celtic Tree Calendar...
 -
Sun & Moon, Stars & Spirals
Oct 20, 25 09:31 AM
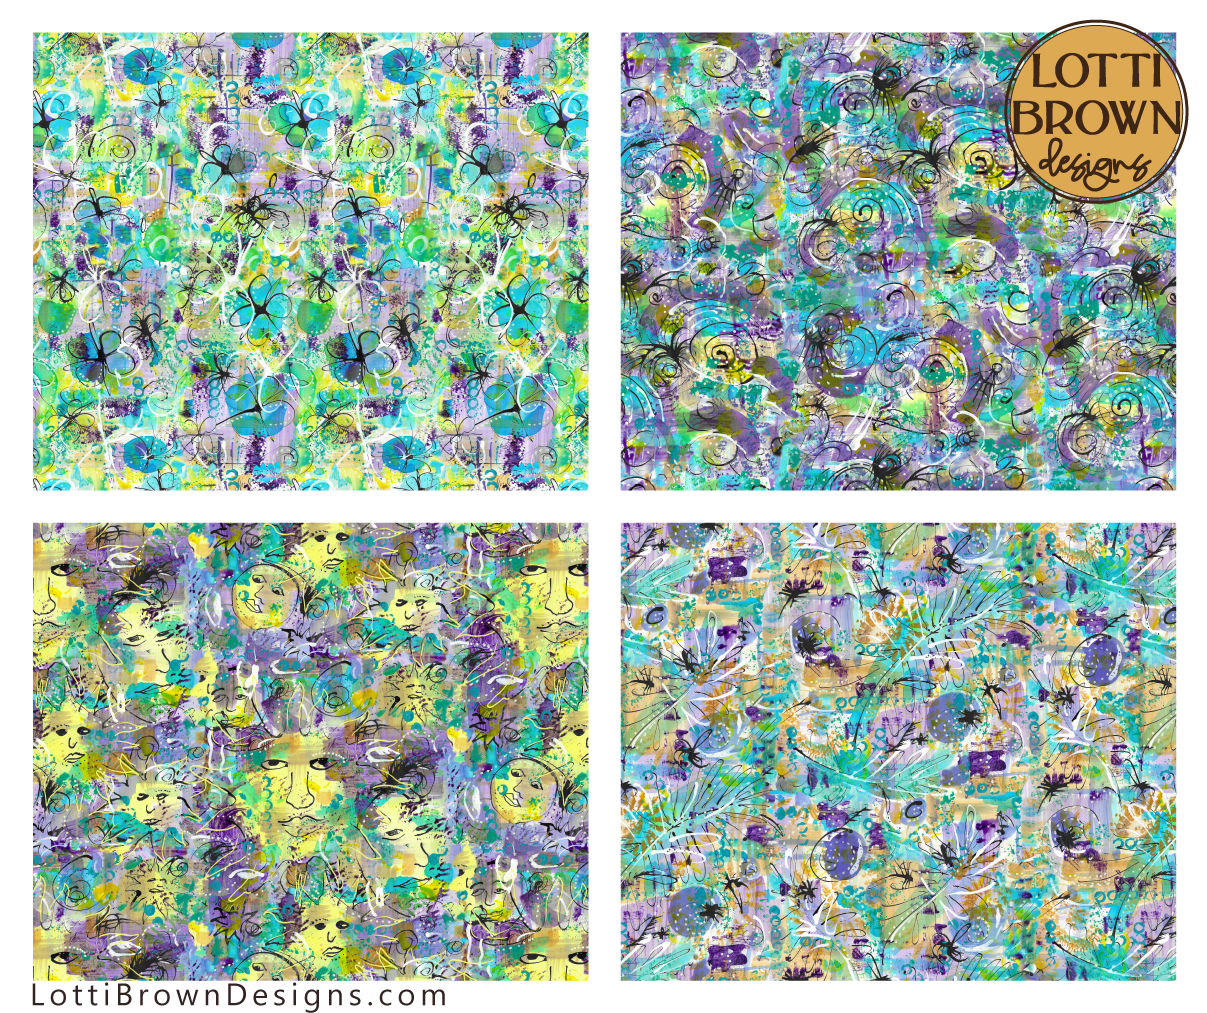 New painted patterns with sun and moons, floral, spiral and star designs...
Explore fabrics and wallpapers in these designs here (Spoonflower)...
Explore homewares and accessories in these designs her…
New painted patterns with sun and moons, floral, spiral and star designs...
Explore fabrics and wallpapers in these designs here (Spoonflower)...
Explore homewares and accessories in these designs her…
Follow me:
Share this page: