*** IMPORTANT - I'm retiring my digital files - SVG/PNG/DXF/EPS - and printables from 31st December 2025 ***
*** Please ensure that you have everything you need - files and/or instructions printed off from the website (find them currently in the ARCHIVES section) - by 31st December 2025 as they will not be available after this date ***

How to Make Paper Daffodils
Tutorial Page 1
- Home
- SVG files
- Floral SVGs
- Daffodil Craft Tutorial Page 1

How to make paper daffodils - tutorial page one.
This is the first page of my craft tutorial to help you make a papercraft daffodil from my daffodil template...
 Learn to make these pretty papercraft daffodils
We're going to make this beautiful daffodil from my daffodil template - it's a project that you can make with your cutting machine (I used my Cricut Maker) or you can cut it by hand (using the PNG files included in the template).
On this page, we're starting from having all the parts already cut and ready to assemble - if you're not at that stage yet, or if you'd like to find out more about the project, including a list of crafting materials you'll need, plus how to set up the file in your cutting machine, please check back to this main project page so you can catch up... it's okay, I'll wait right here for you to come back when you're ready!
 Learn how to make this papercraft daffodil from cardstock
How to Make Paper Daffodils Craft Tutorial
 We start with everything already cut out and ready to go...
 You will also need these craft materials
Let's Get Prepared
If you would like to print these instructions for how to make paper daffodils, please use the 'Print' buttons on the page (top right of the page and at the bottom of the content).
This will create a print-friendly version for you and you can also deselect any parts of the page that you don't need to print.
So let's start with everything we need ready and close to hand - that's the cardstock cut pieces to make the daffodil, plus all the crafting materials you'll need. If you're not quite there yet, take a look at this page to catch up.
So for many of the parts of this project, we're going to work with the underside of the card as the 'front' (and not the front as the front). This is specifically for the type of cardstock I'm using, which is Sizzix 'Surfacez' textured cardstock which has a slightly shiny textured finish on the 'front' side of the card...
This doesn't really give us the correct texture we want for making the paper daffodil, and it means that the coloured pencils I want to use won't colour very well onto this surface - but if I use the reverse or underside of the card, they will - the underside is smoother and matt in finish.
Your choice of cardstock may or may not be the same - so have a look and consider which you'd like to use. If you've got a Sizzix 'Surfacez' textured cardstock like me, take a look at the image below and note that the front petal (the front side of the card) looks textured and more shiny - the back petal (the underside of the card) is smoother and matt.
 We'll use the underside of the cardstock for all of the front-facing parts of the daffodil
So this means, that all the 'front-facing' parts of the daffodil will be using the smoother side of the card - especially, any part where I'm adding coloured pencils, that will be the underside/smooth & matt side of the card. That's those parts you can see in the image below - you can get those ready as we're going to use those next...
 These are the parts of the daffodil we'll be working with first
Let's Score Some Lines
The first thing we're going to do is score lines along various parts of the daffodil to help us make the paper daffodil...
- Use your embossing or scoring tool (or a cocktail stick, if that's what you have)
- The first place we're going to score is on the orange trumpet shape - along the tab end. Identify the points we'll score between in the two photos below - remember we're working with the underside/smooth side of the card facing up, if you're using the same cardstock as me...
- From this corner in the image right below...
 You'll be scoring from this corner...
- To this corner (see image below)...
 To this corner
- Use your tool to just draw a line into the cardstock - as long as you can draw a reasonably straight line, you don't need to use a ruler. It doesn't need to be perfect, it's just to give the cardstock a guide to where you want it to fold. You also don't need to press mega hard, it just needs to be a line not a gouge. You can see mine in the image below.
 Score a line between these two corners
- Next, we're going to 'decorate' the trumpet shape with some wavy lines, this is to give it a bit more of a texture. If you don't want to do this, or your paper or cardstock isn't suitable, it's fine, just leave these steps out.
- If you would like to do it, you just need to use your scoring/embossing tool to draw wavy lines along the length of the trumpet shape, like in the image below. They don't need to be exact or perfect, it's an effect not a work of art!
 Use your embossing tool to draw wavy lines across the length of the daffodil trumpet shape
- Here's how mine looked when I'd finished - see the image below...
 My scored daffodil trumpet shape
- Next, we're going to score some lines along the petal shapes. We want to try and mimic the lines on the real life daffodil that run along the petals. They run vertically along the petal, but take on some of the curve of the petal too. You can see how I drew mine in the image below - keep them kind of wiggly or wavy as nature isn't too much into perfectly straight lines...
 Score curvy lines onto each petal with your embossing tool
- Keep going like this for all six petals - three on each petal shape - see mine in the image below...
 Score lines onto the paper daffodil petals like this
- Finally, we're going to add some lines to the little tan shape that looks a bit like an onion - it's going to be the little papery flap or hood on the back of the daffodil that I want to call a 'sepal' but when I look it up, seems to be called a 'spathe'.
- No matter, we're going to add lines to it, vertical in the centre and curving out a little close to the edges - closer together for this one is better. As you can see in the image below, mine certainly aren't straight or regular, so no need to worry or be too precise...
 Add score lines to the daffodil sepal
That's it for the line scoring - onto the colouring...
How to Add Colour to Your Paper Daffodil
Let's add some colour to our daffodil. I do this because I think it helps make the daffodil look more natural and realistic giving an idea of texture and variation of colour that's more like what you get in nature (rather than a flat piece of card!). If you prefer not to do this step, that's okay too.
I chose colouring pencils as:
- I like them!
- They give quite a subtle colour that's not too defined
- You can press gently for a subtle colour that still shows the cardstock colour through
- You can see the score lines we just drew through the colouring which gives your petal even more texture, variation and interest
- They suit the texture of the matt cardstock really well
If you've got other colouring materials you want to use instead, go ahead and use them - more subtle colours will work better for this project, so perhaps a watercolour, or dabbed-on stamping ink. If you're using markers, try for colours close to the main colour and perhaps try to build up your colour with lots of little lines, so that some of the original colour still shows through and it's a more subtle effect.
So if you're using coloured pencils like me, just softly draw some roughly shaded lines across the whole length of the trumpet - they can very roughly follow the scored lines you drew. The idea is more to provide a sense of texture or form to the trumpet shape rather than to add a detail or pattern. See mine in the image below...
- I'm using an orange coloured pencil, close to the colour of the trumpet - if you're using another colour trumpet, choose a colour fairly close to the cardstock colour.
 Add some shaded lines to the trumpet using orange colouring pencil
- If you like, you can add extra shading - in the image below, you might just be able to see that I added a little extra shading all along the bottom and the top of the trumpet shape. Don't bother to add colour to the bottom tabs, as you won't see these.
 This is how my trumpet shape looks when I've finished adding coloured pencil - see how the scored lines still show through the shading - this will add more interest and texture to your papercraft daffodil
- Next, we'll add some extra colour to the daffodil petals. I'm using a pale yellow that's not too dissimilar to my cardstock colour - you can still see the contrast though. Add the shading in wide stripes that roughly follow your score lines. You can see mine in the image below...
 Use a yellow colouring pencil to add extra shading and colour to the daffodil petals
- Again, there's no need to be too neat or precise - we're just after an effect...
 Add shading to each of the petals
- You can see I also added a little shading just around the edge of the central circle too - see image below. You won't see the very centre of either circle so no need to add extra colour to it.
 The yellow coloured pencil adds a bit more variation, texture and interest to the daffodil petals
- Finally, use a tan pencil to add some lines to the 'onion shape' piece - if you don't have a tan pencil, some kind of brown, orange, or yellow will likely work well. See mine in the image below...
 Use a tan pencil to add shaded lines to this sepal (onion shape) part of your daffodil
- Here's mine finished - see below...
 This is how mine turned out
So that's it for the coloured pencil part - now we're going to start sticking together our central stamens...
Assembling the Stamens
We're going to assemble the stamens that will go in the centre of the daffodil. How this is going to work, is that we'll roll the tan/brown one (with the sticking up stamen shapes) first. Then we'll roll the pale yellow one around it as an outer and stick it down with the tabs. This will make sure that the tabs are the same colour as the daffodil petals and won't show too much inside the trumpet.
We need these two parts (see image below)...
 We'll use these two parts to make the stamens in the centre of the daffodil trumpet
- So our first step is to make a little fold in the tan-coloured strip with the little stamens on. I've got the piece with the shiny side down on the worksurface and the underside facing up - so as you make the little fold, which is in the short end of the strip, you'll see the shiny side upturned just on that end - see the image below...
 Make a small fold in the SHORT END of the strip with the stamens
- Then, add glue all along the length of the strip, trying to avoid the stamens themselves - see the image below - putting this on the underside of the cardstock, allows it to soak into the card a little better than trying to use the shiny side...
 Add glue to the length of the strip - try to avoid the stamens themselves
- Now, using your folded edge as your starting point, start to roll up the strip, pressing hard with your fingers as you go to make it stick down - see the image below...
 Start to roll up the strip, pressing with your fingers as you go, to stick it down
- It should look something like this (see the two images below) when you're done - you might need to add a little extra glue to the end to stick it down well. If your end has ended up on one of the shorter curves and won't lie flat, feel free to snip a bit off with your scissors so it will lie flat.
 The stamen strip is tightly rolled up and stuck down
 The rolled strip for the central stamens
- The next bit, you might not need to do if you have strong glue or a hot glue gun that will stick this stamen section (above) down well. I don't, and this central section kept falling out, so I made this solution to allow this central part to stick down well in the centre of the trumpet, and also so that it matches the main petal colour too so that the tabs don't show inside the trumpet, too.
- The first step is to add glue to the smooth/matt side of the cardstock - just the strip and not the tabs at this stage - see the image below...
 Spread glue along the length of the strip, avoiding the tabs
- Then, roll it up around the outside of the central stamen roll - the tabs will point downwards (that's the opposite direction to the stamens) - start with the end with the longer tab, and try and roll in the same direction as your first roll, if you can - see the images below...
 Roll it up around the stamen section, keeping the tabs pointing downwards
- Depending on how tight your original roll is, will determine exactly where the tabs land - if they bend or tear a little around a curve, it's okay, it will still work - remember to press down with your fingers as you roll, to make it stick well...
 Keep rolling - and press down with your fingers as you go to stick it down
- Add a little extra glue and/or trim the end slightly when you're done, if necessary, to make the end stick down firmly - see the image below, this is before I added extra glue... Your tabs may not be in exactly the same position as this as that will depend on your first fold and how tightly you rolled.
 Stick down the end when you've finished rolling - the tabs may end up in any position
- Next, let's bend the tabs over - the short one will bend outwards - the longer one will bend back across the main roll - see the image below. It's at this point that the curve of your roll may interfere with the tab folding perfectly straightly - it doesn't matter if it bends a bit or if the edges of the tab tear a tiny bit to get it in the right place, it will still work.
 Fold the tabs over in two different directions
- It should look a bit like the image below now - we just need to put it safely to one side while we make the rest of the paper daffodil...
 The central stamen section of the paper daffodil is now complete - put it safely to one side while we work on the rest of the flower
The rest of the tutorial is on the next page...
Where to Go Next
To follow the rest of the How to Make Paper Daffodils Tutorial, go to the next page now...
If you want to find out more about the project or if you need to go back to an earlier stage, I've included all the links & pages below to help you:
- Main papercraft daffodil project page with prep & materials for the project including the template
- How to Make Paper Daffodils Craft Tutorial Page 1 (that's this current page)

Shall we stay in touch..?
Each month, I share stories from my own nature journal, new art from my studio, and simple seasonal inspiration to help you feel more connected with the turning year...
Recent Articles
-
Nature Journaling Autumn Fungi & Folklore
Oct 28, 25 05:58 AM
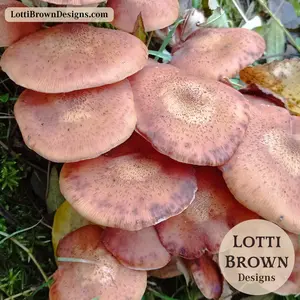 Nature journaling autumn fungi - discover how nature journaling helps you slow down, notice more, and reconnect with the season...
 -
Symbolism and Meaning of Fern/Reed for the Celtic Tree Calendar
Oct 27, 25 07:06 AM
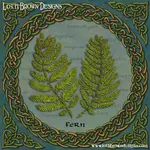 Explore the symbolism, myth and meaning of the fern (reed) as part of the Celtic Tree Calendar...
 -
Sun & Moon, Stars & Spirals
Oct 20, 25 09:31 AM
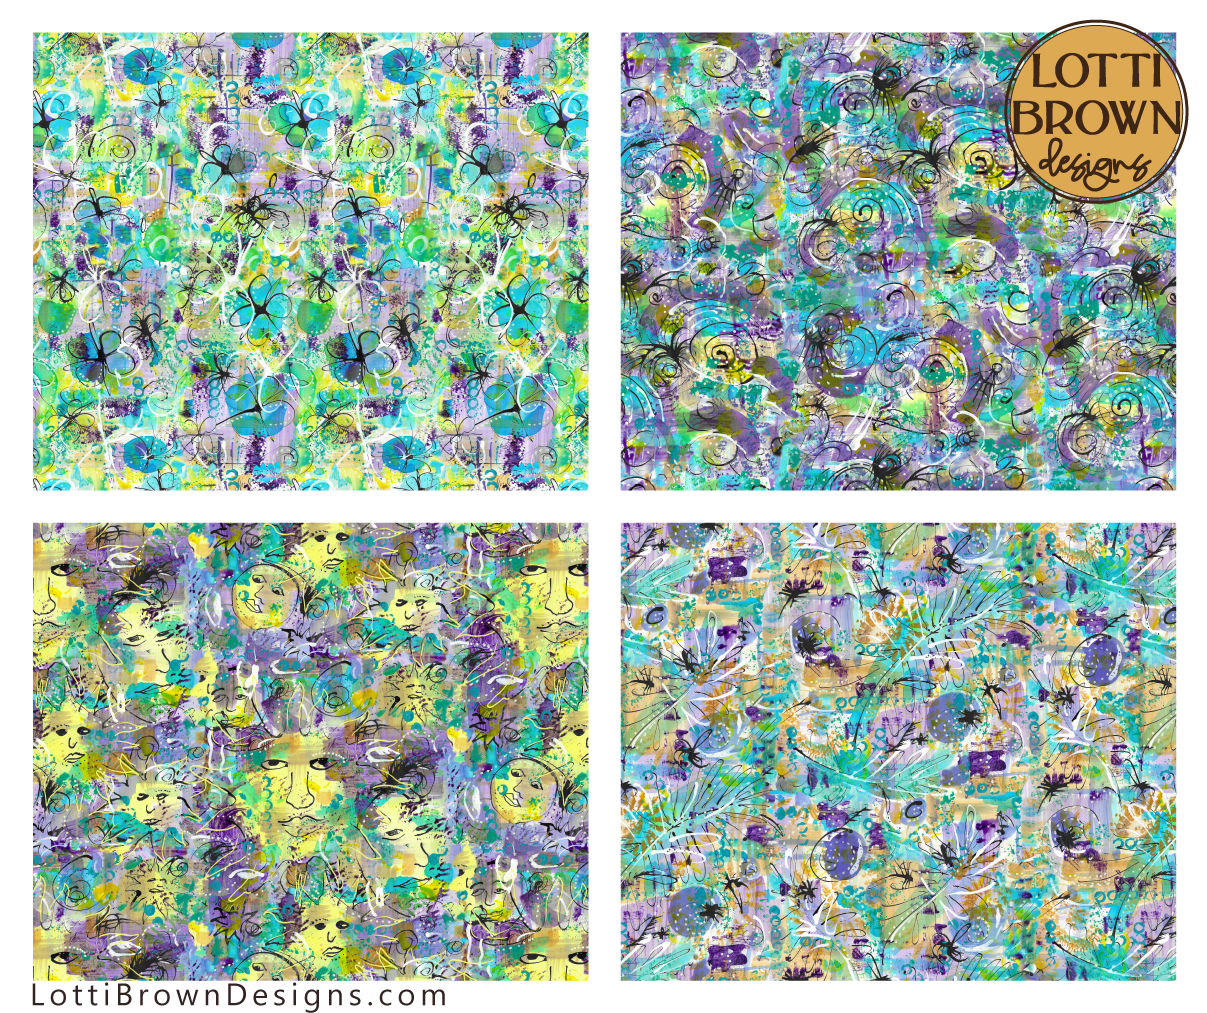 New painted patterns with sun and moons, floral, spiral and star designs...
Explore fabrics and wallpapers in these designs here (Spoonflower)...
Explore homewares and accessories in these designs her…
New painted patterns with sun and moons, floral, spiral and star designs...
Explore fabrics and wallpapers in these designs here (Spoonflower)...
Explore homewares and accessories in these designs her…
Follow me:
Share this page: