*** IMPORTANT - I'm retiring my digital files - SVG/PNG/DXF/EPS - and printables from 31st December 2025 ***
*** Please ensure that you have everything you need - files and/or instructions printed off from the website (find them currently in the ARCHIVES section) - by 31st December 2025 as they will not be available after this date ***

Beautiful Sea Turtle SVG Designs
- Home
- SVG files
- Shadow Box SVGs
- Sea Turtle Svg
Super sea turtle SVG designs for you to craft with your Cricut or similar cutting machine - a layered sea turtle and a fab retro-styled 'Go with the Flow' turtle shadow box template...
I'll show you on this page how to make the shadow box (3D art), which also includes instructions for the layered turtle...
The turtle comes as part of the 'Go with the Flow' shadow box template, but he's also available separately (3 layers) in case you didn't want to build the whole project. If you want to build the shadow box you don't need to buy him separately too!
 'Go with the Flow' sea turtle shadow box template
Get the 'Go with the Flow' sea turtle SVG shadow box template in my store here...
 Layered sea turtle cut file
Sea turtle SVG, DXF, EPS & PNG formats suitable for Cricut and many other cutting machines
For personal and small-business crafting (up to 200 units)
For physical (craft) products only - no digital use, products or sharing
Sea Turtle SVG Templates
My lovely sea turtle stars in two of my SVG designs - so that you can craft with him separately if you want, or choose to build the 'Go with the Flow' shadow box (3D layered art) (where he's included as part of the template).
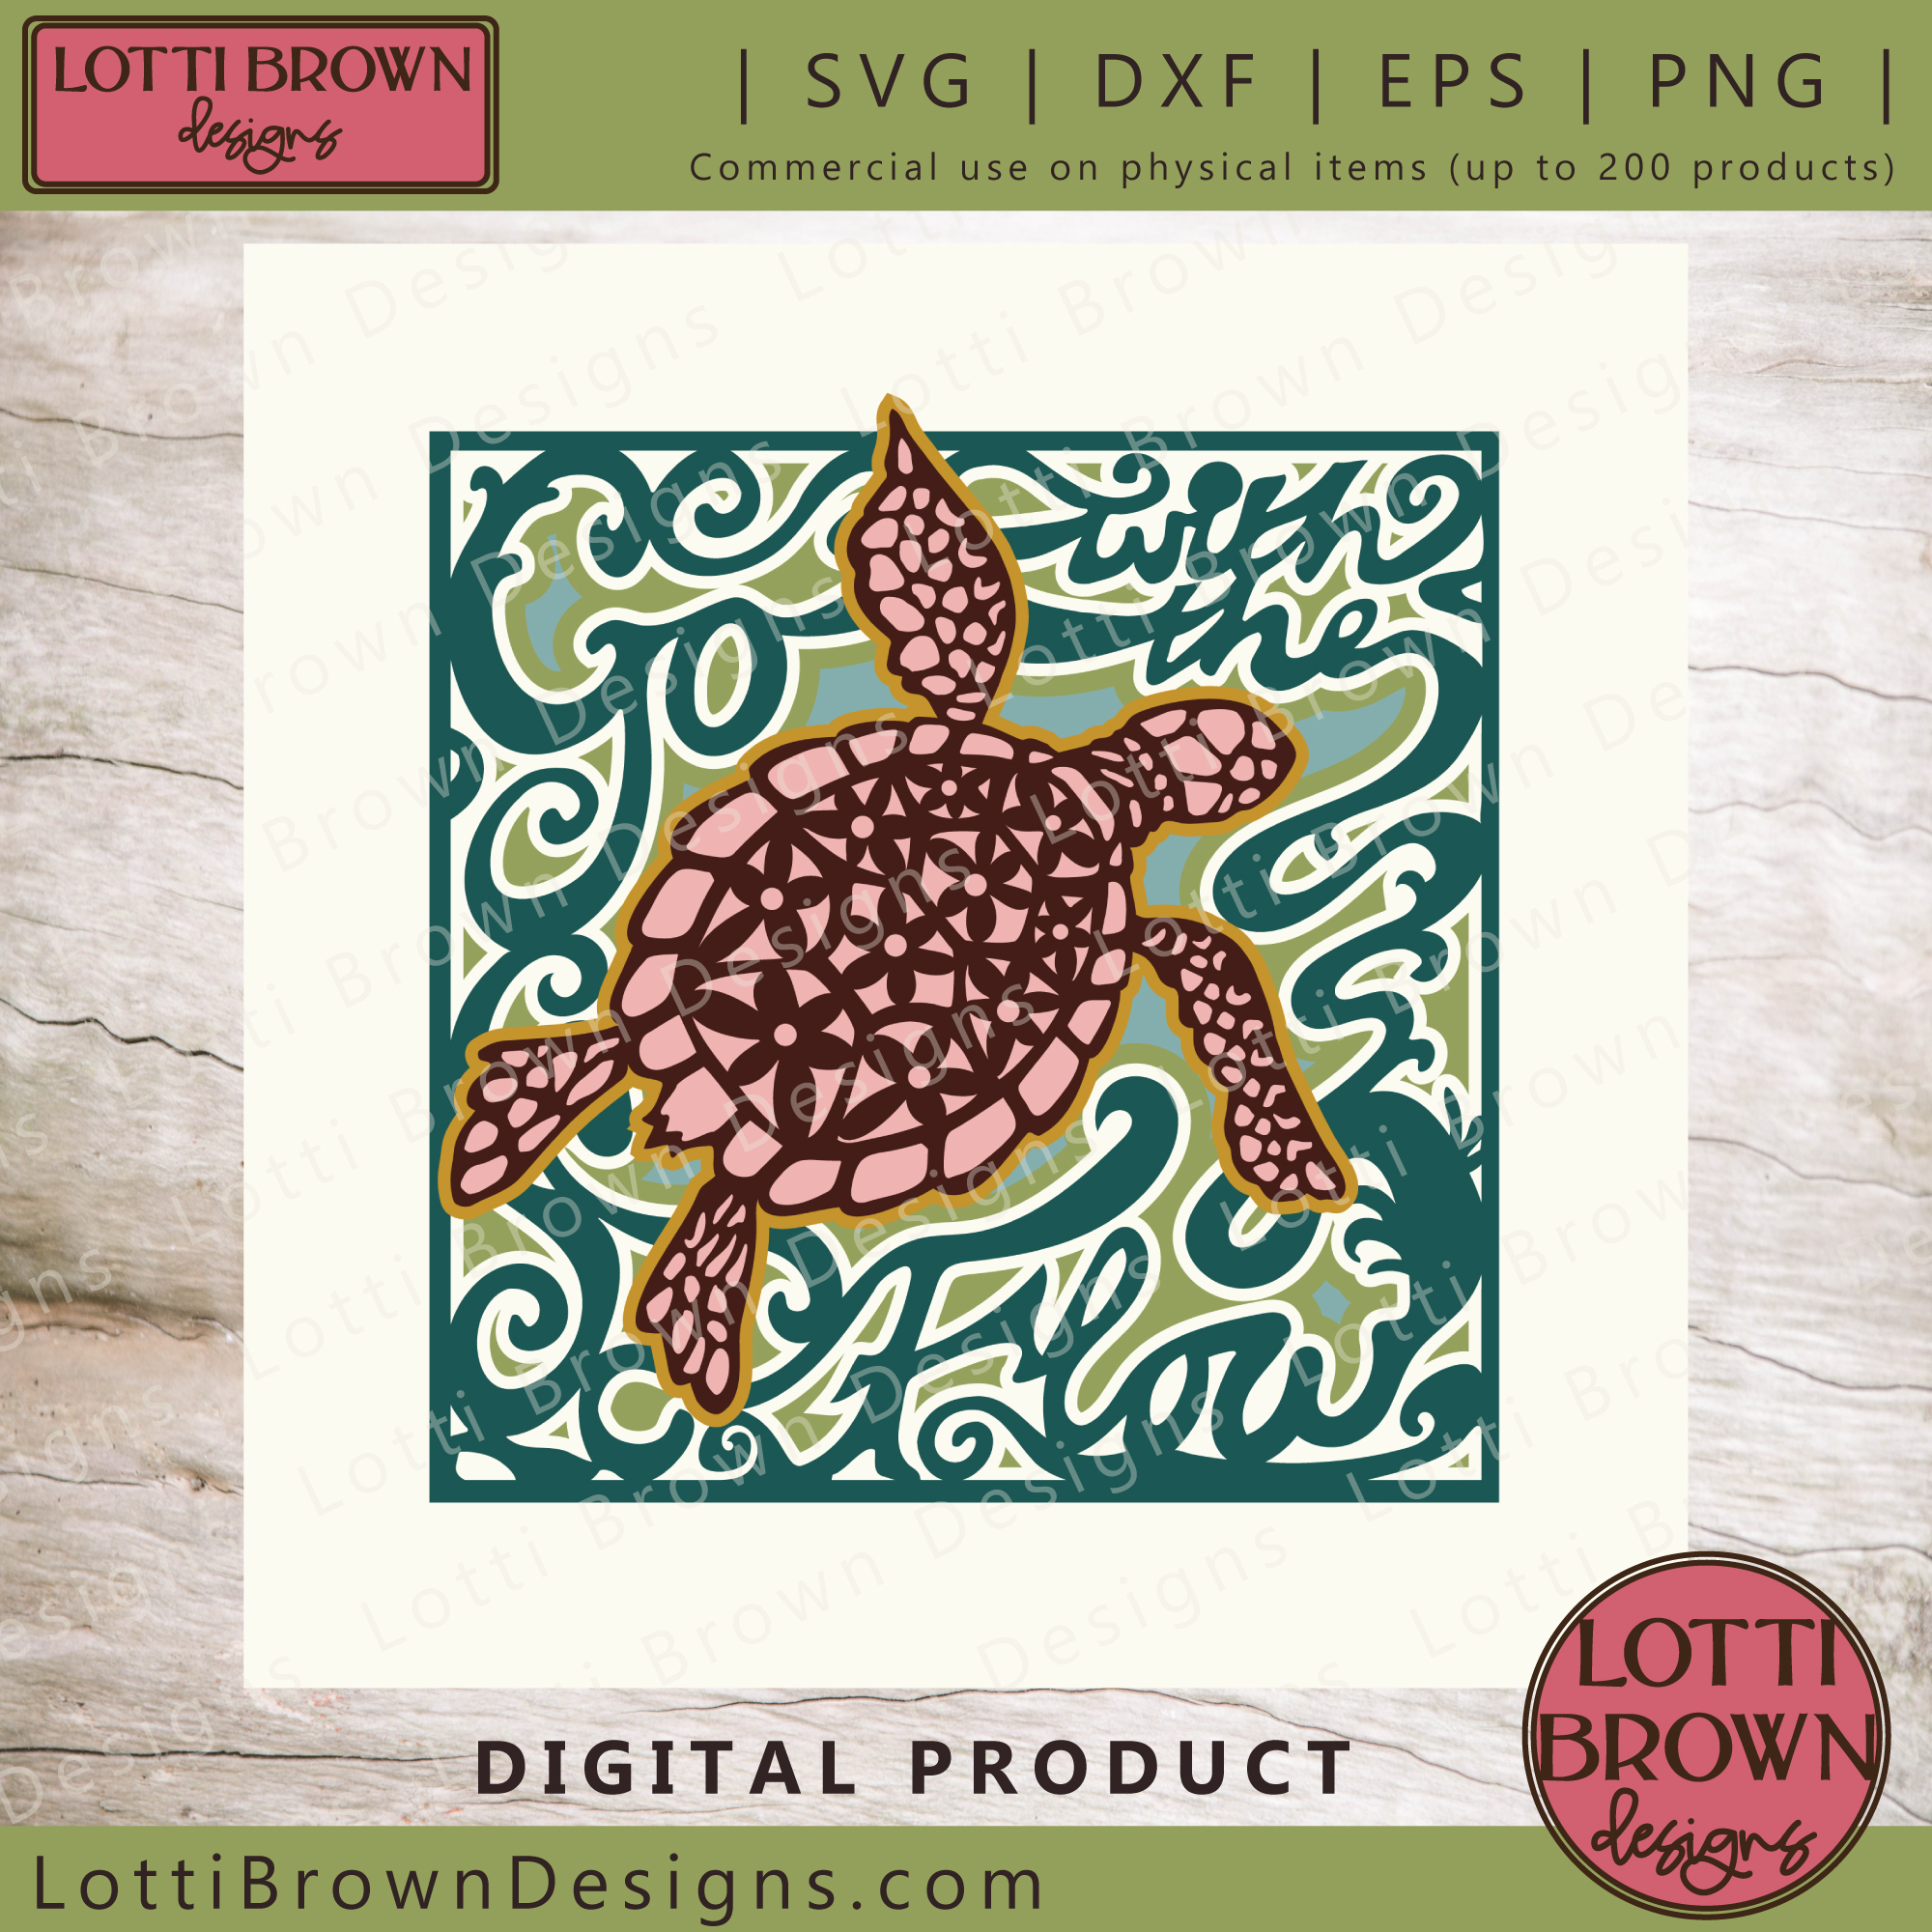 'Go with the Flow' shadow box template
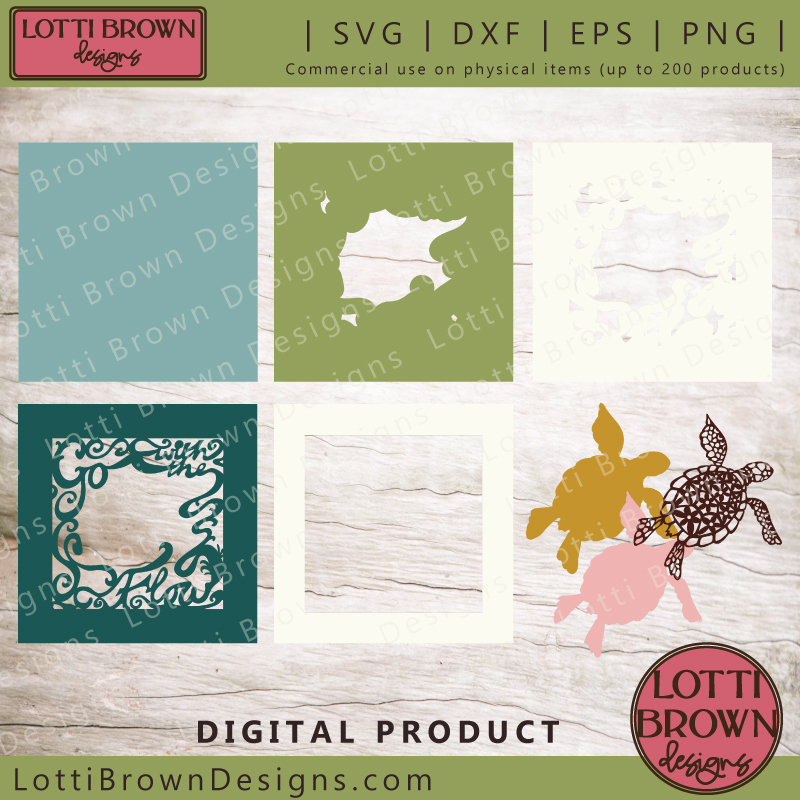 Showing all the layers to make the turtle shadow box
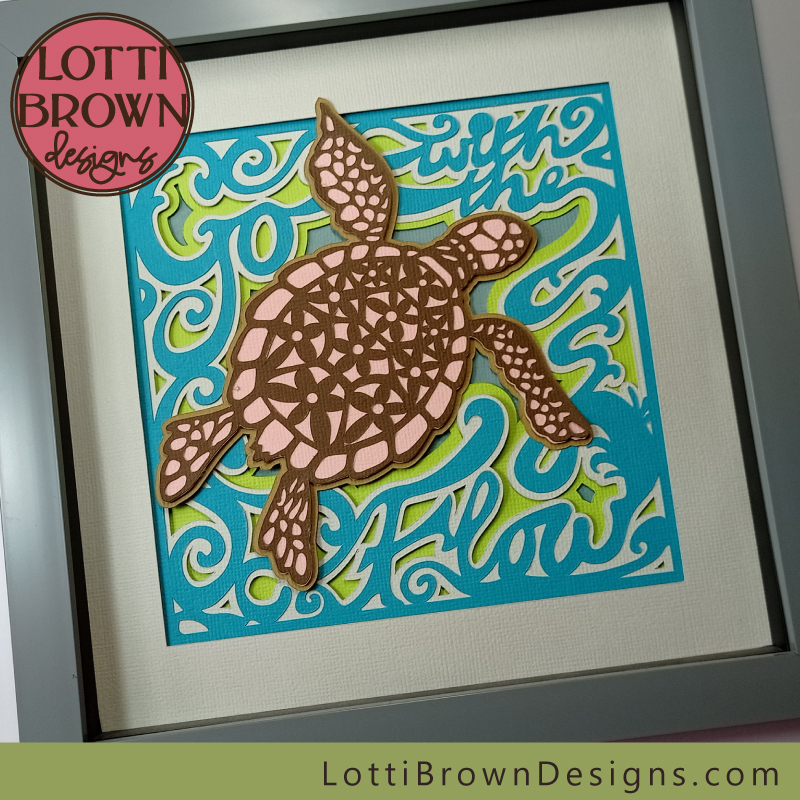 'Go with the Flow' sea turtle shadow box
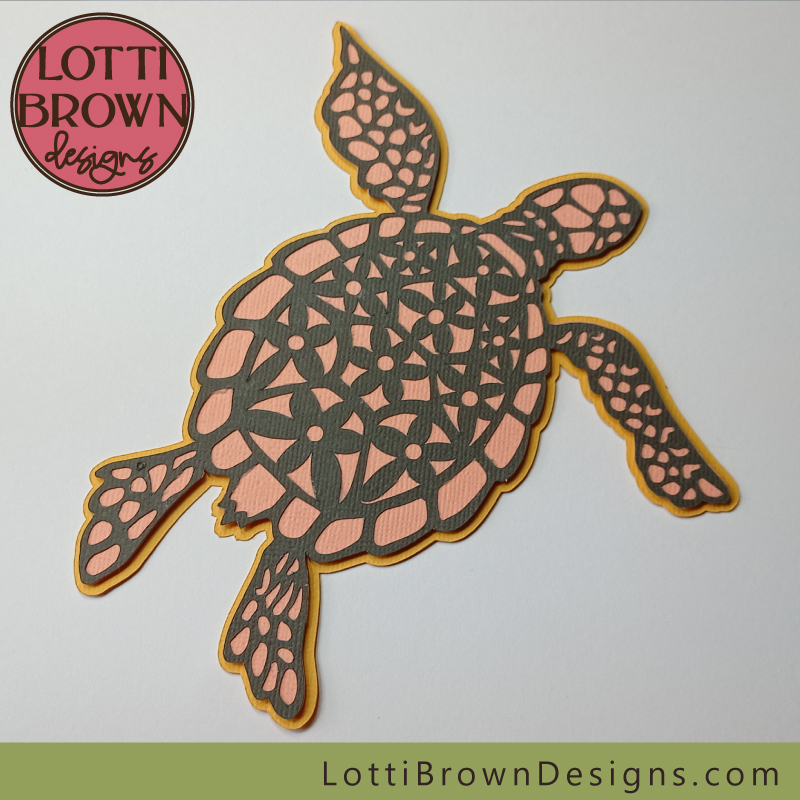
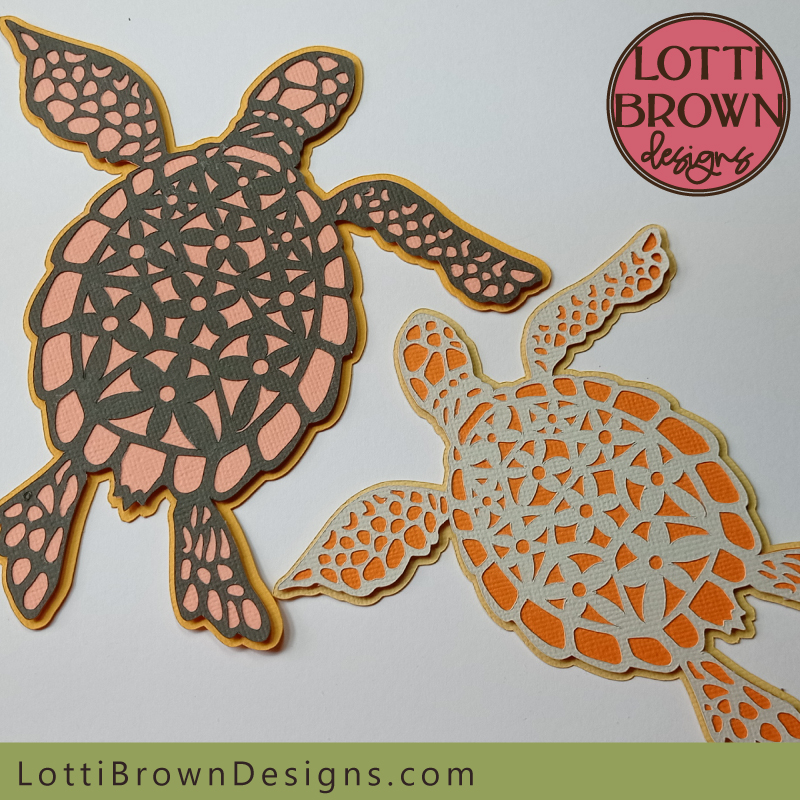
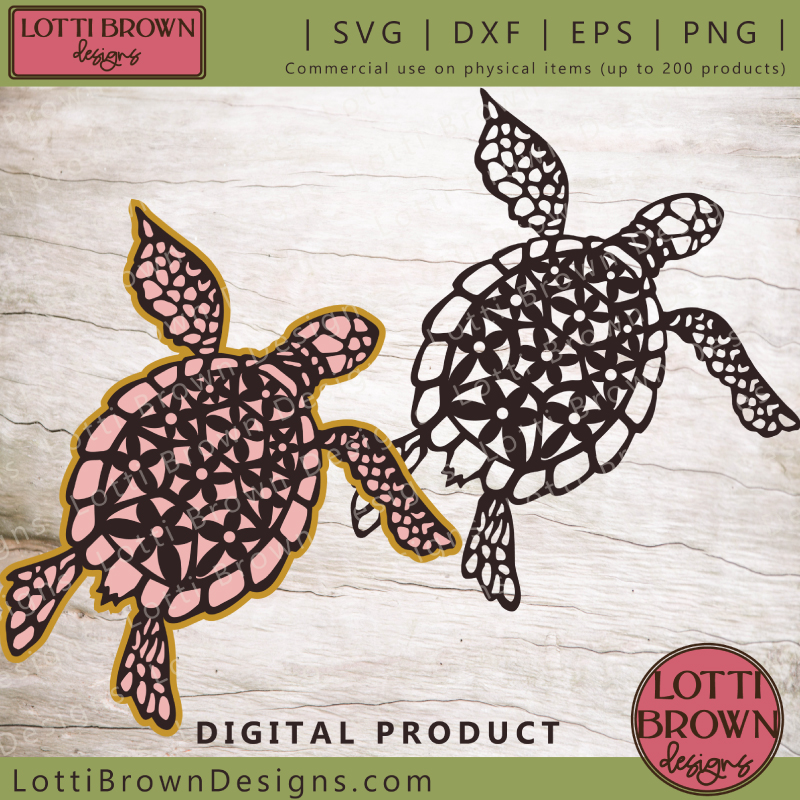 Sea turtle cut file showing layered & single-layered options
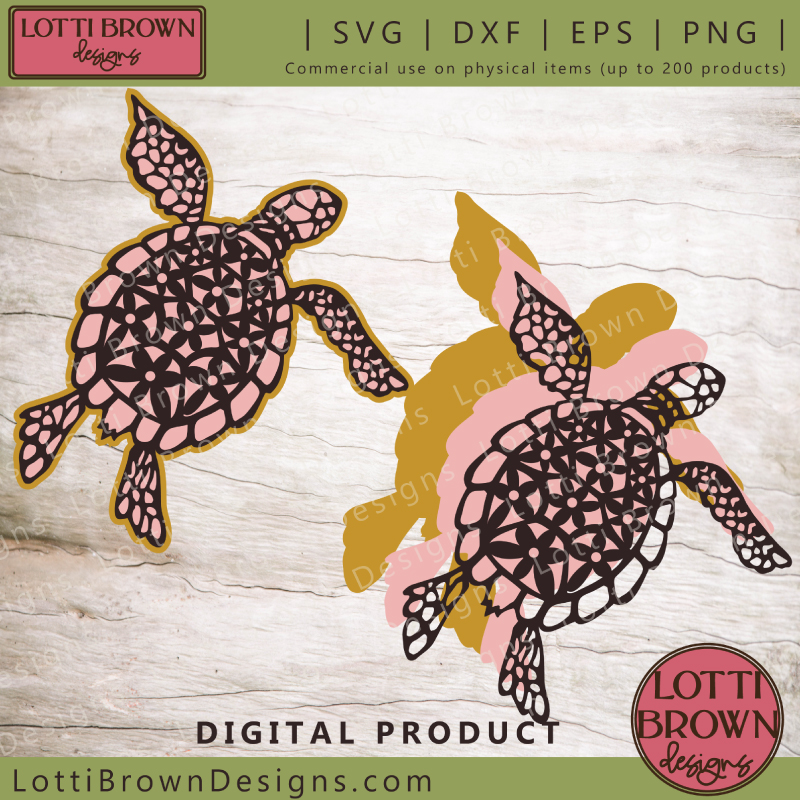 Showing all three layers for the turtle SVG
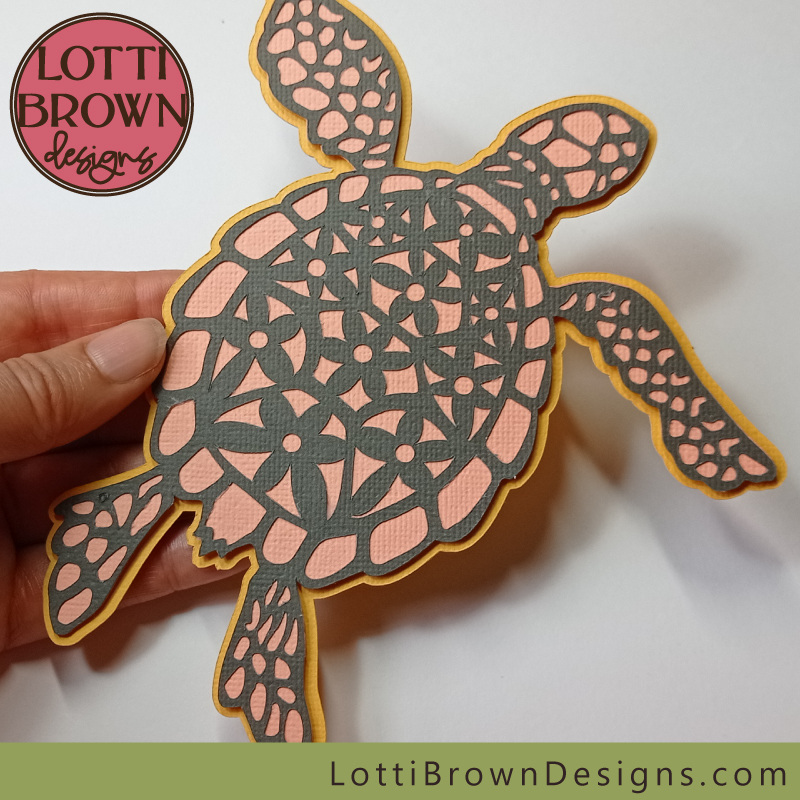 Separate sea turtle template
Below, I'll show you how to make both of the options - the turtle is included as part of the shadow box template (but also available separately) so his instructions are also included in the shadow box instructions below...
How to Make the Sea Turtle SVG Shadow Box
I'll show you how to make the turtle shadow box here - if you just want to make the turtle, you can scroll down until you get to that part in the instructions or just click here to go there now...
I'll also share some colour ideas and alternative colour inspiration for you here - the templates are provided with the pink, brown and yellow turtle and the blue and green shadow box that you see here.
What you'll need for your sea turtle shadow box
You will need:
- Cardstock - in seven different colours. I've used Sizzix cardstock for each of the colour ideas. The cut is quite intricate in places, so please use a quality cardstock that you know cuts well (I cut mine on Cricut's 'intricate cardstock' setting. I've some tips for choosing and using cardstock with a Cricut here...
- Double-sided sticky pads - these stick the layers together and separate them a little to give a better shadow effect. I've only used these on some of the layers, so you will also need...
- Paper glue, such as a stick glue - this is to stick down the more intricate layers
- Frame - a box frame that's a little deeper will give you the best results for your shadow box. I've used a frame that's around 8 x 8 inches (20 x 20cm)
- A way to cut your card layers - I'm using my Cricut Maker cutting machine. You will be also able to use the template with other cutting machines or if you want to cut by hand
- The 'Go with the Flow' sea turtle SVG shadow box template - available via my store here - if you just want to make the separate turtle, his template is here...
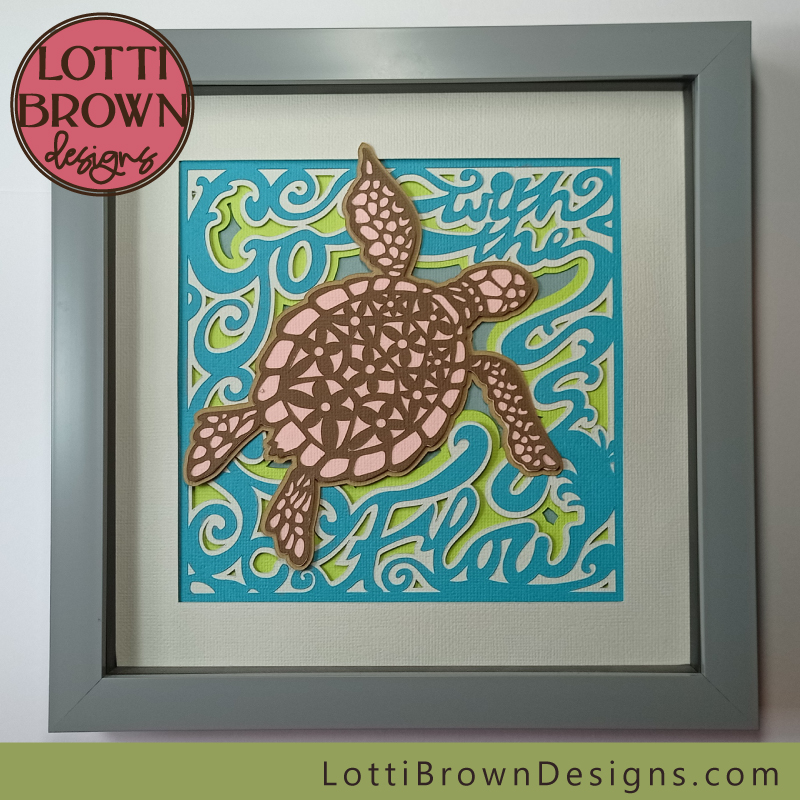 'Go with the Flow' retro sea turtle shadow box, layered cardstock project
Step-by-Step Instructions
You can print these instructions to help you if you wish - the print buttons are on the top right on the webpage and towards the bottom of the page, below the instructions.
- Resize your design - the sea turtle shadow box SVG is sized to make a 20 x 20cm (8 x 8 inch) shadow box. Please use your chosen cutting machine program to resize it to fit your own frame (measure it!). The SVG template should load to 20 x 20 cm in Cricut Design Space, but may not do so if you use another file format or a different type of cutting machine. I just move it over to the left a little to make sure it cuts from an A4 sheet of card for each layer.
- Choose your colours - I've used seven different colours for the shadow box, with two sheets of the white/soft-grey. If you wanted, you could make a simpler version with less layers, just by leaving out the bright green layer and/or the white/soft-grey frame layer. I share some extra ideas about colour just below...
Choosing colours for your project
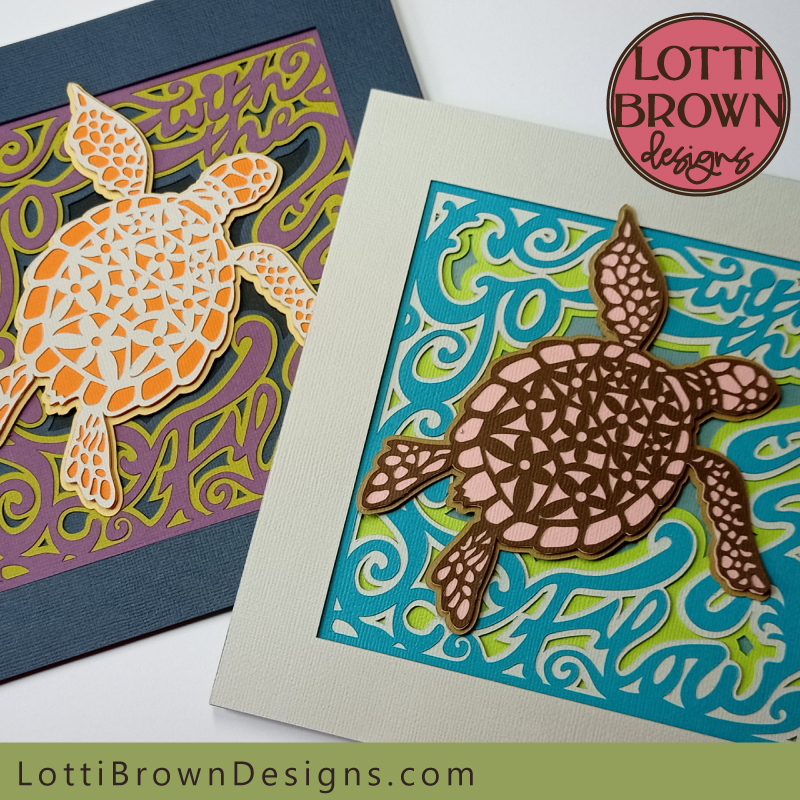
I made my sea turtle shadow box in two different colourways - the blue/green one is the one included in the template. I also like to create an alternative look with the shadow box, which I hope will inspire you to get creative with your own colour choices...
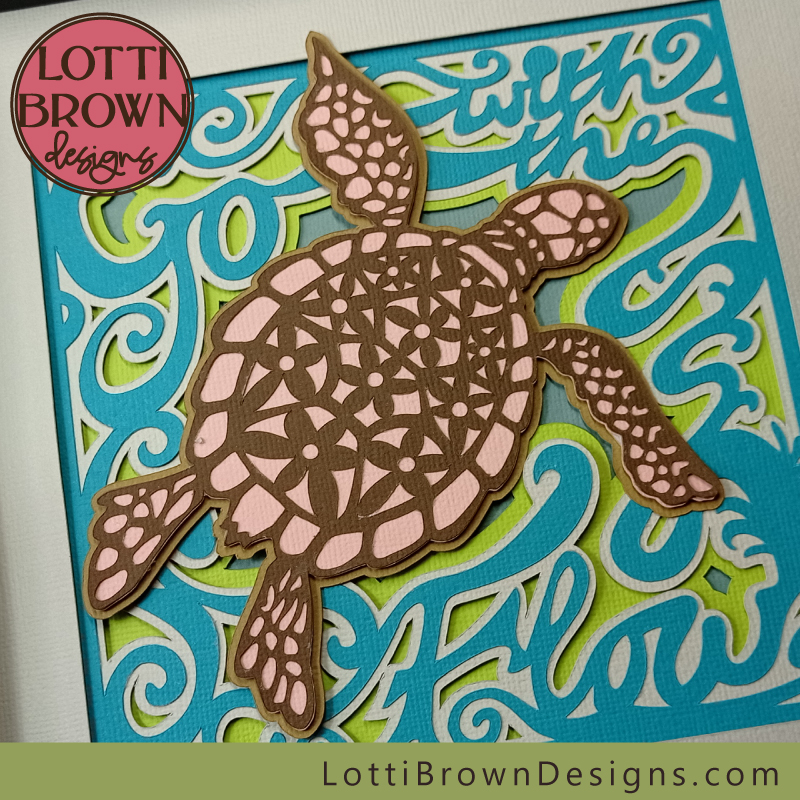 Blue/green turtle shadow box
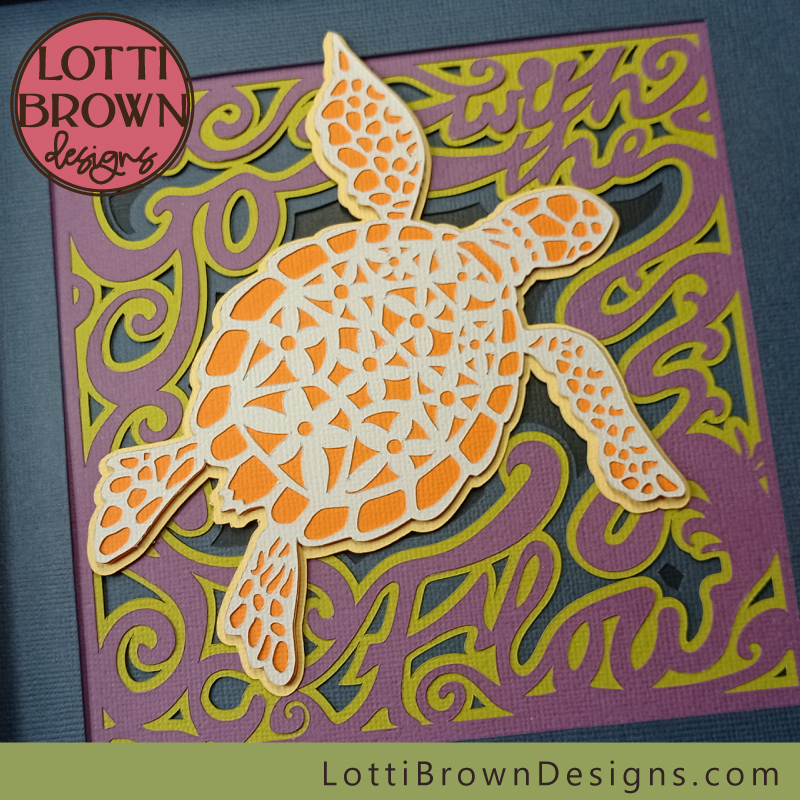 Orange/purple/green turtle shadow box
I picked the blue and green colours in the standard design that you'll find in the template as I think it looks really nice and watery and suits the 'Go with the Flow' message, like the sea turtle is actually swimming through the water.
I chose the funky orange, purple and green to give a really retro feel that I think suits the sixties style hand-lettering I drew for the design. The orange turtle looks quite 'groovy' I think!
If you're choosing your own colours, try and get some good contrast for the turtle - make his intricate top layer and the layer just beneath really stand out from each other so that you can really notice the nice design on him - he is, after all, the centre of attention!
Also make sure that the whole turtle stands out well against the background - you can see how I've put the pink and brown against the blue and green - and the orange and white/soft-grey against the funky purple, greens and dark blue and black.
Similarly, try to get a good contrast with the top lettering layer and the layer just beneath - getting a really good contrast between these two colours will really help the lettering to show up and be read easily - so don't make these two layers too similar in colour.
The top frame can actually be whatever colour you like - you can see that in the first example with the blue and green, I made it the same white/soft-grey as the layer just below the lettering, as this seemed to help the lettering stand out and bring the whole design together...
But for the purple/orange/green version, I went for one of the darker colours - in this instance, this choice helped the lettering stand out too, by drawing attention to that bright green and purple combination. I think a bright green frame alongside that might have been a bit too much.
But some might love that vibrancy! So get creative, experiment a little and do it your way!
- When your colours are chosen and you've resized your template in your own cutting machine program to suit your chosen frame, it just remains to cut all your layers - if you're a Cricut user, I have some help with using your files here and with using your Cricut here...
- When everything is cut and ready, come back here and we'll get on with the fun part of crafting and assembling the shadow box project, right below...
Assembling the layers for your sea turtle SVG cut file
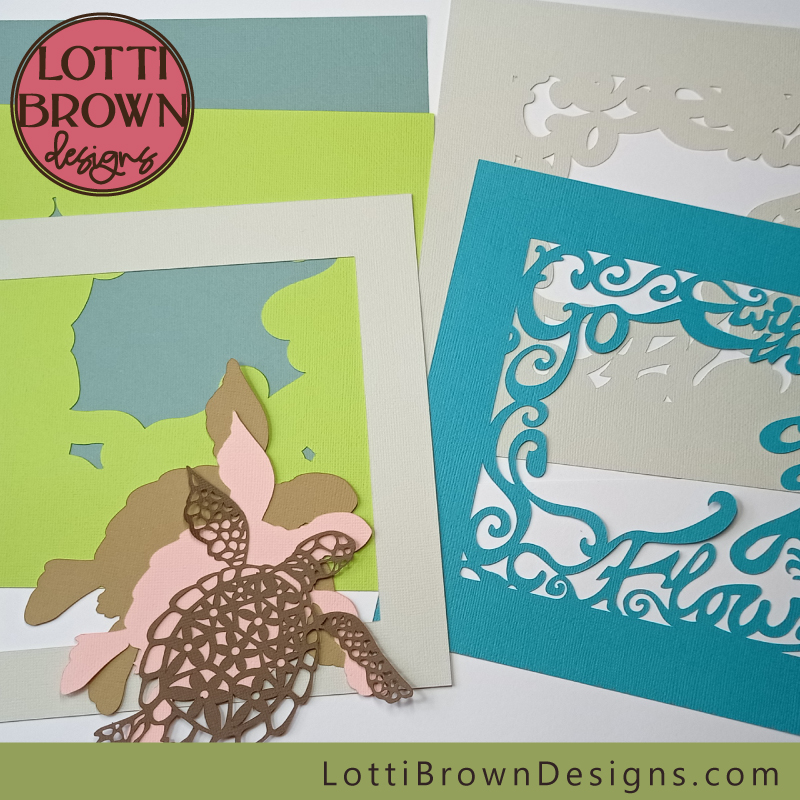 Cut layers all ready to go!
- We're going to build up the shadow box from the back or bottom layer - that's the plain square - soft blue-green in this example. Some of the layers are going to have double-sided sticky tabs between them - these separate the layers out and put some space between them, that gives you a 3D look and creates the shadows. If you want to create a flatter 2D type artwork, perhaps to fit a shallower frame, you can just glue with paper glue.
- So let's start by adding the double-sided sticky tabs to the reverse side of the bright green layer (see below), which we'll sit right on top of the bottom layer (the plain square).
- Add the double-sided sticky tabs around the edge of the layer - I usually use 2, 3 or 4 per side. Try and get them evenly spaced around the edge - we'll try and put the sticky tabs on the other layers in a similar place, so do make a mental note where you're positioning them so that we can try and get them as similar as possible (this helps stop your layers sagging).
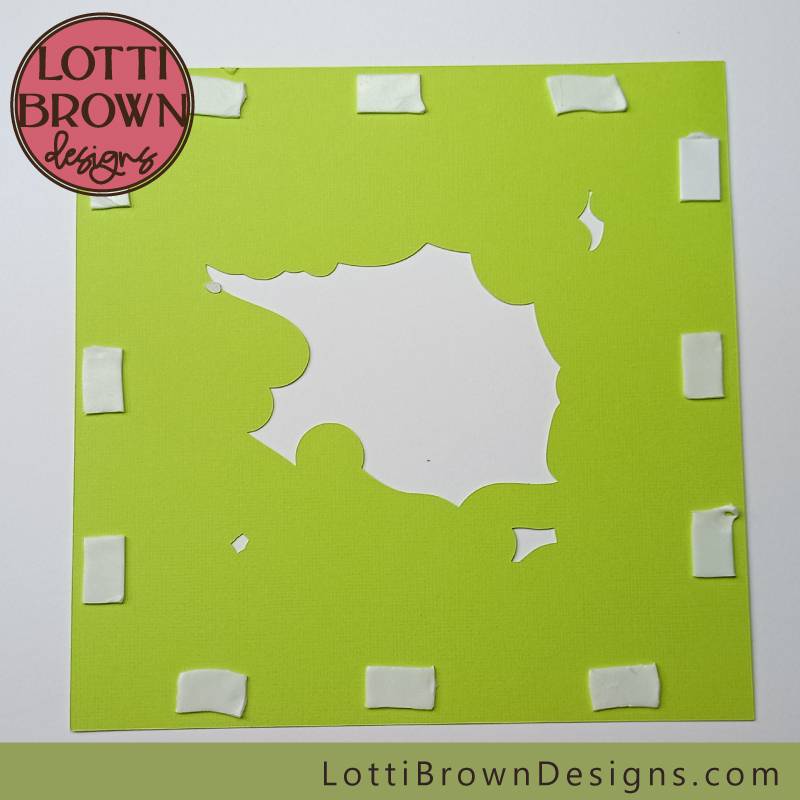 Add double-sided sticky tabs around the edge of the REVERSE of the bright green layer
- Then, carefully line up the two top edges and lower the bright green layer down onto the bottom layer - it should look something like the image below...
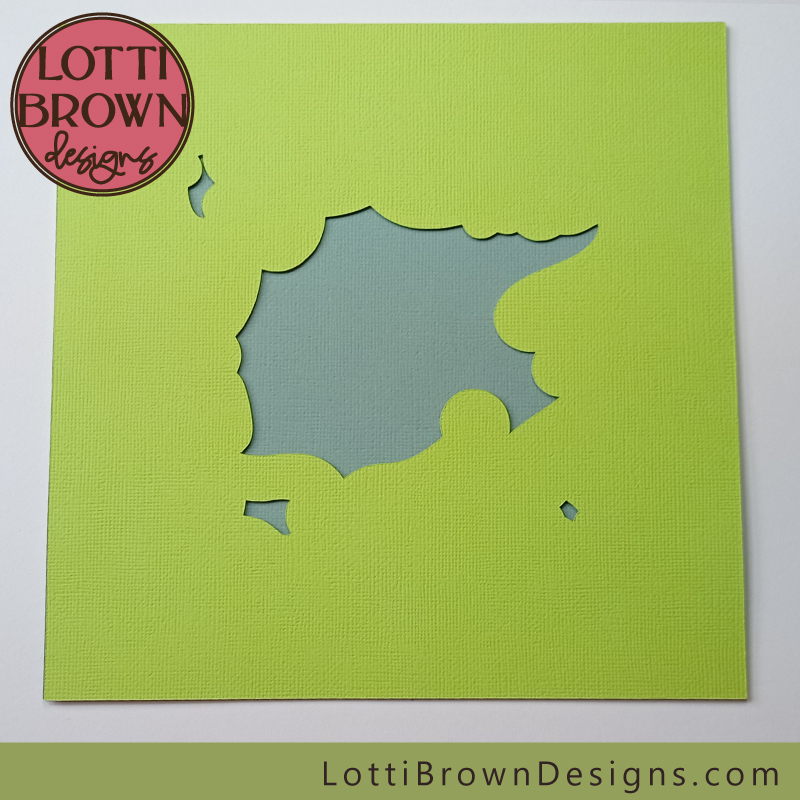 The first two layers are stuck together
- Next, we'll deal with the lettering layer and the layer that goes just beneath it - that's the dark teal layer and the ornate white/soft-grey layer in this example - see the image below.
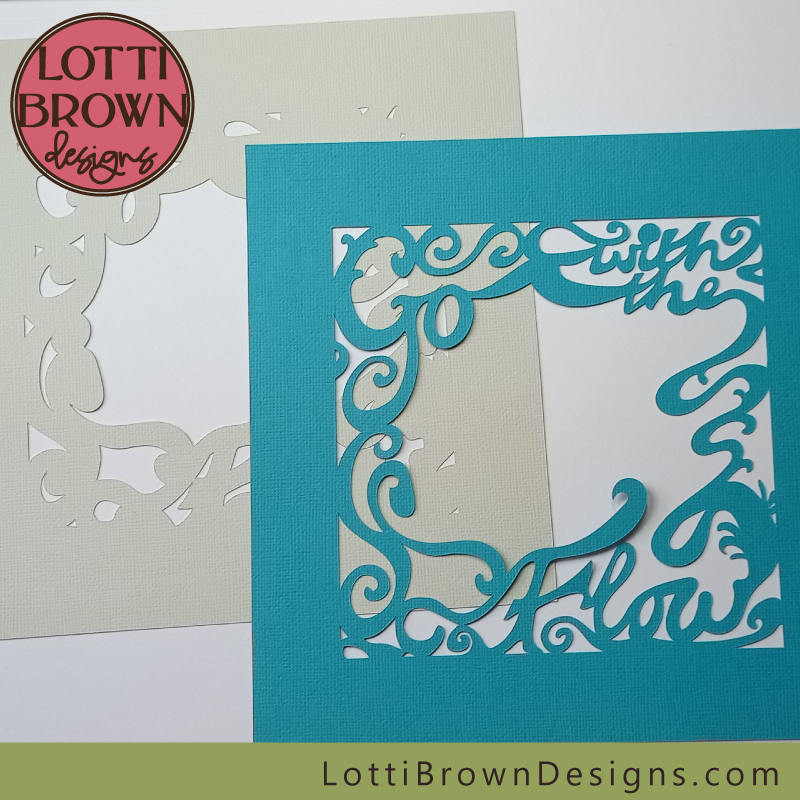 We'll work with these two layers next - the lettering layer and the one that fits just beneath it
- These two layers are going to be stuck together with paper glue (glue stick) - I chose to do this as the nature of the design means it would be difficult to stick down neatly with double-sided sticky tabs - ends could be flapping around or get ruched up and not lie flat - so I decided to stick the whole layer down onto the one beneath using a glue stick. This way, I can get all the little edges stuck down well.
- So spread a thin layer of the paper glue across the whole of the reverse of the top lettering layer (dark teal), making sure to get glue right up to the edges of the intricate cut-outs. Use scrap paper to protect your work area from getting sticky! See below!
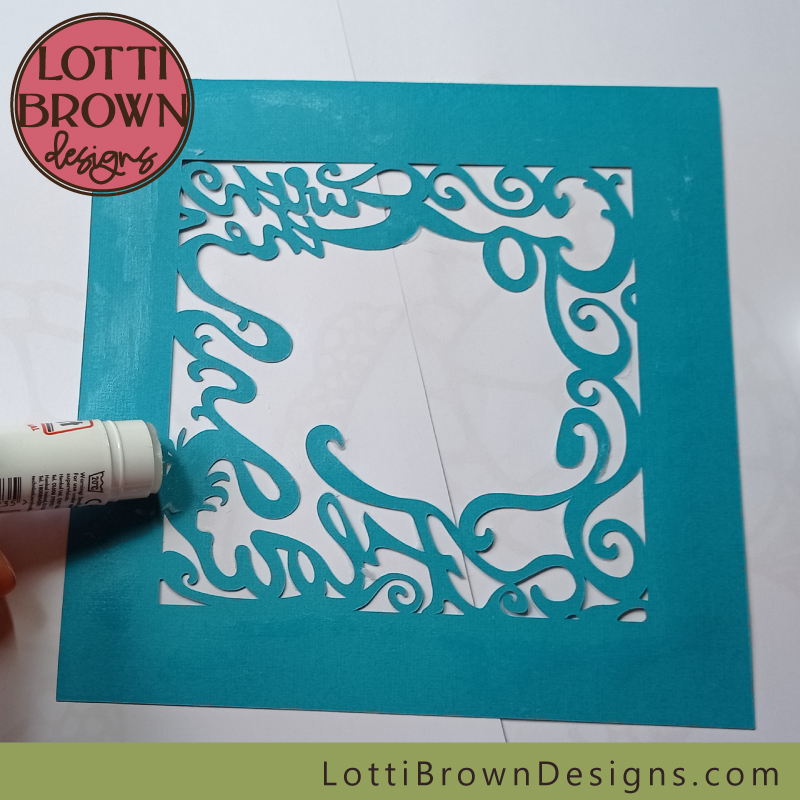 Glue gently across the whole area of the lettering layer (reverse of the layer)
- Then, line up the two top edges and carefully lower the teal layer onto the soft-grey/white layer that we just picked out - press down to help it stick - if there's some edges not quite stuck, you can add a little more glue.
- These two layers will now act as if they're one single layer as we proceed with our project. It should look something like the image below...
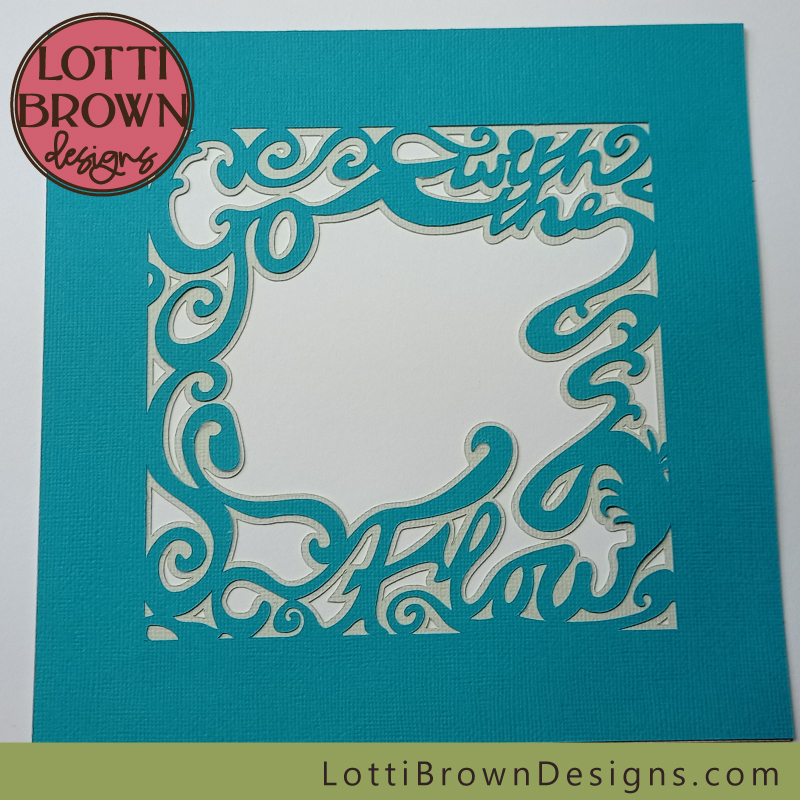 These two layers together will now act as one layer
- Now, we just need to turn over this new 'double-layer' that we just made, and add our double-sided sticky tabs to the back of this layer. Try and get them in the similar spots to the first one we did... just like in the image below!
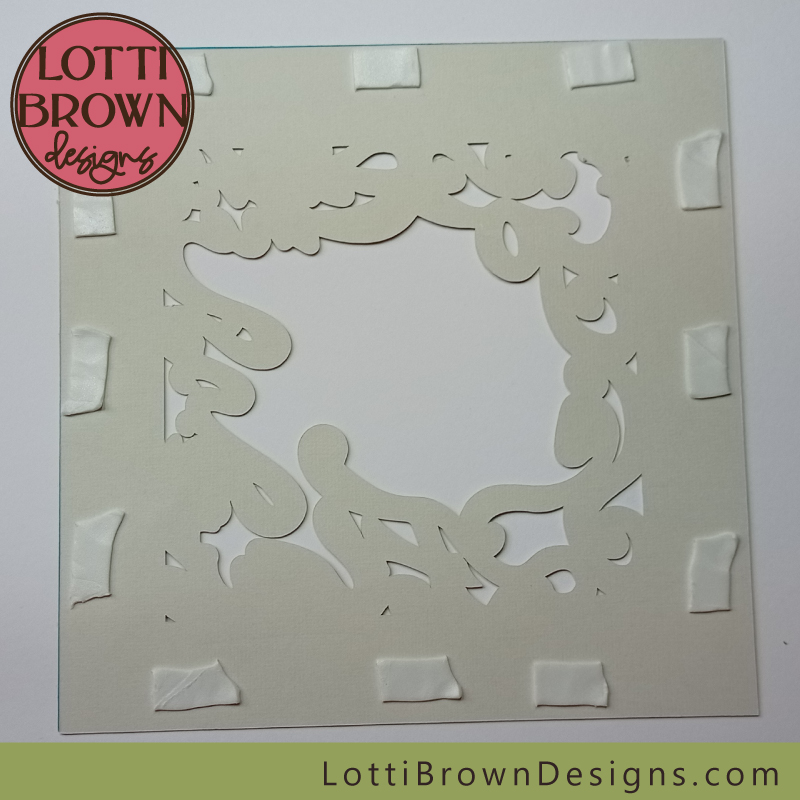 Add double-sided sticky tabs to the back of this new double-layer, trying to get them in as similar as possible positions as the first one we did
- Then, we just line up the top edges again, and carefully position this double-layer on the bright green and soft green-blue layers we prepared a minute ago - it should now look like the image below...
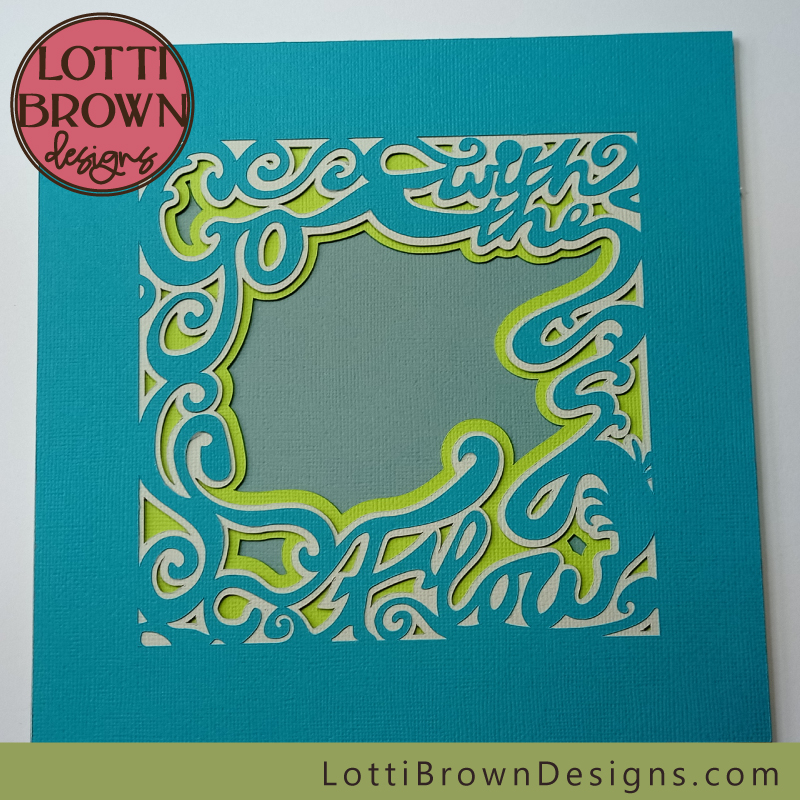 Add this lettering layer (double-layer) to the green layers we prepared first
- Our next layer is the simple frame layer - this is actually optional, but I think it finishes off the turtle shadow box nicely and looks like a proper mount. I chose to have the turtle on top of this frame as I think it looks more 3D, like it's actually coming out of the frame - but an option you might prefer is to have the frame on top with the turtle foot beneath - if that's the case, just leave the frame until last and do the turtle first.
- We'll add the turtle overlapping the frame, so let's add those double-sided sticky tabs around the edge, trying to make sure they're positioned in a similar way to the others - see image below.
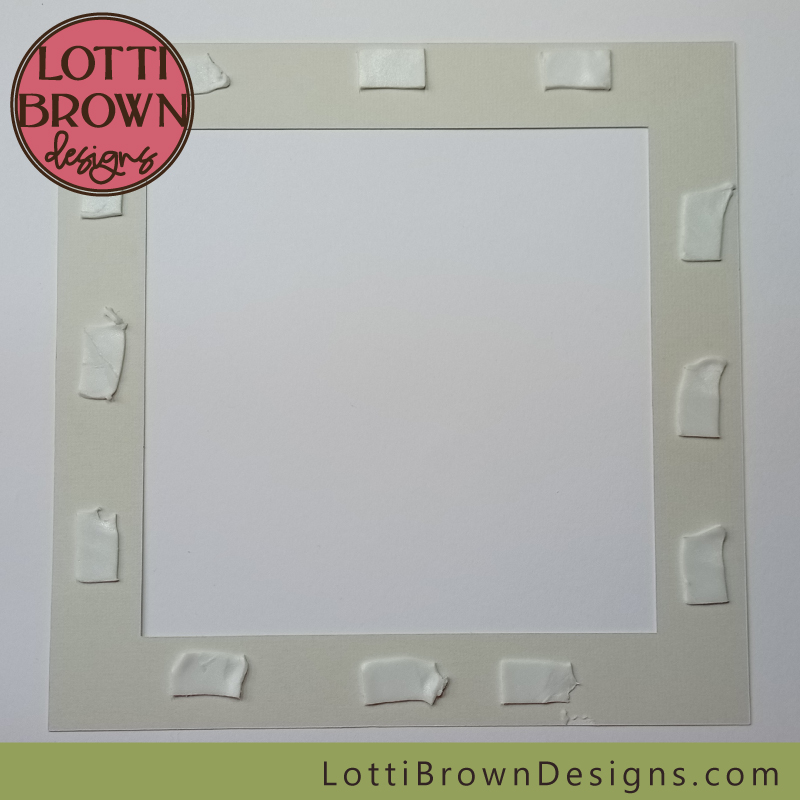 Add double-sided sticky tabs around the edge of the top frame - on the back on the layer and in a similar position to the others we already did
- Lower down this top frame layer onto the others, carefully lining up the top edges - and it should be looking something like this (image below)...
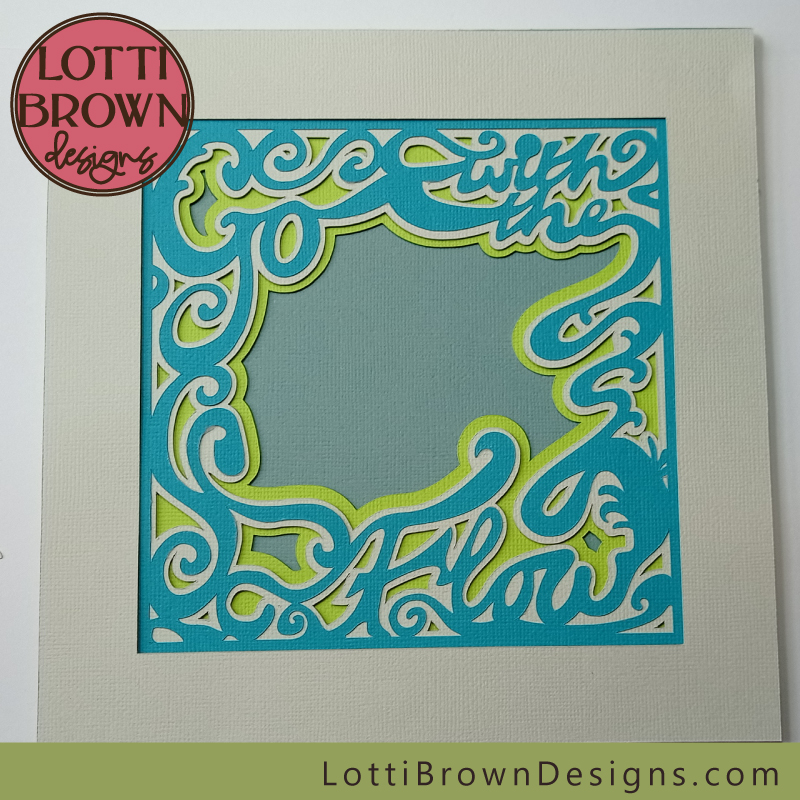 The base layers are now complete - and waiting for the turtle
- Now, we just need to add the turtle!
Making the Turtle
These are the instructions for making the sea turtle to go with the 'Go with the Flow' turtle shadow box or for the separate sea turtle SVG (the designs are the same)...
- We will need the three turtle cut layers - see the image below...
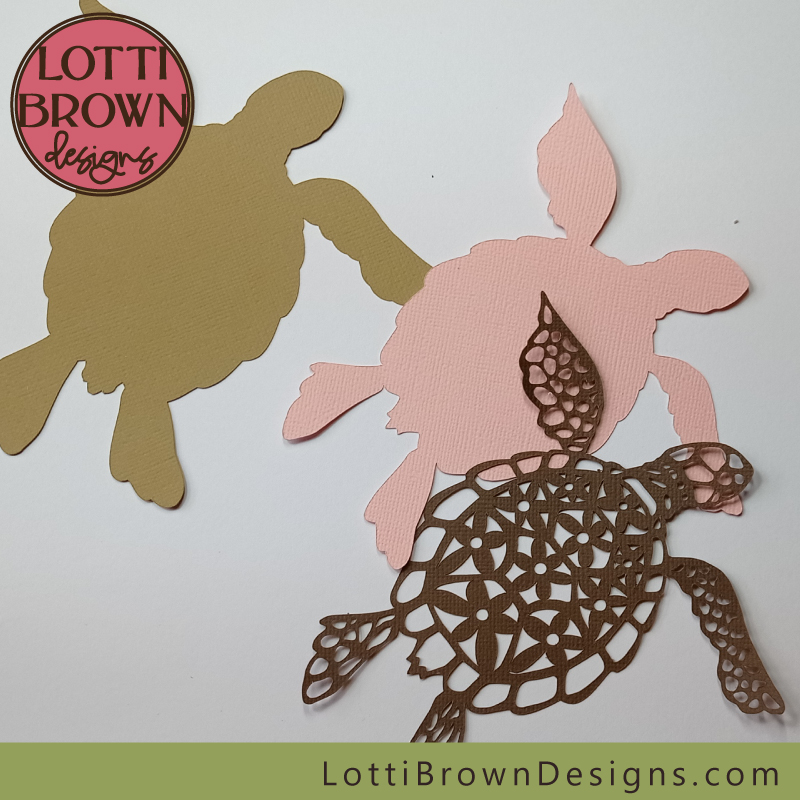 Layers for the sea turtle
- First, let's spread paper glue (glue stick) to the back of the intricate turtle layer - use scrap paper to protect your work area from getting sticky. See the image below...
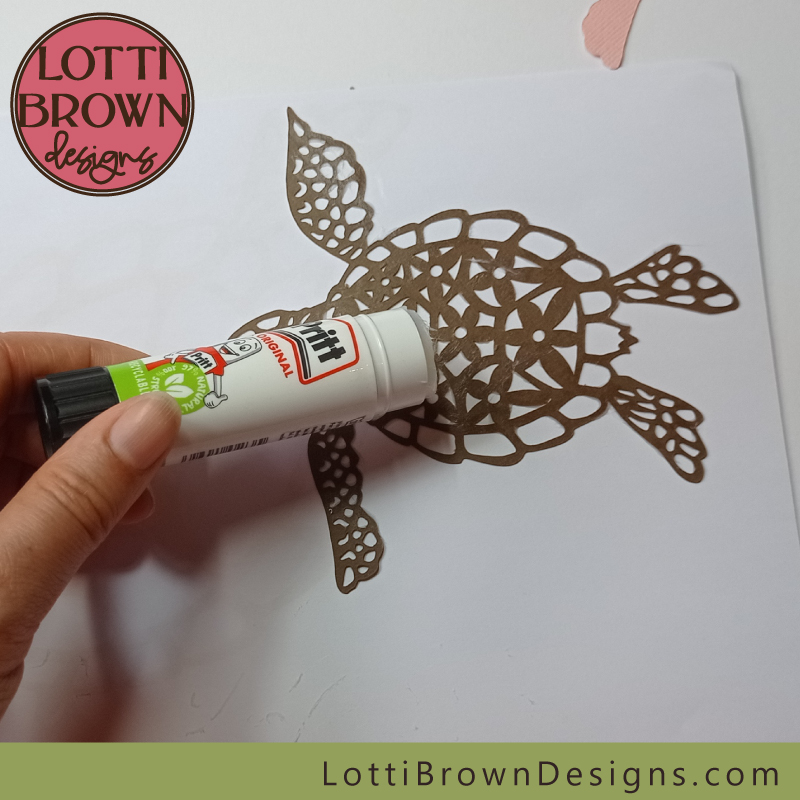 Add glue to the intricate sea turtle layer
- We then stick it down onto the middle turtle layer - pink in this example. This is the smaller of the two silhouette layers and it should fit the edges of the intricate layer exactly - press down so that it all sticks down well. Your sea turtle should now look a bit like the image below...
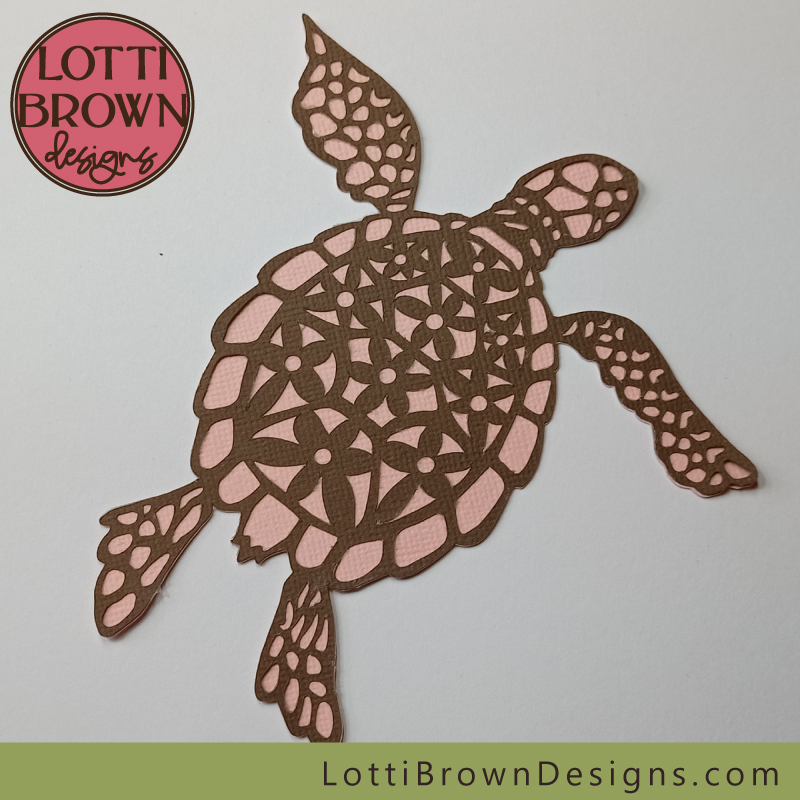 Glue the intricate top layer down onto the middle pink layer, smoothing it down to stick all the edges
- We're going to give our turtle a bit of a 3D look, by adding double-sided sticky tabs between the next two layers! I used a single tab in the middle and then cut tabs in half to fit on his head and flippers. Stick these on the back of the pink layer as in the image below.
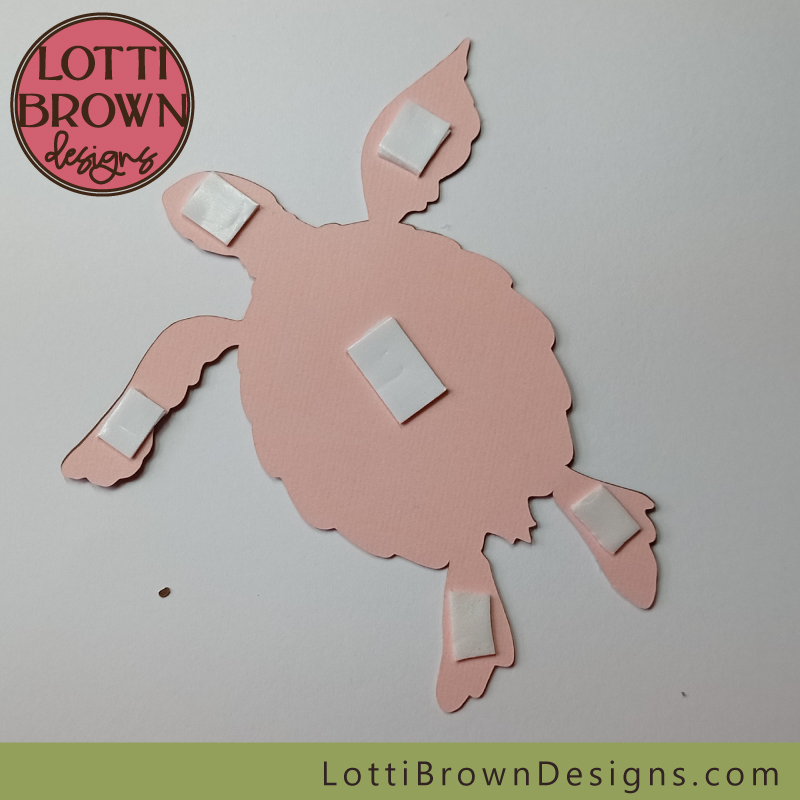 Use double-sided sticky tabs on the back of the turtle pink layer (middle layer) to get a nice 3D effect
- And glue this part down onto the dark-yellow/tan layer - try and get him in the middle with (roughly) even edges showing all around - just like in the image below.
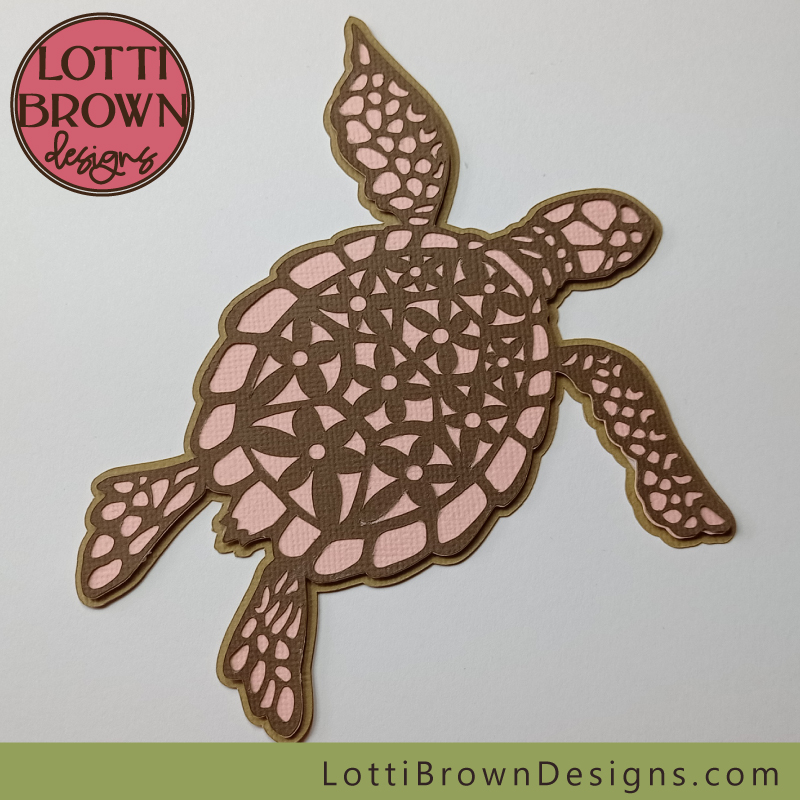 Your sea turtle is ready
- Your sea turtle is now ready - if you were making him separately, you're done. If you're following the instructions for the 'Go with the Flow' sea turtle shadow box, we just need to add the turtle onto the shadow box to complete the project...
- We do this by adding more double-sided sticky tabs to the back of the finished turtle (so the back of the dark-yellow/tan layer). We add these in a similar way to the last time, but with one exception - here, we're going to double-up with the one in the middle of the turtle. So that means stick one double-sided sticky tab down, then stick another one right on top - you should be able to see that in the image below...
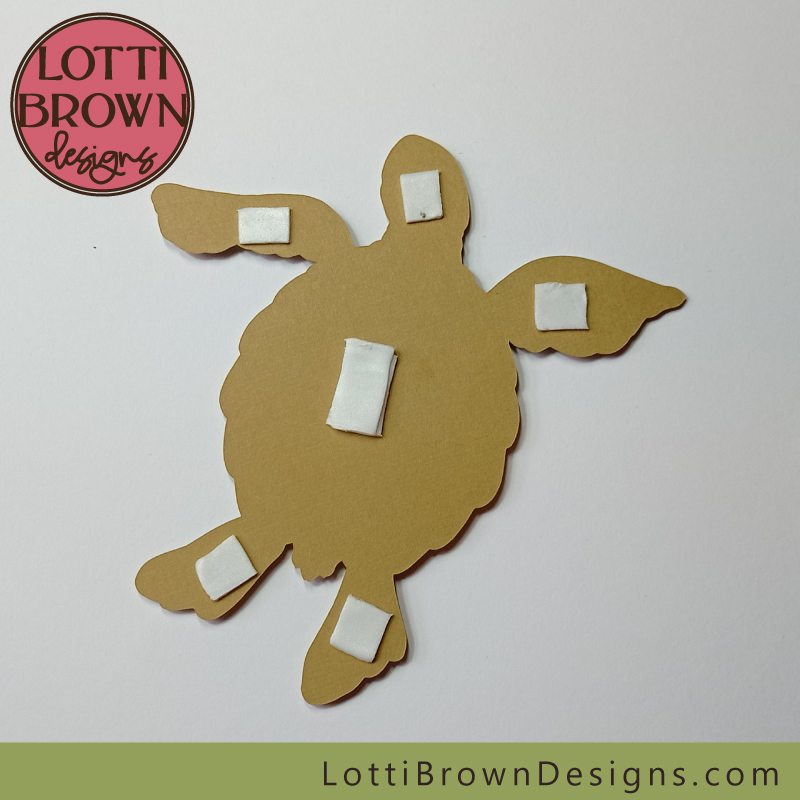 Add double-sided sticky tabs to the back of the turtle but double-up in the middle - this is to account for the different heights of layers in the design
- The last thing to do is just to position your turtle in the shadow box - he should be swimming in the central 'pool' with his head pointing into the gap - try and get him so he's not obscuring any of the words too much. The image below should help you with the positioning.
- I like him with his flipper out over the top of the frame - I think he looks more 3D and dynamic - if you prefer to hide his flipper below the frame, just wait and add the top frame last instead - or if you already got to this point and changed your mind, just tuck it under the frame as you position him.
- When you're happy with his position, press to glue him down!
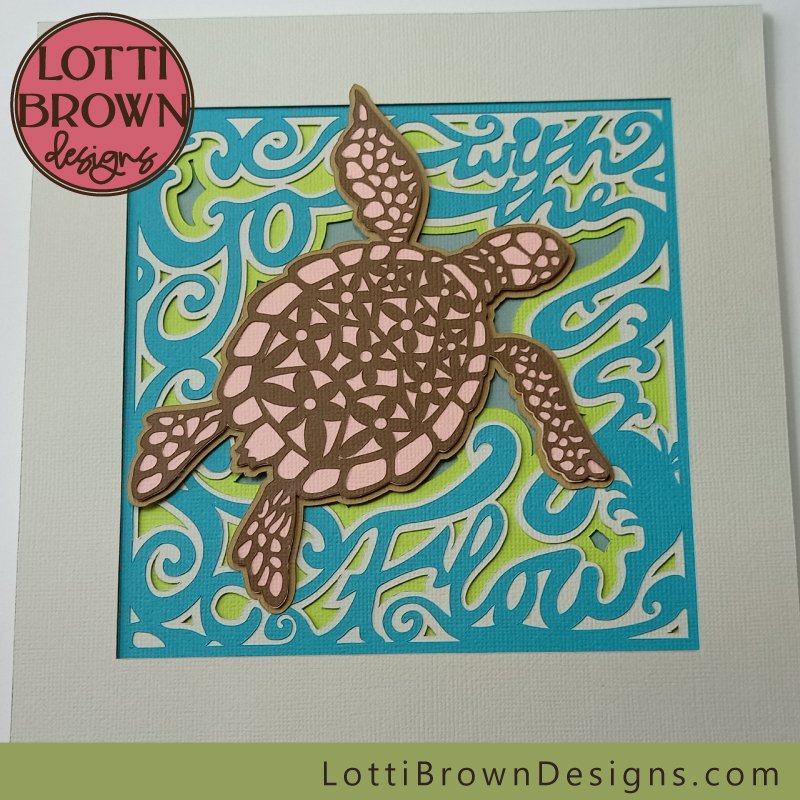 Perfect positioning - swim, sea turtle, swim!
- Finally, you just need to pop your sea turtle into his frame!
 Sea turtle shadow box project
 'Go with the Flow'
Just want the turtle? Click here instead!
Alternative colour idea
I also made this sea turtle 'Go with the Flow' shadow box with alternative colours - I think it gives quite a different look!
Which one do you like best?
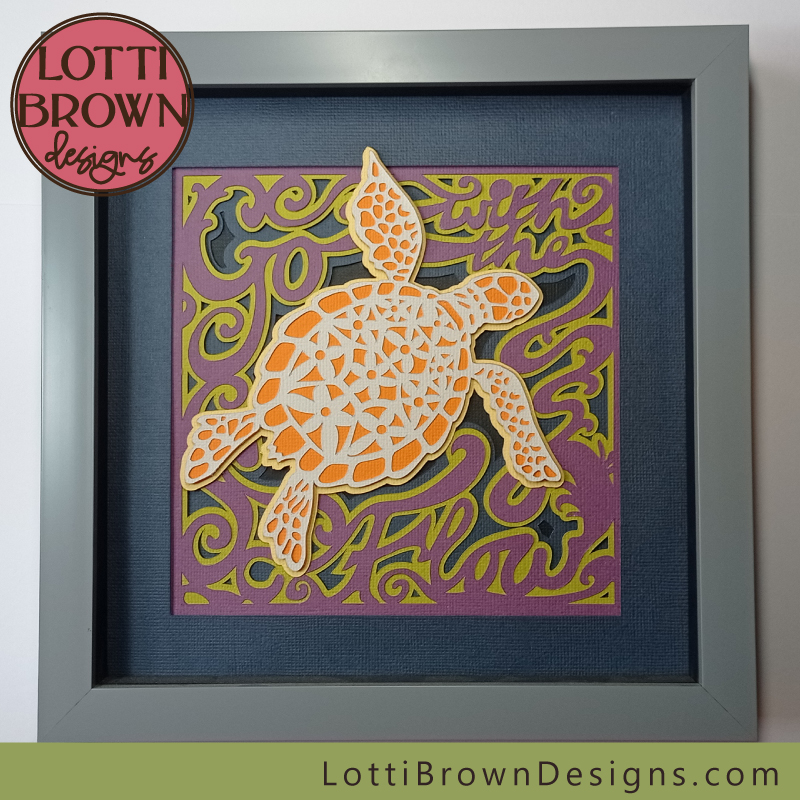 Retro look sea turtle shadow box - orange, purple, green, and dark blue
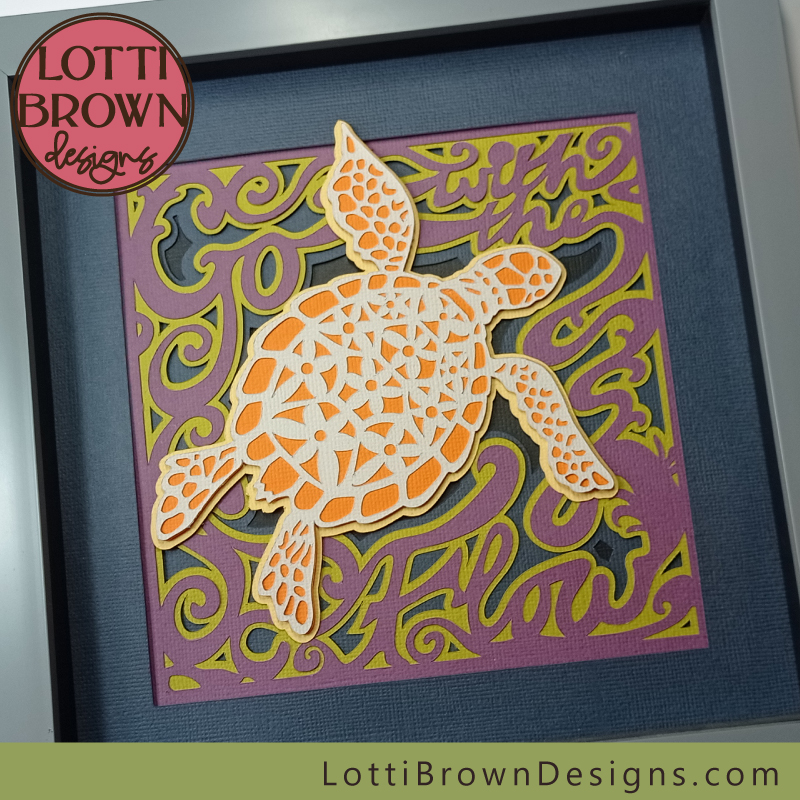 Funky colours for a fabulous turtle!
You can get the sea turtle SVG file to make the shadow box from my store - with instant digital download - see the link right below...
Sea Turtle SVG shadow box template here
SVG, DXF, EPS & PNG formats
Personal & small-business craft use (up to 200 units)
Physical (craft) products only - no digital products or sharing
Just the Sea Turtle SVG
You can also get my lovely sea turtle SVG file separately - that's just the turtle, including all three layers - the intricate top layer, the middle silhouette layer, and a final base silhouette layer...
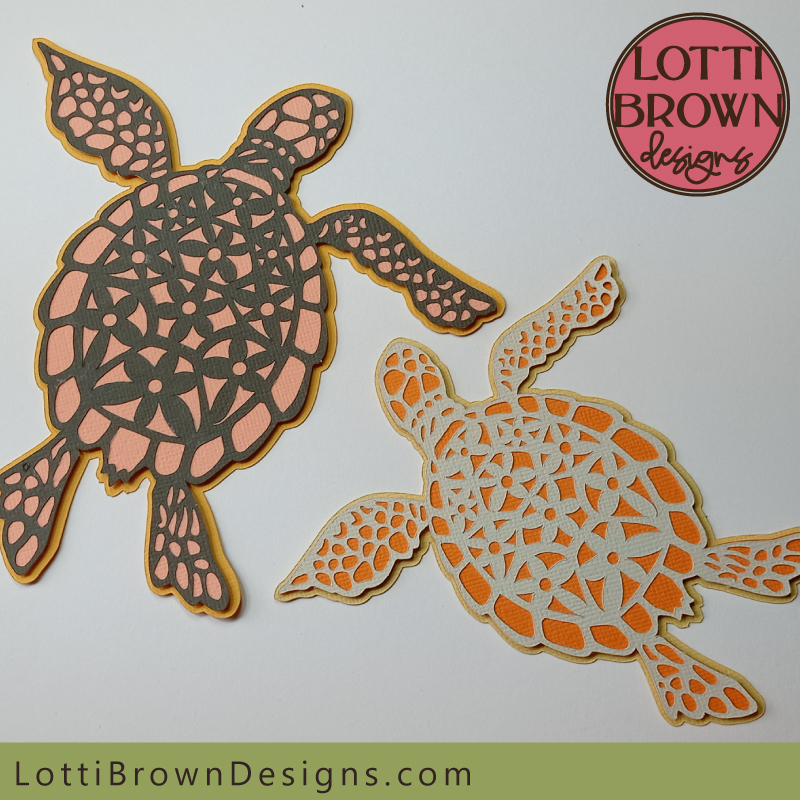 Layered turtle SVG file - available separately
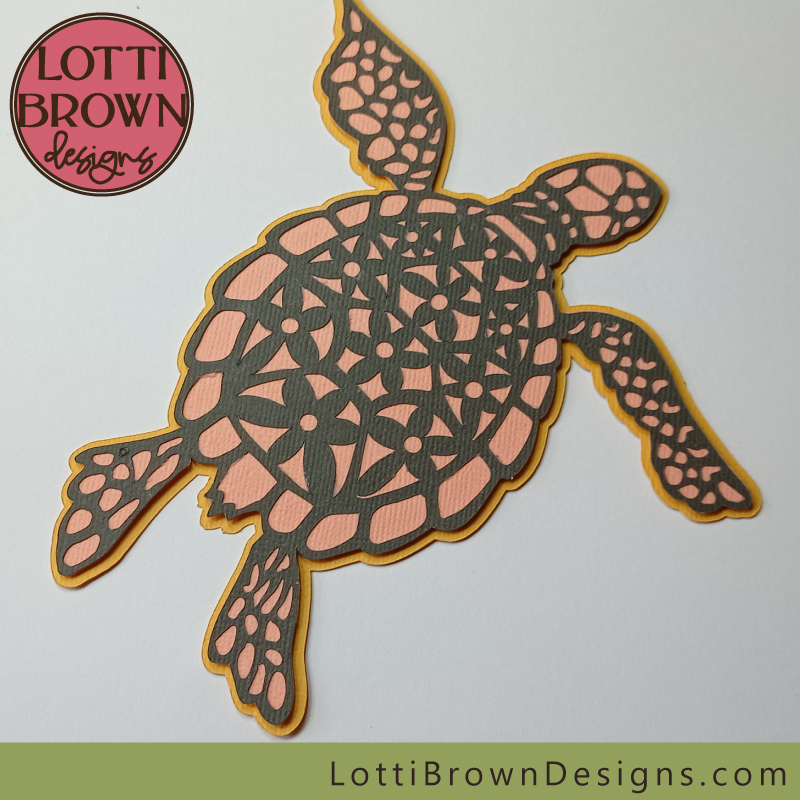 Turtle SVG file - available separately (also included as part of the shadow box)
If you want just the sea turtle SVG file, you can get him from my store right here...
This is just for if you want to make the turtle separately - if you want to make him as part of the shadow box, he's included in that, so you don't need to buy this one!
Sea turtle SVG, DXF, EPS & PNG formats
Personal & small-business craft use (up to 200 units)
Physical (craft) products only - no digital products or sharing
Choose which sea turtle SVG you want...
Shadow Box Turtle Template
Get the sea turtle SVG shadow box template from my store here...
If you want to make the sea turtle as part of the shadow box, he's already included in that, so you don't need to buy the separate one!
SVG, DXF, EPS & PNG formats
Personal & small-business craft use (up to 200 units)
Physical (craft) products only - no digital products or sharing
You Might Also Like:
Lotti Brown's Designs & Templates
How-tos...
- How to use SVG cut files for Cricut (also other cut file formats & machines)
Shall we stay in touch..?
Each month, I share stories from my own nature journal, new art from my studio, and simple seasonal inspiration to help you feel more connected with the turning year...
Recent Articles
-
British Nature Folklore Library: Stories, Seasons & Celtic Tree Wisdom
Dec 01, 25 05:09 AM
Explore British nature folklore, Celtic tree meanings, and seasonal wildlife stories. A growing library of myth, meaning, and hand-drawn inspiration. -
Beautiful Art Inspired by Nature
Dec 01, 25 05:04 AM
Beautiful folksy art inspired by nature from the fields and hedgerows of Yorkshire - colourful birds and wildlife with a nostalgic floral touch... -
Birds and Folklore in Britain: A November Nature Journal
Nov 26, 25 04:32 AM
November birds and berries - fieldfares, redwings, lapwings and snow geese with folklore, meaning and nature journal inspiration.
Follow me:
Share this page:

