*** IMPORTANT - I'm retiring my digital files - SVG/PNG/DXF/EPS - and printables from 31st December 2025 ***
*** Please ensure that you have everything you need - files and/or instructions printed off from the website (find them currently in the ARCHIVES section) - by 31st December 2025 as they will not be available after this date ***

Shadow Box Card SVG Project
'Home Sweet Home'
- Home
- SVG files
- Shadow Box SVGs
- Home Sweet Home Shadow Box SVG

A beautiful shadow box card SVG project to make and frame - 'Home Sweet Home' - use cardstock and a cutting machine like Cricut, Silhouette, etc - you can even cut by hand with a craft knife if you prefer...
 'Home Sweet Home' framed shadow box project in cardstock
'Home Sweet Home' shadow box project SVG - in my store
This is a design that I made as a gift for my sister who's buying her first home with her husband - it's a lovely craft idea for a new home gift but also lovely for anyone who loves their home and family...
You could also make it up to sell, as my design files come with a license for commercial use for small-business crafters.
What you'll need for the shadow box card SVG project
This is a craft project for you to make at home, you'll need:
- Card stock - here, I've used 'Sizzix' textured solid core cardstock (80lb/216gsm) - neutral colours (I've also done an alternative in the bright 'jewel' toned card by Cricut, which I'll also show you) - there are four layers, so four different coloured cardstock is recommended
- Double-sided sticky pads - to stick the card layers together - these allow a little space between the layers to create the attractive 'shadow' effect
- Frame - I've used a shadow box frame here which allows a little more space for the 3D design and a lovely effect - this is a 8 x 8 inch frame
- A method of cutting - I used my Cricut Maker cutting machine to make this - you can also use other cutting machines, such as Silhouette, ScanNCut etc, or you can use the PNG files to cut by hand with a craft knife if you prefer
- The 'Home Sweet Home' digital design template which you can download from my store here - plus a computer/tablet/phone to access it - the files come in SVG, DXF, PNG and EPS formats
- If you want to make it into a lightbox, you can add a battery fairy light pack at the back of the frame - personally, I don't use these, although I think they look pretty, as I want to create my designs so they look beautiful all the time, even when the lights aren't switched on - I think the different coloured card really helps here!
How to Make Your Home Sweet Home Shadow Box Card SVG Project
- Resize the design to fit your chosen frame - use your selected software to resize the design to your chosen size or print out the PNG files to the size you wish. I had a 8 x 8 inch frame (20 x 20 cm) and I resized the design in the Cricut Design Space software to around 20.3 cm. This is slightly smaller than the design size supplied. Make sure you measure your frame space before you start to get your resizing accurate.
- Choose your colours for your cardstock - there are four layers to the design, so it's quite nice and easy to assemble - you can see the colours I chose from the Sizzix 'neutrals' pack here, plus another fun and colourful option I'll share using the Cricut 'jewels' cardstock pack...
 Home Sweet Home SVG layers for the shadowbox cardstock project
If you want to use your own colour choices, I recommend using the strongest colour for the layer with the 'Home Sweet Home' text and house - make sure it stands out against your background choice too - here you can see that I chose a dark grey against a cream for these two layers, with mid-toned neutrals for the additional layers.
For the bright option, I chose the magenta-pink Cricut cardstock and set it against a background of some marble effect card that I had in my craft stash - then put it together with bold yellow and a dark purple.
 Alternative colour options for the cardstock project
You will need to cut out your layers from the digital files using your chosen method of cutting, whether cutting machine or by hand. If you need any help with how to use your cut files, you can find that here...
I also have some help for Cricut users here...
Ready to Assemble the Project
When you're ready to assemble the shadow box card SVG project, get all your layers together - you can use the layered and labelled files to make sure you know which goes where, or just follow the instructions below...
 Get your cut layers in the correct order, like this...
- We're going to work from the back to assemble the Home Sweet Home shadow box - so to start, we'll use the cream background square plus the dark grey 'Home Sweet Home' layer with the little house...
- Add the double-sided sticky pads to the reverse side of the 'Home Sweet Home' layer - this was the most effective positioning around the edges that I worked out (see below)...
 Add double-sided sticky pads to the BACK of the cut layer
- You can also add one to the roof of the house, too - I went back and added one in, once I'd stuck the layer down...
- Then carefully align the two layers and stick together - I find that if I align the top edges very carefully, the rest seems to follow well.
Here's what it should look like!
 The first two layers of the shadow box card project are completed
- Next, we'll add the third layer - that's the tan coloured one in this example, with some star/flower shapes and trees close to the edge.
- Remember to turn it over so that you're working on the reverse side to stick your double-sided sticky pads around the edge.
- Try and stick them in the same or very similar positions around the edge as the first layer...
 Adding sticky pads around the edge of the REVERSE of the third layer
- Again, align the top edges carefully before sticking down the new layer onto the previous ones - this is what it should look like now...
 The third layer is added
- Now for the fourth and final layer, which is the light/mid-grey layer here - we just use the same method - again, stick your sticky tabs to the reverse of the layer - if you're unsure, note that the tree that will be on the side of the chimney is a little narrower to allow for the chimney, so work that out, before making sure you add the sticky pads to the back of that layer...
 Adding the sticky pads to the BACK of the final layer of card
- Once again, just align everything carefully and stick down - this is how it should look...
 The Home Sweet Home shadow box project is complete!
Well done!
Now, you just need to pop the project in a shadow box frame, ready to display or gift.
Home Sweet Home shadow box project, framed Close-up view of the shadow box cardstock project
You can choose alternative card colours to create your own unique version, if you like - here's an alternative look I made using Cricut 'Jewel' cardstock pack, plus a marbled-effect background card from my crafty stash...
 Home Sweet Home - colourful version!
 Close-up look!
 Backlit - colourful version
 Backlit - neutral version
I hope that this craft project has inspired you to make your own Home Sweet Home shadow box - it's a fun and easy project to make with your Cricut or similar - and it makes a lovely gift for someone special or an artwork for you to display in your own home.
If you'd like to make the Home Sweet Home shadowbox card SVG project, you can get the digital design files in my store here...
The files come in SVG, DXF, EPS & PNG formats and can be used for personal craft projects or commercial use (limitations apply).
Something simpler?
If you'd like something simpler, I also have this design in a single-layer papercut template SVG (plus additional background layer) - see it below...
You can see it here in my store...
And see both designs together here, to help you choose...

You Might Also Like:
Lotti Brown's Designs & Templates
How-tos...
- How to use SVG cut files for Cricut (also other cut file formats & machines)

Shall we stay in touch..?
Each month, I share stories from my own nature journal, new art from my studio, and simple seasonal inspiration to help you feel more connected with the turning year...
Recent Articles
-
December Berries Folklore in Britain - Rosehips, Holly and Haws
Dec 24, 25 04:35 AM
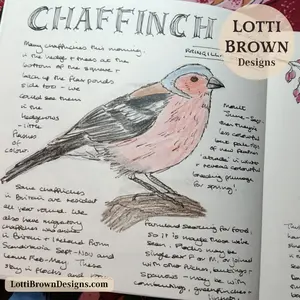 Explore December berries folklore in Britain - rosehips, haws, holly, ivy and sloes - with seasonal nature notes, birdlife, and quiet winter magic.
 -
Birch Tree Symbolism, Myth, and Folklore
Dec 23, 25 04:19 AM
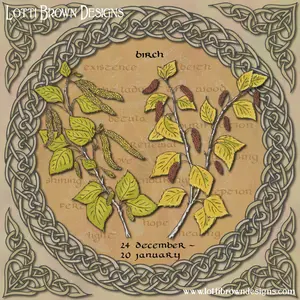 Explore birch tree symbolism, myth, meaning and folklore as part of my Celtic Tree Calendar art project...
 -
British Nature Folklore Library: Stories, Seasons & Celtic Tree Wisdom
Dec 01, 25 05:09 AM
 Explore British nature folklore, Celtic tree meanings, and seasonal wildlife stories. A growing library of myth, meaning, and hand-drawn inspiration.
Follow me:
Share this page: