*** IMPORTANT - I'm retiring my digital files - SVG/PNG/DXF/EPS - and printables from 31st December 2025 ***
*** Please ensure that you have everything you need - files and/or instructions printed off from the website (find them currently in the ARCHIVES section) - by 31st December 2025 as they will not be available after this date ***

Ballet SVG Shadow Box Template
- Home
- SVG files
- Shadow Box SVGs
- Ballet Shadow Box Template
Beautiful ballet SVG shadow box template with three dancing ballerinas in ornate skirts - with inspirational wording 'Graceful', 'Creative', and 'Strong' - makes a gorgeous wall art craft project for a ballet lover...
Instructions included on this page!
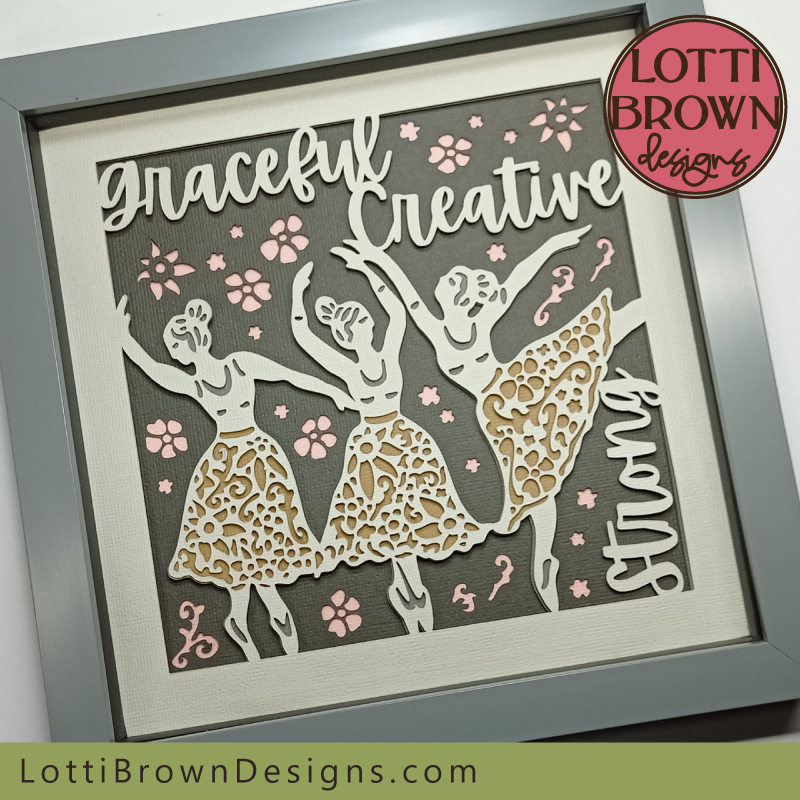 Ballet shadow box template for papercutting and cutting machines
Get the ballet shadow box template from my store here
Digital shadow box template for papercutting and crafting with Cricut or other cutting machines
SVG, DXF, EPS, and PNG file formats
For personal craft use or small-business commercial use (up to 200 products)
For physical (craft) products - no digital products, use, or sharing
I loved making my ballerina SVG files so much that I wanted to use them to make a shadow box template for you, too - one that's beautiful and inspirational...
'Graceful', 'Creative' & 'Strong' - Ballerinas Shadow Box Template
Beautiful ballet SVG wall art template with three dancing ballerinas and wording 'Graceful', 'Creative' and 'Strong'...
Ballet is a beautiful and graceful art so I wanted my shadow box template to capture that for ballet lovers - so I wanted to celebrate the grace, creativity, and incredible strength of ballerinas...
I could go on with their qualities - agility, endurance, poise, elegance, commitment to name just a few - but there's only so much space on the wall art template, so I picked what I felt were the most important reflections, for me, of the artistry of ballets and ballerinas - I hope you agree!
My ballet SVG shadow box is easy to make but looks beautifully intricate - it would be a wonderful gift for a ballet lover.
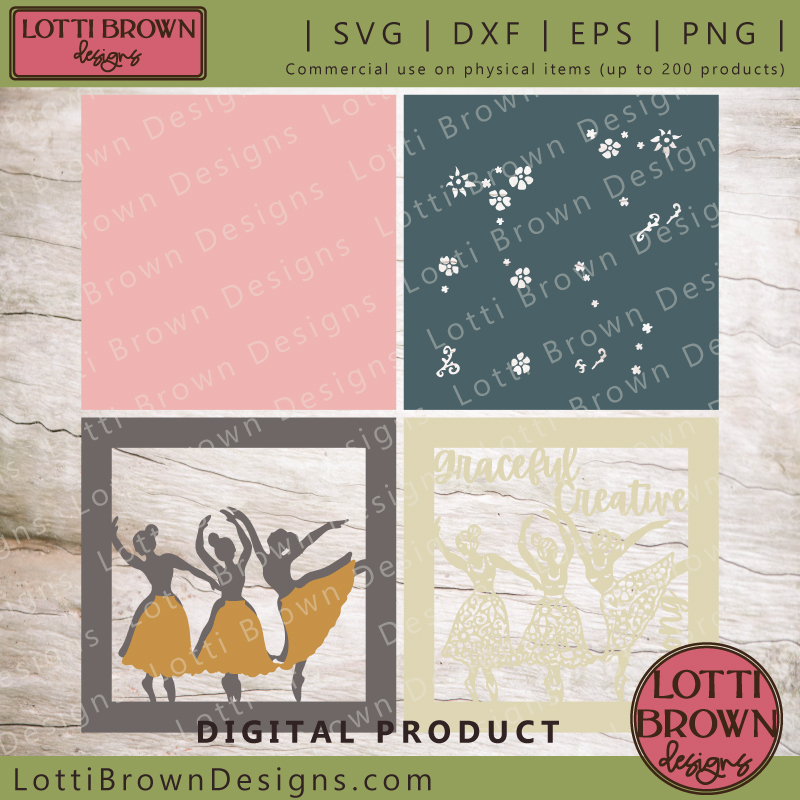 Showing the layers for the ballet shadow box project - SVG, DXF, EPS, and PNG file formats included in the template
The ballet shadow box has just five layers, including one that's a plain background square - so it's not too difficult to cut and put together...
The top layer is very intricately cut and contains all the main design - so you could use just this top layer if you wanted a simple project with just one layer.
If you want to use all the layers, I've got a craft tutorial just below to guide you through assembling the layers - it's easy to do and won't take too long, but does look lovely!
You will need:
- Cardstock in five different colours - I've used Sizzix 'Surfacez' textured cardstock for each of these layers. I have some colour ideas and recommendations for you in the section below
- Double-sided sticky pads (or similar) - these help to separate the layers while sticking them together - you can double-up if you want the layers further apart
- Paper glue - for the skirt layer
- Ballet shadow box template - available from my store here for instant download - comes in SVG, DXF, EPS and PNG file formats
- A way of cutting the template - I recommend a digital cutting machine and accessories - I use a Cricut Maker. You can use the PNG to cut by hand if you prefer
- Shadow box frame - this is slightly deeper than a standard frame so that you can make your shadow box 3D (to create the shadow effects). I'm using a 20 x 20 cm shadow box frame (approx. 8 x 8 inches)
Choosing Colours for Your Ballet Shadow Box
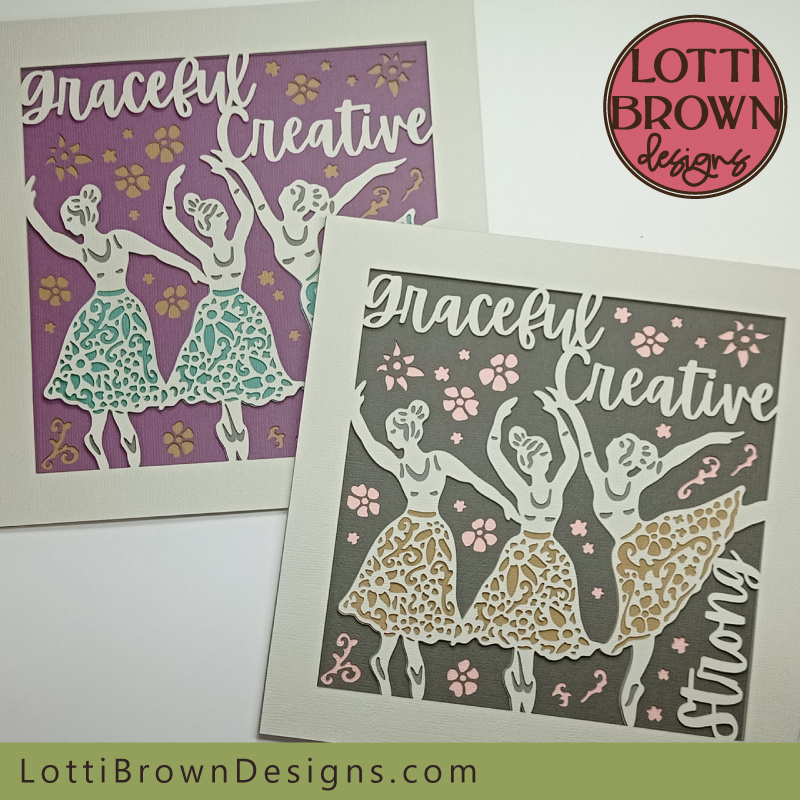 Colour inspiration for your ballerinas shadow box
I made the template for my ballerinas shadow box in soft white with a dark grey background (I wanted to use the deep cool grey card I have with a blue tone, but I've run out so this is a slightly paler grey) and pretty splashes of colour in pink and gold - it gives lovely contrast between the light and dark areas so that the figures of the ballet dancers stand out really well - that's one of the things to look out for when you're choosing your own colours for this project...
So a light or dark colour for the top layer will work well, with the contrasting light/dark colour for the layer with the little flower cut-outs - this gives the main contrast for the design...
Then you get to choose colours for the skirts, the flowers and a colour for the ballerina silhouette layer which gives the detail in the figures. Pretty floral colours can work well here - due to the floral pattern in the skirts and the background - or nice bright colours, whichever you prefer!
You can see my alternate idea for the ballet dancers shadow box below - a lovely rich purple for the background with contrasting gold flowers and teal-green for the skirts - I think it looks a pretty colour combination, creative, and also gives a surprisingly different feel to the project than my original grey, gold and pink template.
Please do get creative and have some fun choosing colours - and I'd love to see your creations too!
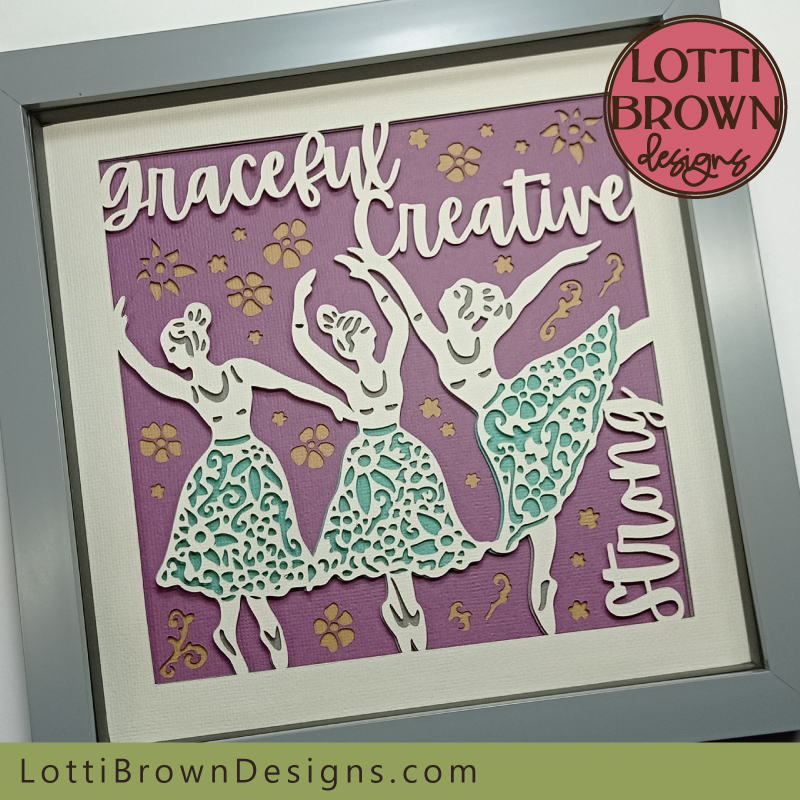 Pretty purple and green - ballerinas shadow box project
How to Make Your Ballet SVG Shadow Box
- First, you will need to measure your frame and resize the template in your cutting machine program to fit your frame - leave a tiny bit of wiggle room to make sure you can fit your creation nicely into the frame when finished. I've sized mine to 20 x 20 cm (8 x 8 inches) to fit my frame - I move it slightly to the left in Cricut Design Space and it cuts onto an A4 piece of cardstock.
- If you need any help accessing, opening or using your file, take a look at this info page. I also have more (general) help for Cricut users here.
- Choose your cardstock colours - see the section just above for ideas with this.
- Cut your layers using your cutting machine or whichever cutting method you prefer. There are five layers to cut. I use my Cricut Maker machine using 'Cardstock for intricate cuts' setting. The top layer is very intricate so please go slowly and be very gentle when you're peeling the sticky mat away from the cardstock.
- When all your layers are cut and ready, we can start the tutorial assembling the layers to make the shadow box - your cut layers should look something like I have in the image below...
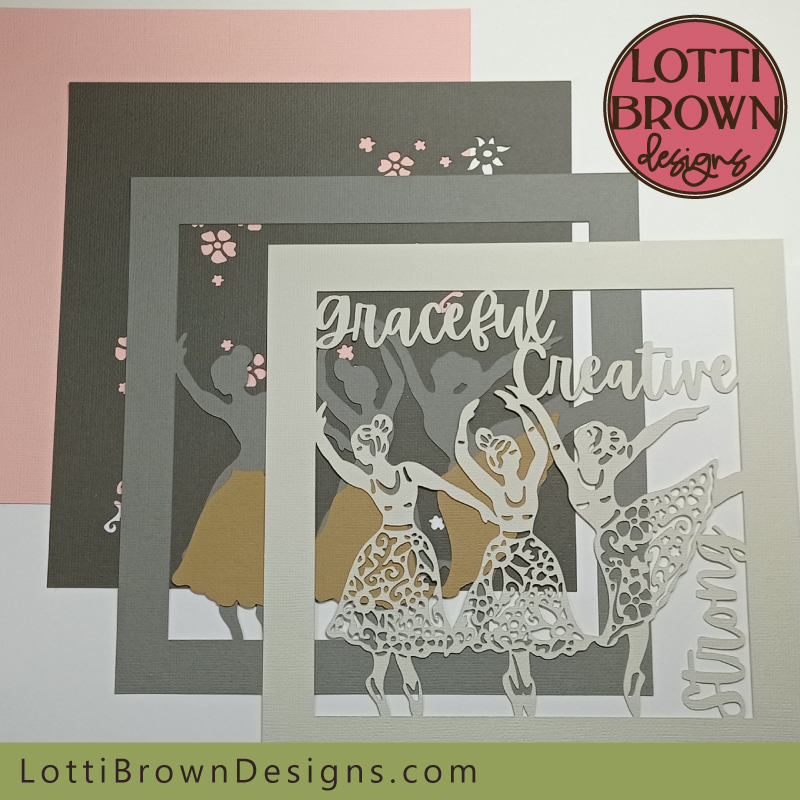 Ballerinas shadow box craft project - layers cut and ready to assemble
- We're going to start from the back or bottom layer of the shadow box and build the layers up from that - so we'll be starting with the plain square (pink here) and the square with floral cut-outs (grey here).
- I'll be using double-sided sticky tabs to separate the layers out a little, while still sticking them together - I've used a single layer of sticky tabs here, but if you want the space between the layers to be deeper, you can double-up with the sticky tabs (literally, just stick one on top of another).
- The spacing is also important - I normally use two or three sticky tabs per side - and you should try and position them in very similar positions on each layer so that when you add the next layer, each rests on the one below and this avoids your project becoming wavy or sagging. No need to be exact or measure, but do try hard to get them in the same or very similar spots for each layer.
- We're positioning them around the edges like you can see in the image below - on the BACK of the floral cut-out layer (grey here)...
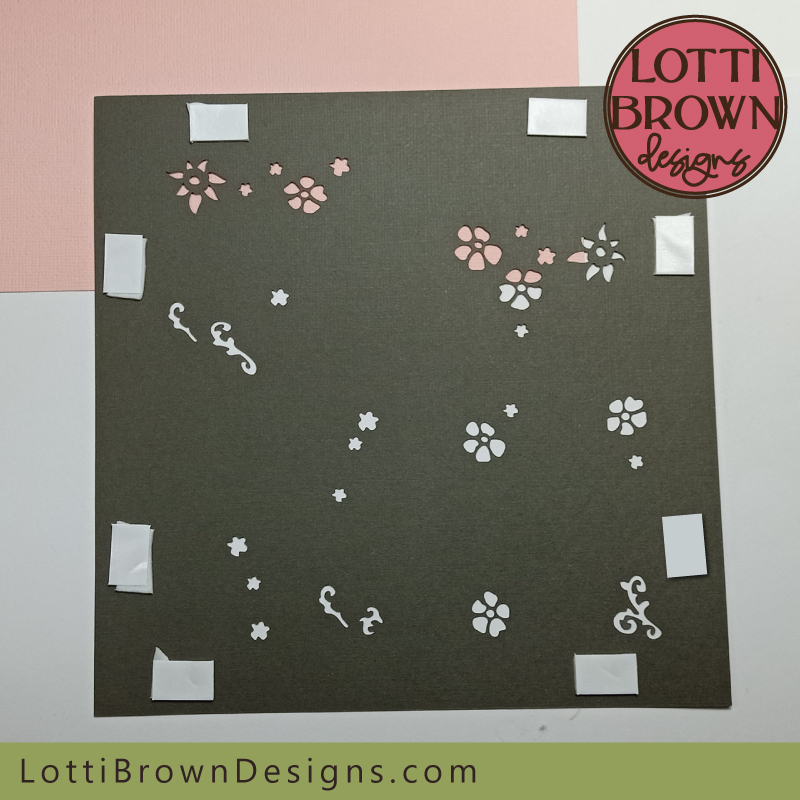 Adding double-sided sticky tabs to the back of the first shadow box layer
- The, we just need to turn over the layer with the sticky tabs and stick it down onto the one beneath - in this case, the plain square (pink) - I find it best to line up the two top edges first and then lower the layer down very gently to try and keep the edges all aligned. See image below...
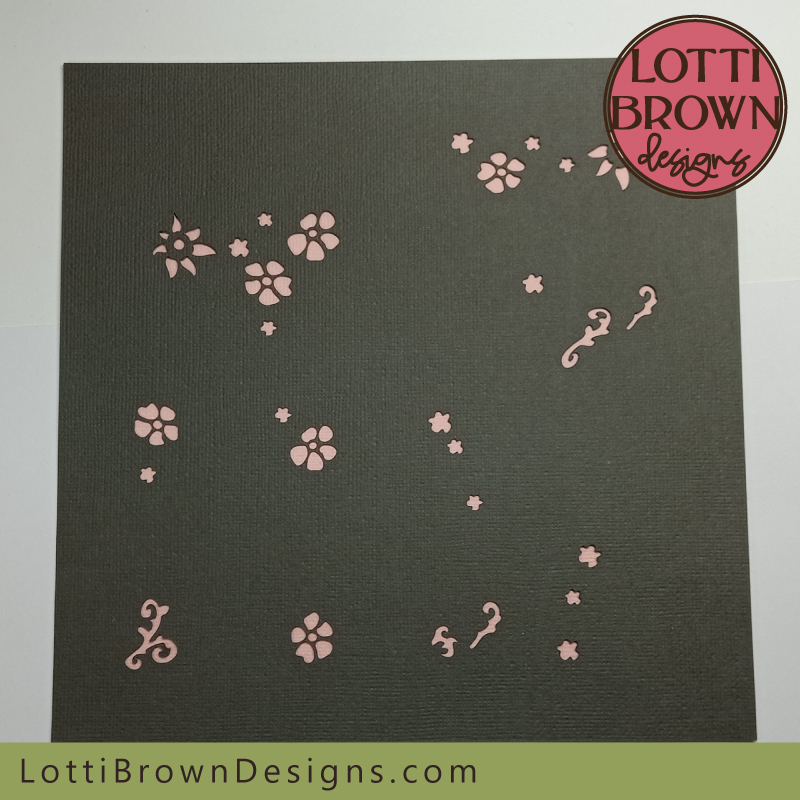 The first two layers are stuck together
- Our next layer is the one with the silhouettes of the ballet dancers (lighter grey here) - but before we stick it down, let's attach the skirt layer onto the ballet dancers...
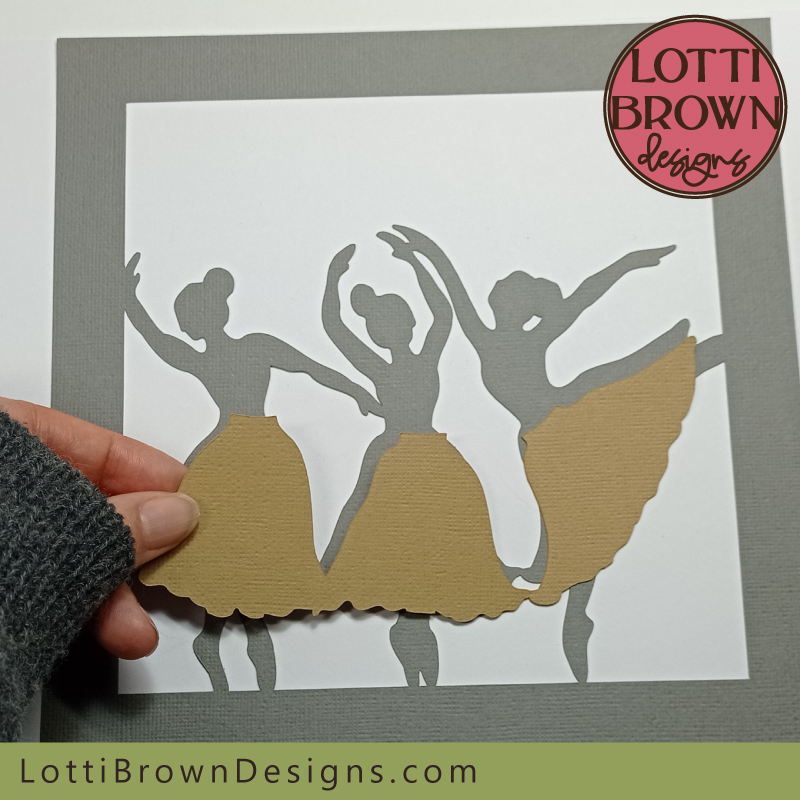 Next, we'll be attaching the skirt layer to the ballerina silhouette layer
- I've just used paper glue (a glue stick) to attach the skirts layer to the ballerinas layer - I don't think it needs to have a depth or 'shadow' to it, so I decided to just stick it flat to the ballerinas layer - if you think otherwise, you can use double-sided sticky tabs instead. Add your glue to the BACK of the skirts layer.
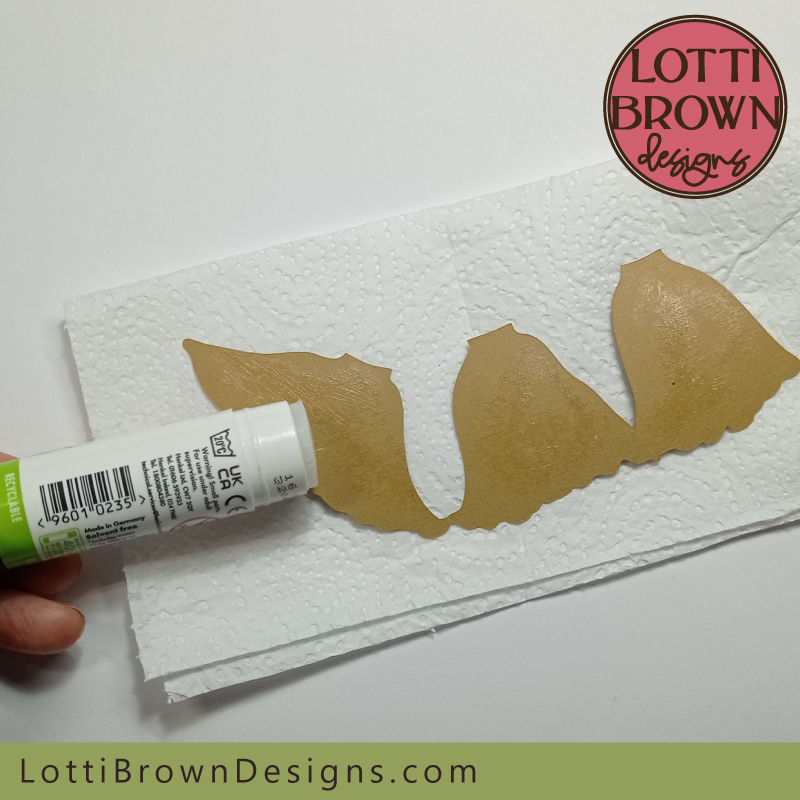 I've used paper glue (a glue stick) on the BACK on the skirts layer, ready to attach it to the ballerina silhouette layer
- So just carefully line up the skirts against the skirt edges in the layer below and stick them down - see image below...
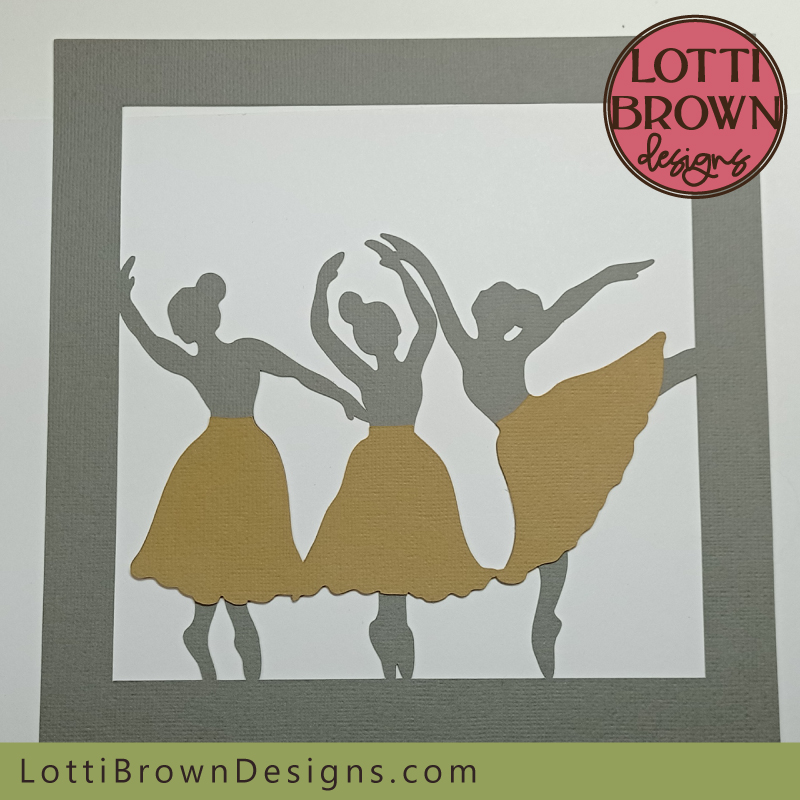 The ballet skirts are now attached to the ballerinas silhouette layer
- Now we need to attach this whole layer to the ones we did previously. Let's stick the double-sided sticky tabs around the edges on the BACK of this layer, trying, as much as possible, to get them in the same place as the layer before - see the image below...
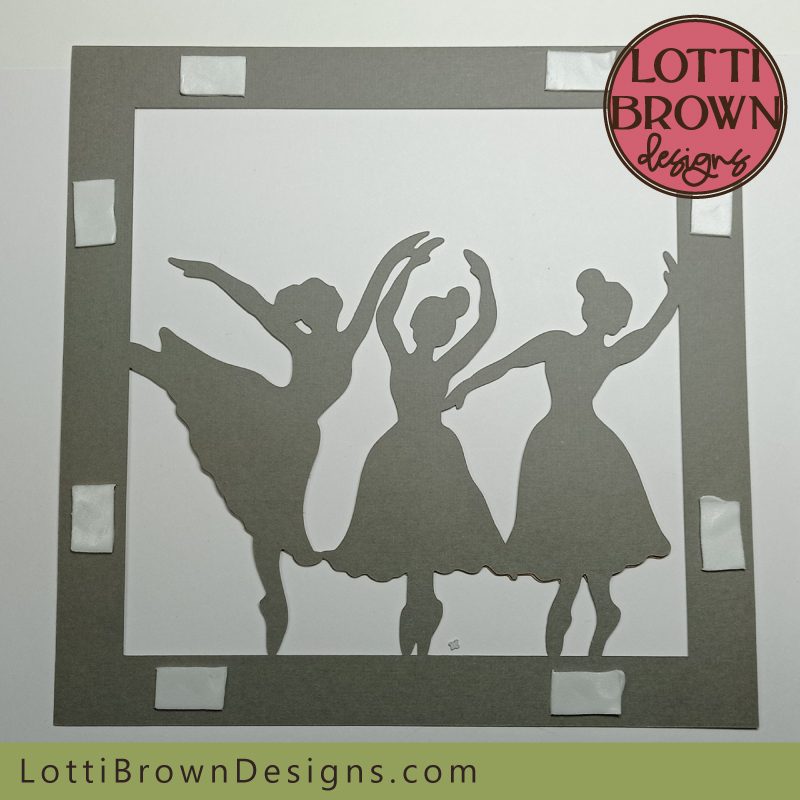 Add double-sided sticky tabs around the edges on the BACK of the ballerina silhouette layer
- Then, in the same way as we did before, just carefully line up the top edges, then lower the whole layer down onto the background layers that we made previously to glue it in place - your project should now look something like this - image below...
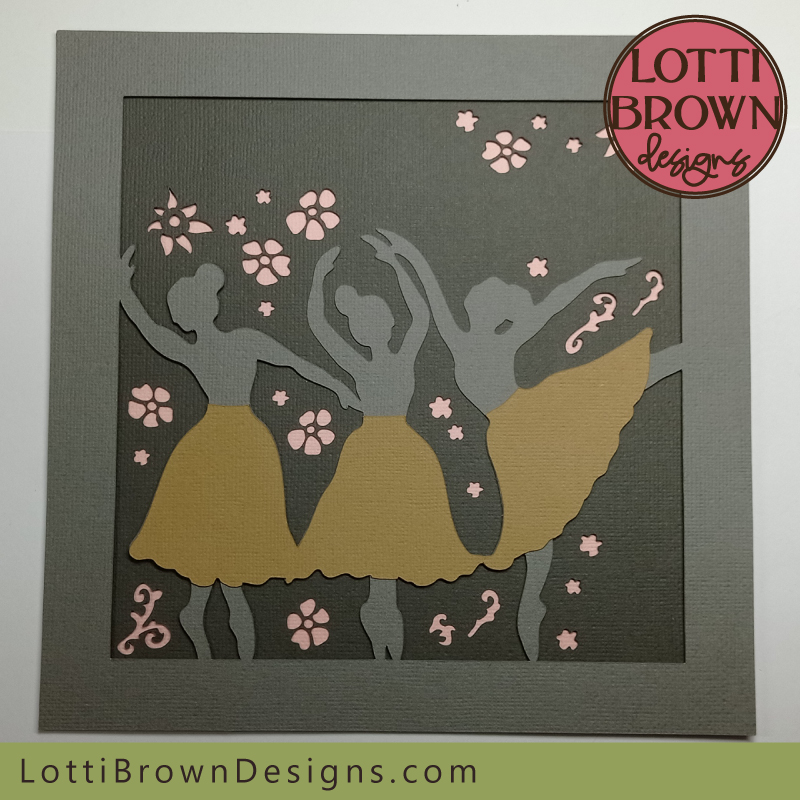 The project is starting to come together now - nearly there!
- There's just one layer left now, and that's the top layer with the intricate cut ballerina design and inspirational wording - we just need to do the same thing with this final layer - and that's add the double-sided sticky tabs around the edge of the layer (on the back of the layer, of course)...
- Remember to try and keep the positioning as similar to the previous layers as possible! See the image below...
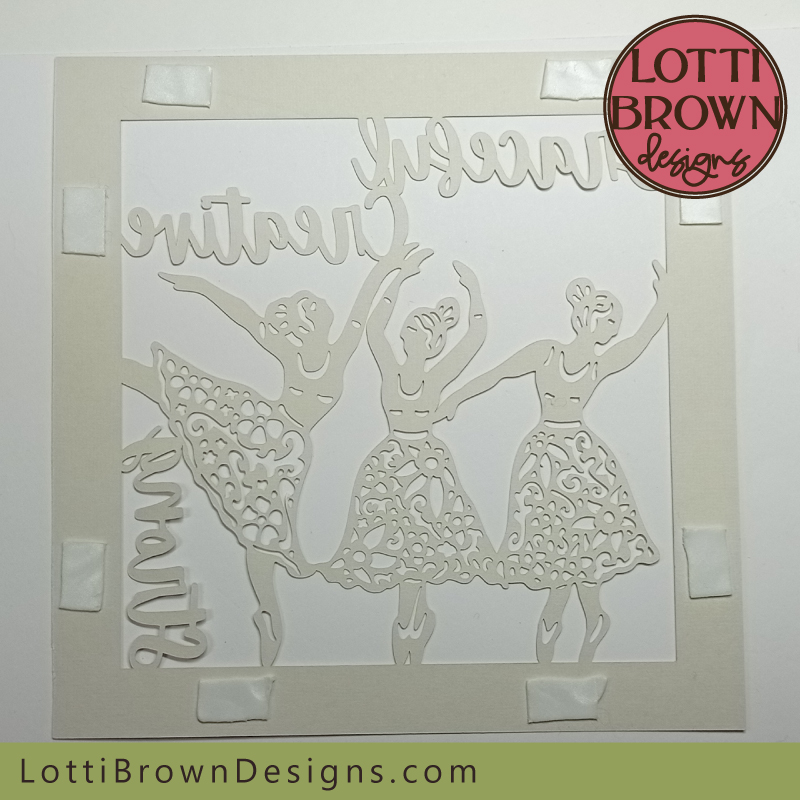 Adding sticky tabs to the back of the final (top) ballerina layer
- Then, just line up the two parts along the top edges and lower the top layer carefully down to glue onto the layers beneath - it should look like this (below)! Completed!
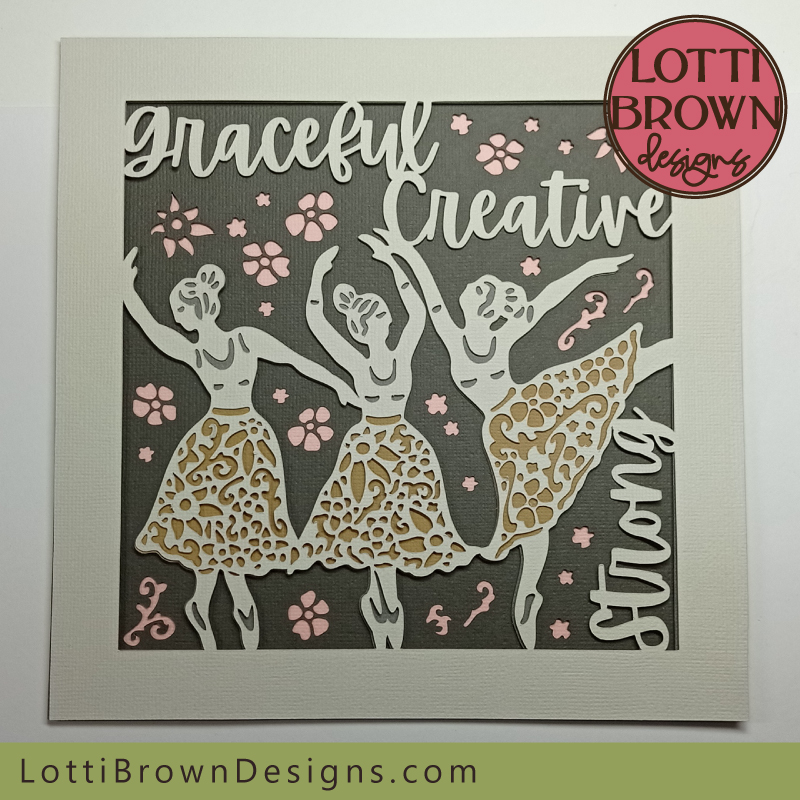 The completed ballet dancers shadow box project
- One last task - which is to put it into a suitable frame and enjoy or gift!
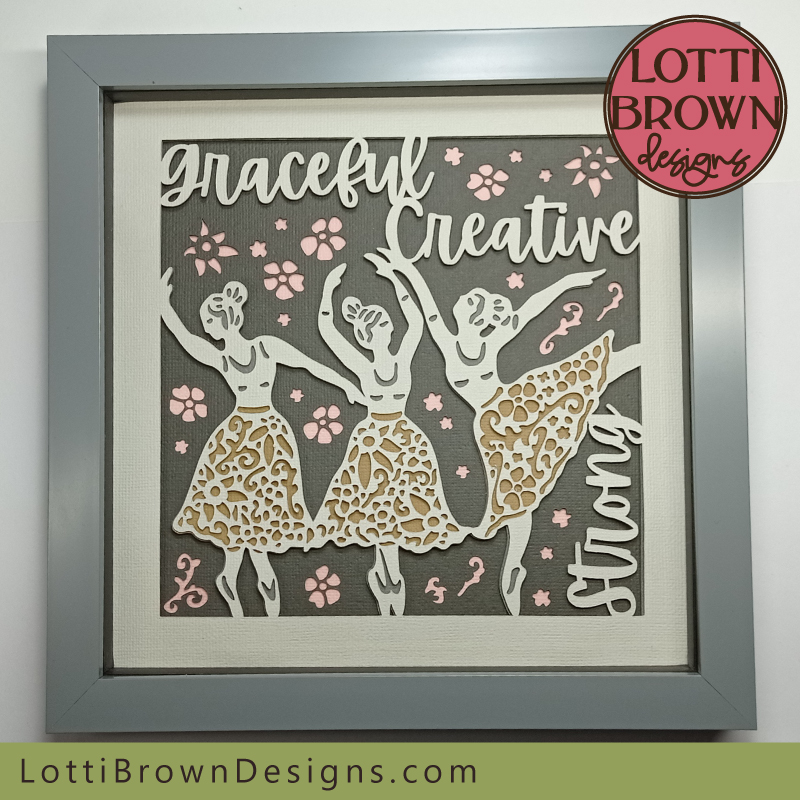 Framed ballet dancer shadow box craft project - made with Cricut Maker
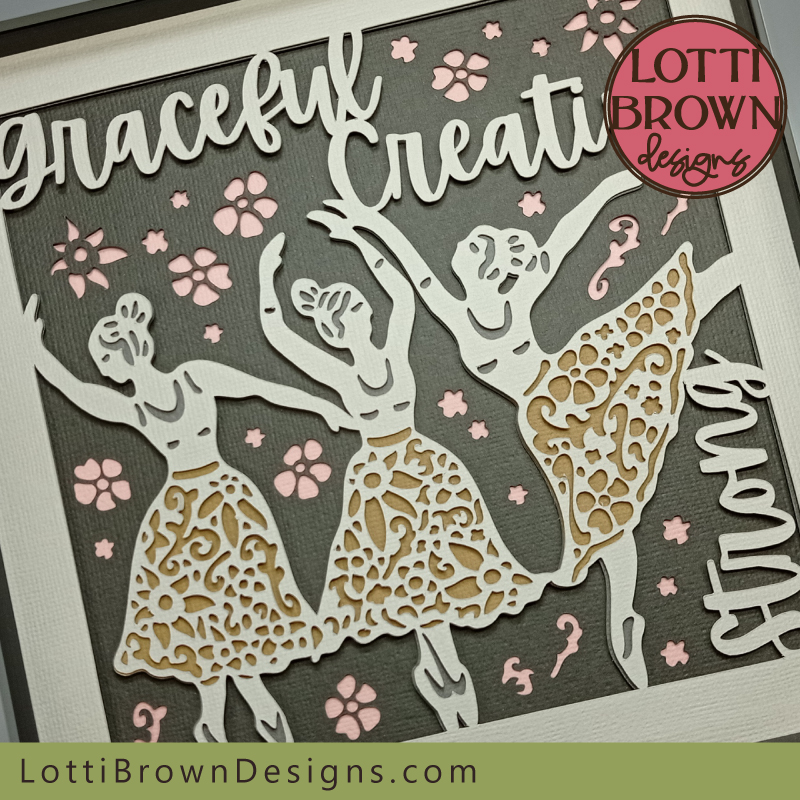 Detailed look - beautiful ballerinas - Graceful, Creative & Strong
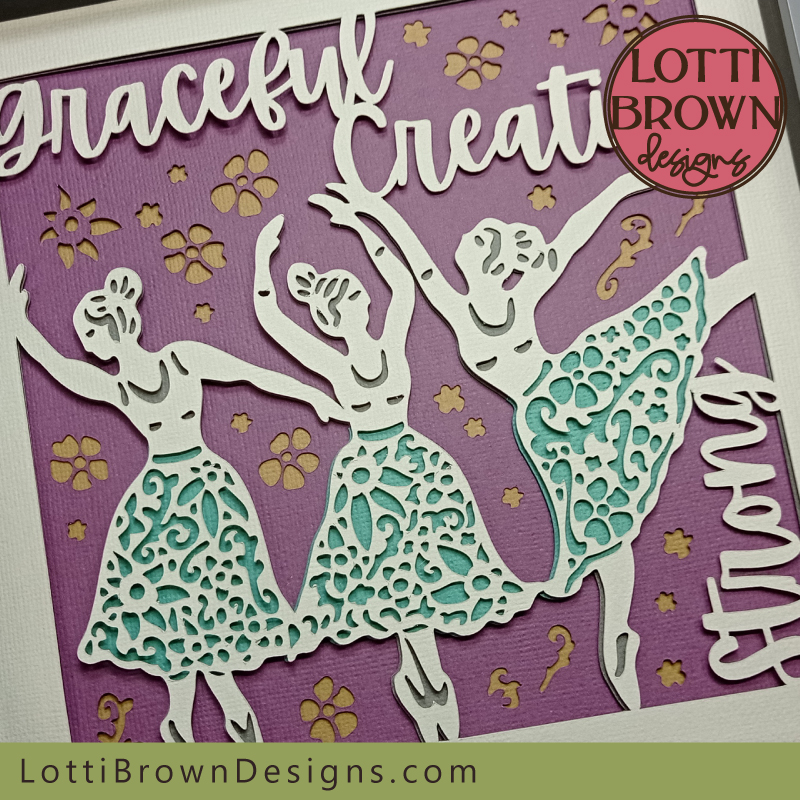 Alternate colour idea - ballet dancers in pretty purple and green
Beautiful Ballet SVG Shadow Box Template
If you'd like to make my Ballet SVG shadow box you can get the template from my store at the link below with instant download...
 Ballet SVG shadow box template - papercutting with a cutting machine
Get your ballet shadow box template from my store here
SVG, DXF, EPS, and PNG file formats
For personal craft use or small-business commercial use (up to 200 products)
For physical (craft) products - no digital products, use, or sharing
You Might Also Like:
Lotti Brown's Designs & Templates
How-tos...
- How to use SVG cut files for Cricut (also other cut file formats & machines)
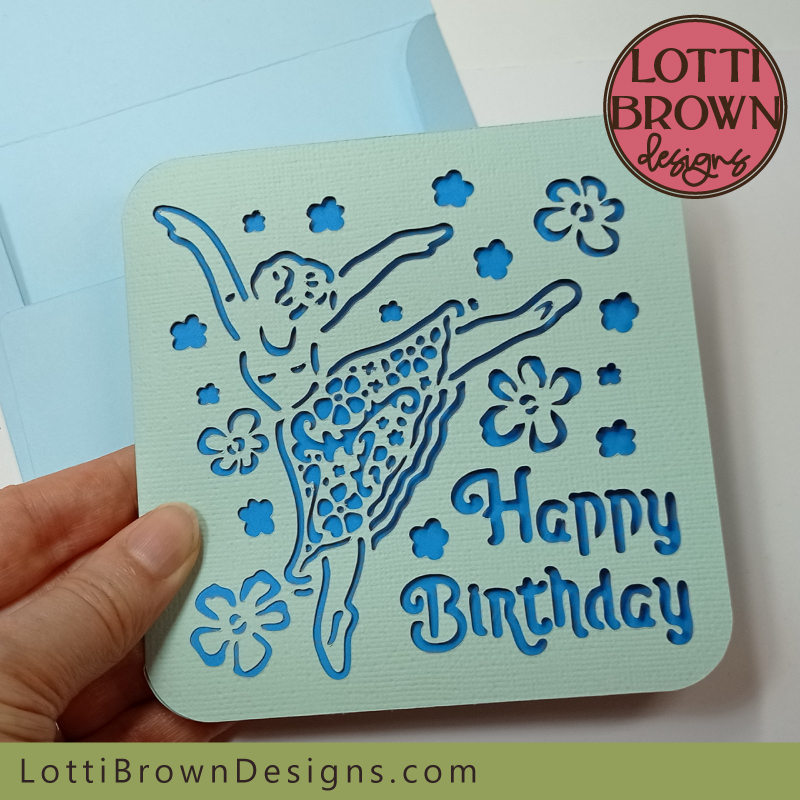 Ballerina birthday card SVG template
If you're gifting the ballet dancers shadow box, you could always send it with a matching card! I have the template here to make with your cutting machine (or by hand)...
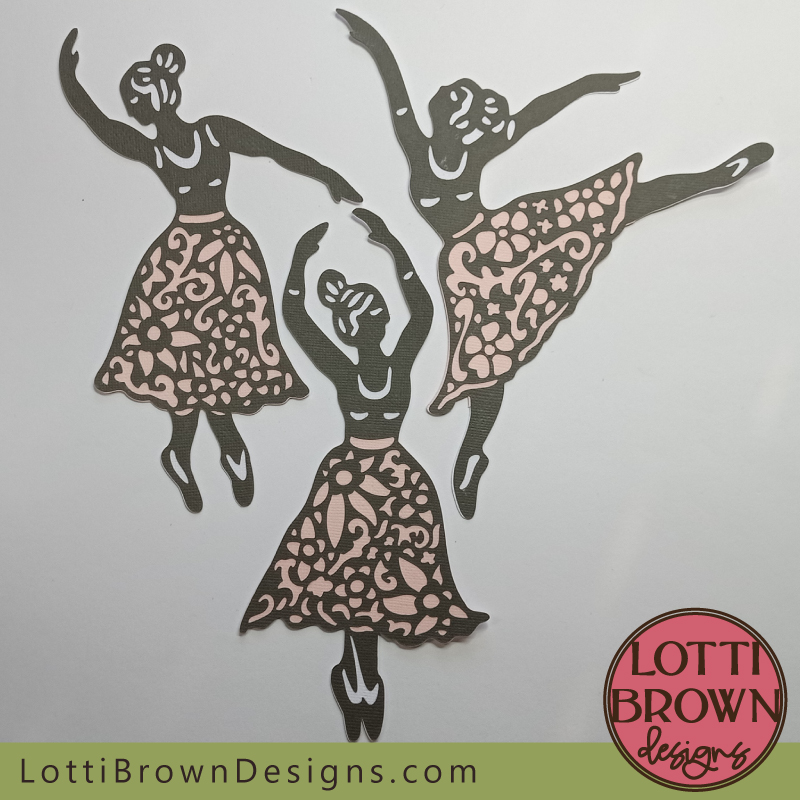 Individual ballerina SVG files
You can get the ballerina figures from the shadow box separately, either individually or as a bundle of three designs - take a look at them here...
Shall we stay in touch..?
Each month, I share stories from my own nature journal, new art from my studio, and simple seasonal inspiration to help you feel more connected with the turning year...
Recent Articles
-
British Nature Folklore Library: Stories, Seasons & Celtic Tree Wisdom
Dec 01, 25 05:09 AM
Explore British nature folklore, Celtic tree meanings, and seasonal wildlife stories. A growing library of myth, meaning, and hand-drawn inspiration. -
Beautiful Art Inspired by Nature
Dec 01, 25 05:04 AM
Beautiful folksy art inspired by nature from the fields and hedgerows of Yorkshire - colourful birds and wildlife with a nostalgic floral touch... -
Birds and Folklore in Britain: A November Nature Journal
Nov 26, 25 04:32 AM
November birds and berries - fieldfares, redwings, lapwings and snow geese with folklore, meaning and nature journal inspiration.
Follow me:
Share this page:


