*** IMPORTANT - I'm retiring my digital files - SVG/PNG/DXF/EPS - and printables from 31st December 2025 ***
*** Please ensure that you have everything you need - files and/or instructions printed off from the website (find them currently in the ARCHIVES section) - by 31st December 2025 as they will not be available after this date ***

Accordion Book Making with Cricut
- Home
- SVG files
- Project Ideas
- Accordion Book

Fun accordion book making project for Cricut and similar cutting machines...
 Accordion book project for Cricut and other cutting machines
Get your accordion book cut files from my store here...
Digital download template to make an accordion book with a cutting machine
SVG, DXF, EPS, PNG file formats
For personal craft use and small-business use (up to 200 products)
For physical/craft products only - no digital use, products, or sharing
Accordion Book Making Project
 Accordion book template for Cricut
This is a fun craft project for Cricut and other cutting machines - making an accordion book with 14 folding pages and two inner-cover pockets that ties with a ribbon...
It's great for notes, sketches, journaling, or would make a sweet handmade gift!
 Accordion book with pockets for your inserts
This is an accordion book making method that I learned at school - I've added the inner pockets, so that you can pop little bits and pieces in your book - it's little enough that you can pop it in your pocket or handbag so that it's always handy!
The finished accordion book is around 9 x 11 cm (3.5 x 4.25 inches) in size with 14 pages and two pockets. You can resize the files, of course, and make it any size you want.
You will need to be able to score and cut the template. If your cutting machine doesn't have a scoring tool, or if you prefer not to use it, you can score by hand (after deleting the score lines in your cutting machine program). I'll share the instructions for setting the score lines to score properly in Cricut Design Space in the tutorial on this page you're currently on....
You can also check out a discussion of which scoring tool to get, plus how to score by hand on this page (also contains instructions for setting the score lines up for my card templates).
If you'd like to print out the instructions, you can do that by clicking on the button below - this will allow you to print only those parts of the page which you need.
You can also find the print button on the top right of the page, and again at the bottom of the page, just below the content.
Getting to Know the Template
 Accordion book template for Cricut and other cutting machines
What's what in the file:
- Green - covers for the book (to be made with stiff card)
- Pink - decorative papers to cover the covers - choose your own patterned paper to create the style for your accordion book making project (no pattern design is included with the template)
- Blue - inner cover inserts and pockets
- Yellow - pages
- Red lines - score lines
This template will make an accordion book with 14 pages. If you'd like your book to have more pages, you can cut more of the page set without a flap. I recommend making the book I show you first, to get the hang of how it works, then think about adding extra pages for your next book.
If you need the measurements for the file to help with your accordion book making, check them out just below...
Measurements
The measurements below are taken as the files have been supplied and are including the score lines.
Please ensure you read from the correct section - metric (cm) or imperial (inches).
Metric measurements (cm)
- Yellow - right-hand flap - 26.89 x 10.45 cm
- Yellow - left-hand flap - 26.9 x 10.45 cm
- Yellow - no flap - 24 x 10.45 cm
- Pink - single - 11.45 x 13.95 cm
- Pink - both - 24.06 x 13.95 cm
- Green - single - 8.66 x 10.88 cm
- Green - both - 21.25 x 10.88 cm
- Blue rectangle - single - 8.21 x 10.26 cm
- Blue rectangle - both - 20.8 x 10.26 cm
- Blue triangle shape - single - 9.91 x 7.63 cm
- Blue triangle shape - both - 21.58 x 7.63 cm
Imperial measurements (inches)
- Yellow - right-hand flap - 10.59 x 4.11"
- Yellow - left-hand flap - 10.59 x 4.11"
- Yellow - no flap - 9.45 x 4.11"
- Pink - single - 4.51 x 5.49"
- Pink - both - 9.47 x 5.49"
- Green - single - 3.41 x 4.29"
- Green - both - 8.37 x 4.29"
- Blue rectangle - single - 3.23 x 4.04"
- Blue rectangle - both - 8.19 x 4.04"
- Blue triangle shape - single - 3.9 x 3"
- Blue triangle shape - both - 8.49 x 3"
All measurements were taken using Cricut Design Space.
What you will need:
You will need:
- 2 sheets of 12 x 12 inches paper to make the pages - I'm using Dovecraft Colours Essentials paper (120 gsm) - this has colour on one side and white on the other - this isn't necessary for the book (I just thought it would be fun - and also help with the tutorial), you can just use white (or any other colour) paper if you prefer
- Kraft board or other stiff card to make the covers - if you're using Kraft board like I am, you might prefer to cut the cover shapes twice and double up to make stiffer covers - I'll show you this below
- 1 sheet of 12 x 12 inch patterned paper to make the decorated covers - I'm using Oaixuilhy 'Garden I' patterned craft paper (160 gsm). Choose your own patterned paper (no pattern design is included in the template)
- 1 sheet of coloured cardstock (12 x 12 inches) to make the cover inserts - I'm using Craft Sensations 'Pastels' Design Pad (230 gsm)
- Something to score with - you can use your cutting machine scoring tool, or score by hand with a knitting needle or other blunt point
- Metal rule or other hard edge to help you with the folding (and scoring if scoring by hand)
- Something to cut with - I'm using my Cricut Maker cutting machine
- Paper glue - I'm using Pritt Stick - I recommend a glue that will allow you a few minutes to reposition if necessary
- Ribbon to fasten - around 90-100 cm - you will need enough to wrap around your book a couple of times and allow for tying
- My template for the accordion book making project - find that here...
Setting up your project in Cricut Design Space
Let's get your file set up in Cricut Design Space. If you're using another type of cutting machine, please check over these instructions first, to find out what to do, before applying the method to your own cutting machine program.
The basic process is:
- Ungroup
- Set each score line to 'Score'
- Attach each set of score lines to their corresponding shape (below the lines in the layers panel on the right)
- Send to 'Make'
I'll share more detailed instructions with images to help you below...
- Open up your file in Cricut Design Space - if you need help getting to this stage, click here...
- The first step is to click on 'Ungroup' - see the image below...
 Click on 'Ungroup'
- This will list out all the individual elements - like you can see in my photo below. Take a moment to familiarize yourself - I've listed out the shapes with the score lines that go with them just above the shape. Unfortunately, score lines cannot currently be imported into Cricut Design Space, so we'll have to change the lines from 'cut' to 'score' as part of the set up here...
- If you want to score by hand instead, please just delete the score lines.
 List of layers - note the lines for scoring are positioned ABOVE their relevant shape
- So let's select each of the lines that are to become score lines. Starting from the top of the layers, work down selecting each as you can see in the image below. You can select multiple items by selecting your first item, then holding down the 'Shift' key on the keyboard while selecting further items. The image below just takes you to what is on the first screen (on my screen) - if you follow this, even if your screen includes more or less, you'll get them all done - the green colour shows what's selected...
 Select the lines shown - the green colour shows they've been selected
- Now, let's set them to score - with all those items still selected, go to the 'Operation' drop down menu on the left of the screen and change the 'Basic Cut' function to 'Score' - see the image below...
 Change the drop down menu to 'Score'
- You should be able to see that each of the lines you just selected has changed to 'Score' - see the image below...
 Look for 'Score' in the layers panel
- Next, scroll down the screen so that we can catch the further elements in the panel - select the lines again - see the image below - this shows the elements that were left on my screen - check that there's no lines left (not shapes) showing 'Basic Cut' instead of 'Score' to make sure you catch them all!
 Scroll down and select further lines
- Set these to 'Score' - they should end up looking like the image below...
 Set to score
- Now, let's tell Cricut that we want to 'attach' the lines to their relevant shape so that it knows where to put the score lines. Select the score lines PLUS the shape just below it. See my image below...
 Select the score lines plus their shape just below
- Then click on 'Attach' - see the image below...
 click on 'Attach'
- The new group will shoot to the top of the layers - the new group will be hidden beneath the little arrow, so click on the arrow to show the contents of the group which should be the lines and shape you just selected and attached. See the images below...
 The new group is hidden beneath the arrow
- Clicking the arrow will expand the group as in the image below...
 Click on the arrow to expand the group
- Next, we'll continue, selecting the next group of score lines together with their shape just BELOW - see the image below...
 Select the lines and their shape just below
- Click 'Attach' - see the image below...
 Click 'Attach'
- Continue working through each set - select the score lines, together with their shape just BELOW - then click to 'Attach' - you should end up with five attached groups like you can see in the image below. You can click on the arrows next to the paperclip to expand each group to check what's inside and click again to close it.
 Set up like this
- When you're ready, click on 'Make' to send your project to cut and score. See the image below...
 Click Make
- Follow through with the instructions and mats as you would normally.
- When you get to the mats that need scoring, if you need to use a different scoring tool than the one listed, you can click on 'Edit Tools' on the screen (see image below) and then select your preferred scoring tool (see image 2 below) - remember to also put the scoring tool in the machine!
 Select 'Edit Tools' to change the scoring tool
 Select your preferred scoring tool
Once all the parts of your book are cut and scored, we can get on with our accordion book making project and actually put all the parts together to make the book - that's just below...
Get started with your accordion book making project
 When everything is cut and scored, we can get started
So when you've got everything cut and scored, we can get started with our accordion book making. We'll start with the covers...
- Take the two rectangles you cut from stiff card, or if you're like me and decided to cut an extra set to double up to make your covers stiffer, you'll have four rectangles.
- If you have four rectangles, our first job is to stick these together so that we have two stiff rectangles. If you already have stiff card, and decided not to double-up, no need to do anything for this particular step. Keep the edges carefully aligned as you glue them together so you have two stiff rectangles - see mine in the images below...
 If you decided to double-up on your card for the covers, glue these together now so you have two rectangles for the covers
- Next, we'll add the patterned covers - see mine below...
 Next, we'll cover our stiff card rectangles in patterned paper
- Add glue to the back of the patterned paper, making sure you go close to the edges - see mine below...
 Add glue to the back of the patterned paper making sure you go up to the edges
- Then pop the stiff card rectangle for the cover in the centre of your glued paper - like mine in the image below...
 Position the stiff-card rectangle for the cover in the centre of the glued paper like this
- Then fold over the glued edges neatly like mine in the photo below - and press to stick down...
 Fold and stick the glued edges
- Repeat this for the other cover - you should now have two covers looking something like mine in the image below...
 Repeat for the other cover
- Turn your covers over - now's a good time to look at the design and (if they're different, like mine) decide which cover you'd like to be the front of your book, and which the back - I'll be making the one of the left in the photo below the front of the book, and the one on the right will be the back.
 Check out your covers and decide which you'd like to be front, and which the back
- Next, we'll move onto the pages - you'll notice that there's three sections. Keep the score lines on the side of the paper facing up and you'll notice you have one with the flap on the left, one with the flap on the right, and one with no flaps. See the photo below. When we make the pages up, we'll keep the flap on the left on the left, the flap on the right on the right, and the piece with no flap will sit in between, in the middle.
 Let's make the pages for the book
- First, let's fold along each score line. Just take your metal rule (or other hard edge) and line it up with the score line, hold it in place firmly, then fold up the other side against the edge, like mine in the image below...
 Fold along the score lines
- Repeat this for all the score lines for each of the three pieces - when you're done, it should look something like mine in the photo below...
 Fold all the score lines
- The accordion book making method relies on the pages being folded in a concertina manner - so we'll do this for the pages, now, and also work out how the different sections will attach together.
- Take your front cover and lay it face down on the left-hand side of your work space. Then take the paper section with the flap on the left - the flap will attach onto the back of the cover, then we'll start the fold. So lay out your cover and first paper section (with the flap on the left), next to it - just like in my photo below...
 Lay out your cover and first paper section like this
- So our first fold will be folding the flap back in onto the paper, like mine in the photo below. For the concertina folding method, each fold will be the opposite of the previous one. So the first fold folds in like this.
 Make your first fold like this
- Your next fold will need to fold in the opposite direction (going against the fold you made when using the metal rule) - and the third fold will fold in the opposite direction again (with the original metal rule fold line). Your piece should end up looking like the photo below when you're done. Just fold the first piece for now - we'll look at how the second piece works next.
- Also take a moment to make sure the edges are well-aligned with each other once your piece is folded like this - the pages need to be neatly squared else your accordion book will end up messy.
Also see the next couple of photos if you're struggling with how to make your folds...
 Your paper should be folded into a neat block like this
- We're going to attach the page sections together by gluing a whole page piece on each section (don't glue yet). So create your folds to take this into account. So in the photo below, you can see the first section you made (keep the flap on the left) that's coming into the photo from the left. You'll glue the first page of the next section, (which will use the piece with no flaps), onto the last page of this section. So the fold will continue as if it was one continuing piece, with a alternating concertina fold along its length. See the two photos below to help you...
 We'll attach the pieces by gluing page sections together
- Your folded pieces should look like the ones in the photo below - so we have the left-hand flap on the left - and overlapping page connecting to the piece with no flaps...
- Which connects with an overlapping page again, to the piece with the right-hand flap, which should finish the fold on the right-hand side of the concertina.
 Your folded pieces should look like this
- So let's connect the pages by gluing the overlapping pieces. Start with the section that has the left-hand flap. Add glue all over the final (right-hand) section, taking care to go right up to the edges (and also trying not to get it too much on the page just next to it, if possible). See the photo below.
 Add glue to the final page in the first section (the section with the left-hand flap)
- Then take the first page of the next section (the section with no flaps) and glue the two pages onto each other, taking care to keep it very neatly aligned so that your accordion book stays straight and true. See my photo below. If you need to unstick your page and reposition it to get it straighter, do this, as it's important that it's well aligned.
 Glue the two pages together like this
- Your glued page should be almost invisible - my joined page in the photo below is the vertical one in the centre of the photo - you can just about tell it's joined and double-thickness.
 Showing the glued page (vertical in the centre)
- The next two photos show glued pages, showing the seam in detail (front and back)...
") Glued pages (back view)
Glued pages (back view)") Glued pages (front view)
Glued pages (front view)- Next, we'll attach the final section in the same way - so the photo below shows how the pages will overlap and how they'll be glued.
 It's time to attach the final page section
- So add glue (right up to the edges) on the final page of the concertina section you've been working on - see my photo below...
 Add glue to this final page
- Then once again glue the page from the final section right on top of this, trying to keep everything neat and aligned to keep your accordion book folding up true and nice. See my photo below...
 Glue the pages together
- So your pages should end up looking like this - see my photo below...
 Pages for the accordion book
- We're going to work keeping the original left flap on the left, so make sure your pages are arranged like this - this is how yours should look (see photo below) - make sure the flap on the left is folded in the same way as mine.
 Make sure your folds look like this
- Then fold your concertina of pages flat, with the left-hand flap ending up on top like mine in the photo below...
Fold your accordion book pages flat like this- We're going to pop the pages inside the covers like my photo below - so you can see the back cover face down on the work surface, then the pages (as in the photo above), then the front cover (face up).
 Start putting your accordion book together
- Turn the front cover over, as if you were opening a book, and lay it face down on the work surface. We're going to glue the flap down onto the cover like you can see in my photo just below. Don't glue yet, we'll do it together in just a second...
 This is how the pages will attach to the cover
- Slip a tissue or piece of scrap paper under the flap to protect the pages, and add glue onto the back of the flap - see mine in the photo below...
 Add glue to this flap
- Then glue the flap down close to the edge (just a little bit in) on the back of the front cover - see mine in the photo below...
 Glue your flap down onto the front cover like this
- Then turn your whole book over so that the front cover is face down on your work surface and you're looking at the back cover. Then lift-off the back cover. You should be able to see the flap for the back cover. Protect your pages with a tissue or scrap paper and add glue onto the whole of the flap - see mine in the photo below...
 Add glue to the back flap
- To glue the back cover on, just place it carefully down onto your flap, making sure that it lines up nicely with the front cover along all the edges. When you're happy press down to stick it down. See the photo below...
 Line up the back cover and glue in place
- When you lift the back cover, the flap should be in the correct position - so press down to stick it in place. See my 2 photos below...
 Lift the back cover to see the flap in position
 Press down to stick in place
- The basic accordion book making is now complete - your book should look something like mine in the photos below - check that the book edges are straight and align with each other (front and back covers). If you need to unstick anything and reposition, do it now before the glue sets. When you're happy with it, we can continue to neaten up and finish your book with the inner cover inserts.
 Check the accordion book covers line up
 Front side of pages in your accordion book
 When you turn your accordion book over you see the other side of the pages
- Now let's tidy up your book and finish it. First, is a ribbon - cut your ribbon into two equal lengths - see photo below...
 Ribbon to fasten the book
- Add glue to the last inch or so of one of the pieces of ribbon - see the photo below...
 Add glue to the ribbon
- Then open up the front cover and glue the ribbon down inside, trying to get it approximately in the centre of the cover. Press down to stick firmly. See the photo below...
 Glue the ribbon inside the front cover
- Repeat in the back cover for the other piece of ribbon - see the photo below...
 Glue the ribbon inside the back cover
- Finally, let's make the inner cover inserts. That's two rectangles and two triangles with score lines. See the image below...
 Cover inserts for the accordion book
- Use your metal rule to fold along each of the score lines on the two triangular pieces. See my photo below...
 Fold along the score lines
- They should end up looking something like mine in the photo below...
 Folded triangular pieces
- Once you've folded up all the score lines, then fold each back on itself so that your pieces look like mine in the photo below...
 Fold each fold back on itself
- See the photo below to see how these will fit to make little pockets for your accordion book. If you decide you don't want pockets, you can leave these off.
 These will make pockets in the inner covers
- Now, add glue just to the back of the two flaps on each triangular piece (this is the back of the cardstock that you're looking at in the photo below)...
 Add glue to the back of each flap
- Now, take one of the cardstock rectangles and position it into the corner of the triangular piece - in the photo below, the cardstock is face down and you're looking at the back...
") Position like this (reverse)
Position like this (reverse)- Then fold over the flaps like in the photo below...
 Fold over the flaps
- When you turn over the piece, you should see your pocket ready, like in the photo below. Repeat for the second inner cover set.
 Two inner cover inserts
- Then add glue to the back of the inner cover insert, going right to the edges - see mine in the photo below...
 Add glue to the back of the insert
- Glue the first into the inside of the front cover - see the photo below...
 Glue inside the front cover
- Then repeat with the second piece and glue that inside the back cover, too - see the two photos below...
 Glue the insert inside the back cover
 Glue the insert inside the back cover
- To tie your ribbon, take the ribbon from the front cover to the right, wrapping around the back of the book, back round to the front to meet itself. Then take the ribbon from the back cover and also take that towards the right, wrapping around the back of the book, to meet the other piece of ribbon. Tie a bow, and trim any excess. You can also experiment with tying the bow on the front of the book - see which you like best before you trim! See mine in the photo below...
 Wrap the ribbon around the book and tie it before trimming away any excess
 Front of the accordion book
 Back of the accordion book
Your accordion book making project is now finished! Well done! Have fun with your new little book - write, draw, take it with you as a gorgeous nature journal to pop in your pocket, or give it as a lovely handmade gift!
 Accordion book project
I hope you enjoy your little book!
Where to Get the Template for the Accordion Book Making Project
You can get the template for the accordion book from my store with instant worldwide download at the link just below...
Make this little accordion book with CricutGet the cut files for the accordion book making project from my store here
SVG, DXF, EPS, PNG file formats
For personal craft use and small-business use (up to 200 products)
For physical/craft products only - no digital use, products, or sharing
If you liked making my accordion book, you might also like making this easy book project - check it out here...
 Homemade book project for Cricut
And there's more craft projects for your Cricut right here...

Shall we stay in touch..?
Each month, I share stories from my own nature journal, new art from my studio, and simple seasonal inspiration to help you feel more connected with the turning year...
Recent Articles
-
Nature Journaling Autumn Fungi & Folklore
Oct 28, 25 05:58 AM
 Nature journaling autumn fungi - discover how nature journaling helps you slow down, notice more, and reconnect with the season...
 -
Symbolism and Meaning of Fern/Reed for the Celtic Tree Calendar
Oct 27, 25 07:06 AM
 Explore the symbolism, myth and meaning of the fern (reed) as part of the Celtic Tree Calendar...
 -
Sun & Moon, Stars & Spirals
Oct 20, 25 09:31 AM
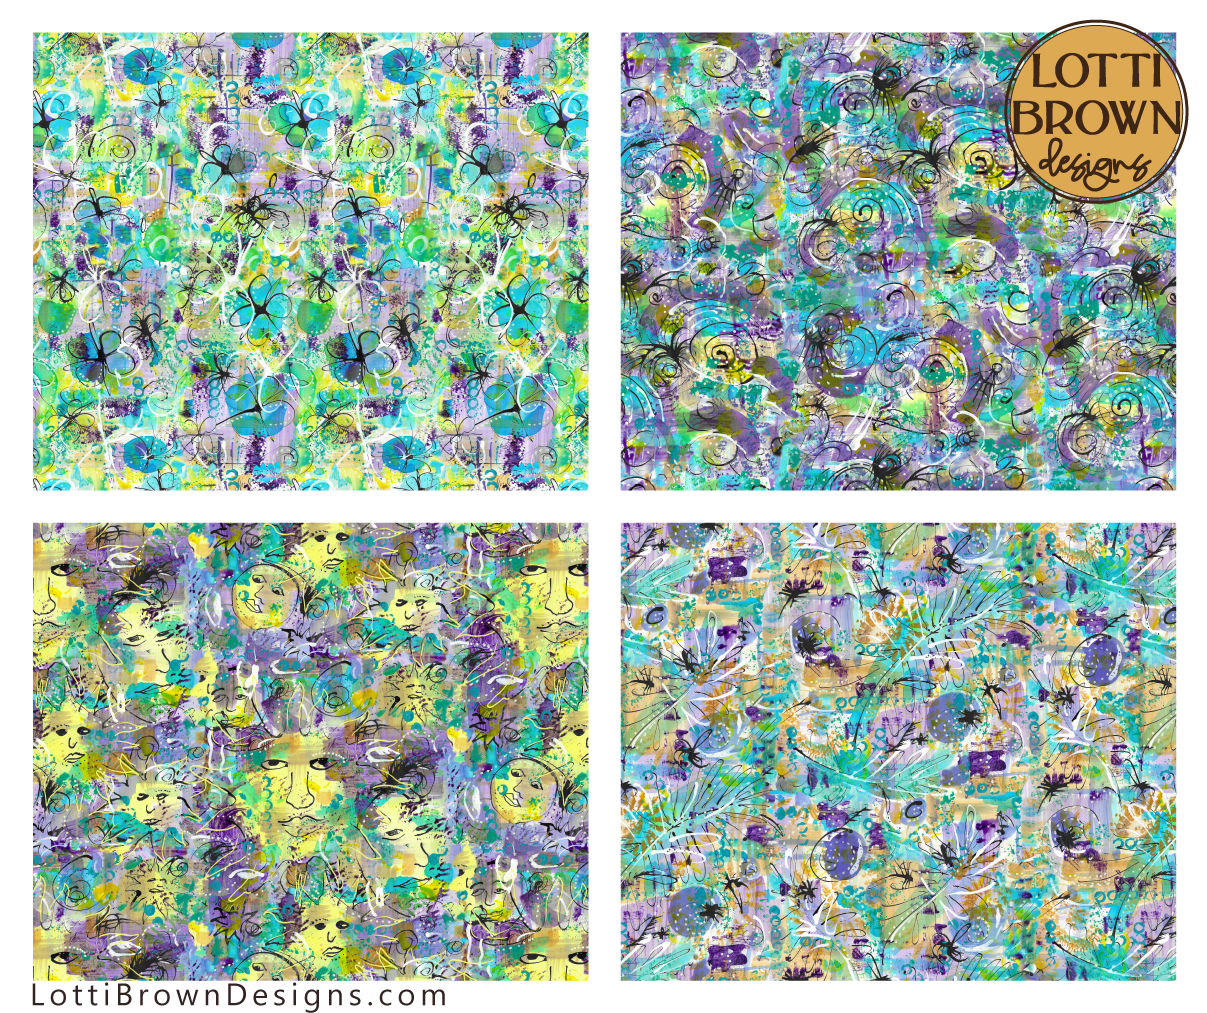 New painted patterns with sun and moons, floral, spiral and star designs...
Explore fabrics and wallpapers in these designs here (Spoonflower)...
Explore homewares and accessories in these designs her…
New painted patterns with sun and moons, floral, spiral and star designs...
Explore fabrics and wallpapers in these designs here (Spoonflower)...
Explore homewares and accessories in these designs her…
Follow me:
Share this page: